Development Process
Environment Setup
Software environment:
Category Name Recommended Version Operating System Ubuntu 16 and above Software QT Creator 5.0.0 and above Software Config QT 5.12.9 and above Software Config GCC 7.5 and above Open a terminal and perform the following steps to install aubo_caps:
git clone https://github.com/AuboRobot/plugin_template
cd template
chmod +x ./INSTALL.sh
./INSTALL.sh
After completing the installation, verify its success by:
Opening QT Creator, clicking on [File > New File or Project].
In the dialog box, select [Library] and check for the presence of aubo_caps.
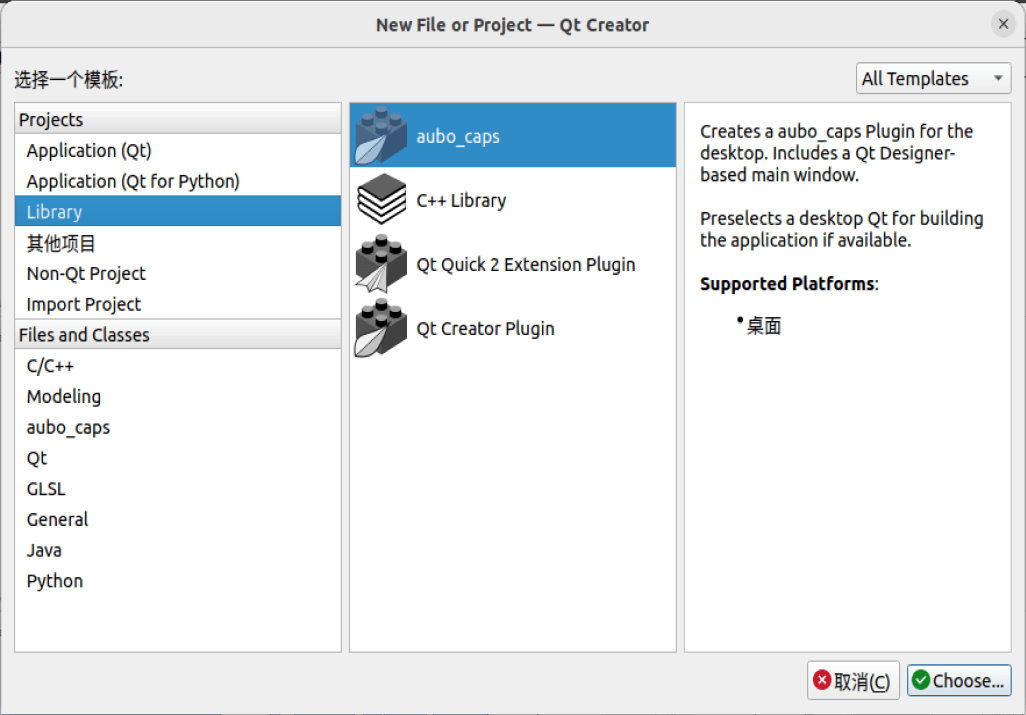
If aubo_caps is not available, retry step 2.
Creating Plugin Project
Open QT Creator and click on [File > New File or Project] in the menu bar.
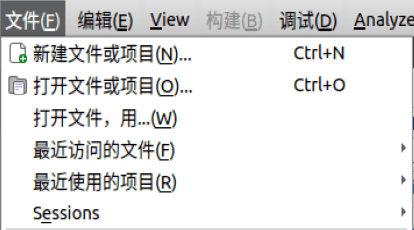
In the [New File or Project] wizard, click on [Library > aubo_caps], then click [Choose].

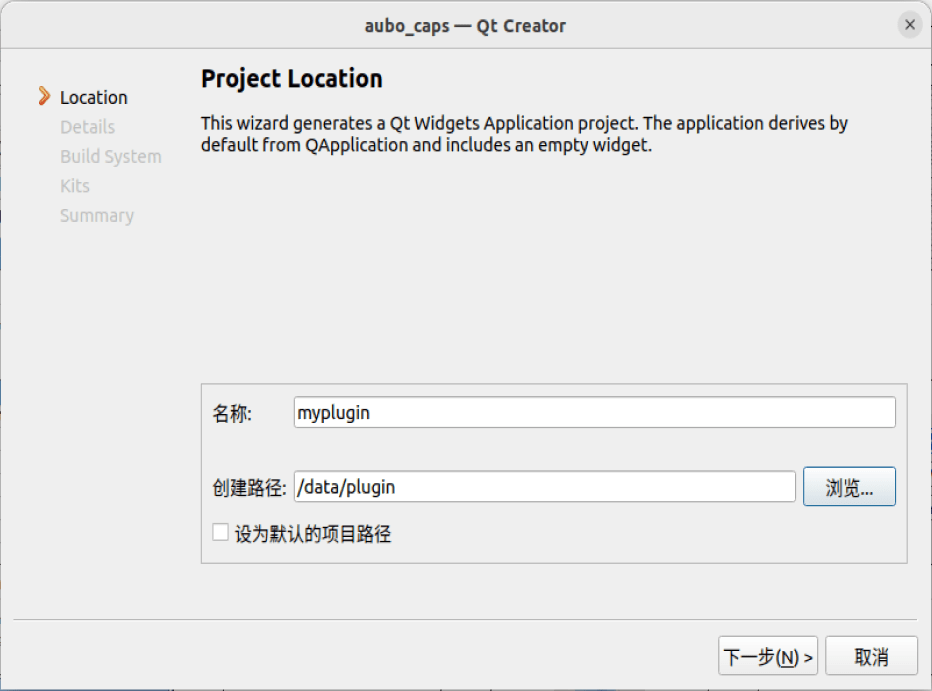
Set the name and save path for the new project, then click [Next].
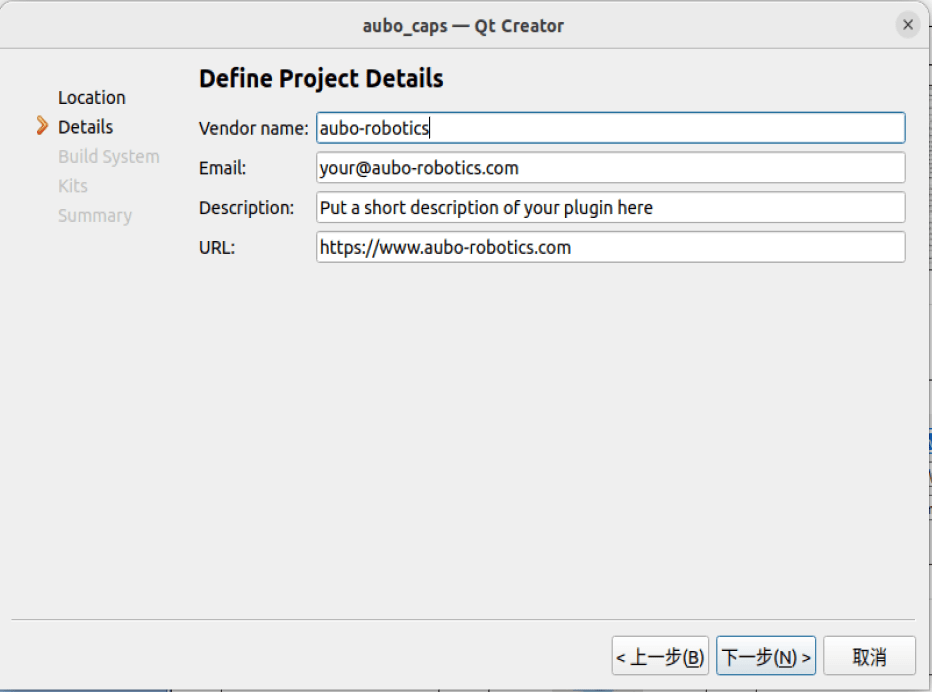
Enter project details: Vendor name, Email, Description, URL, then click [Next].
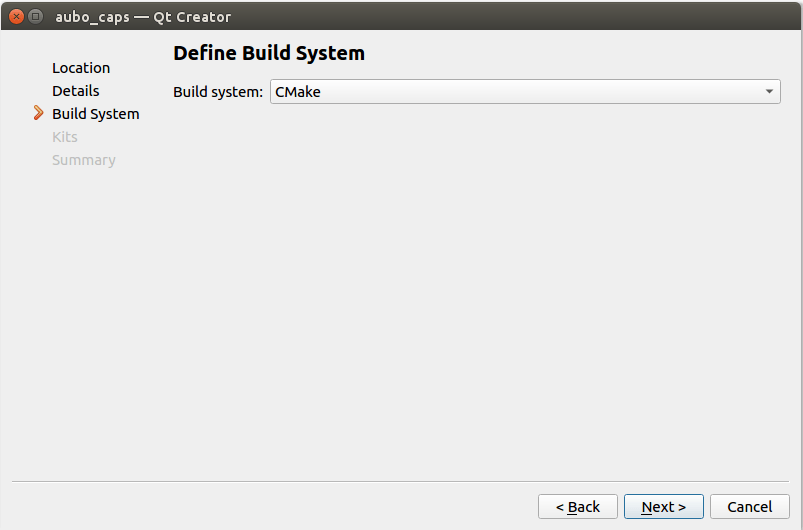
Choose the build system and click [Next]. Currently, only CMake is supported.
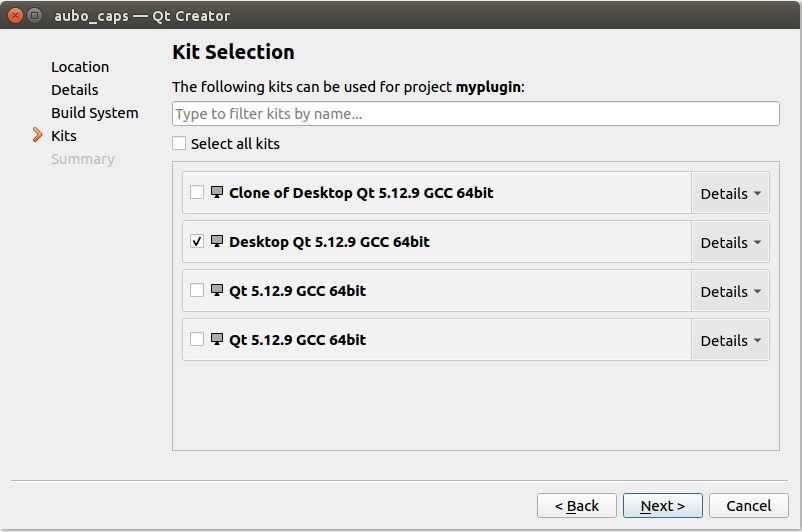
Select the compiler toolchain and click [Next]. Choose Qt 5.12.9 + gcc7.5 toolchain.
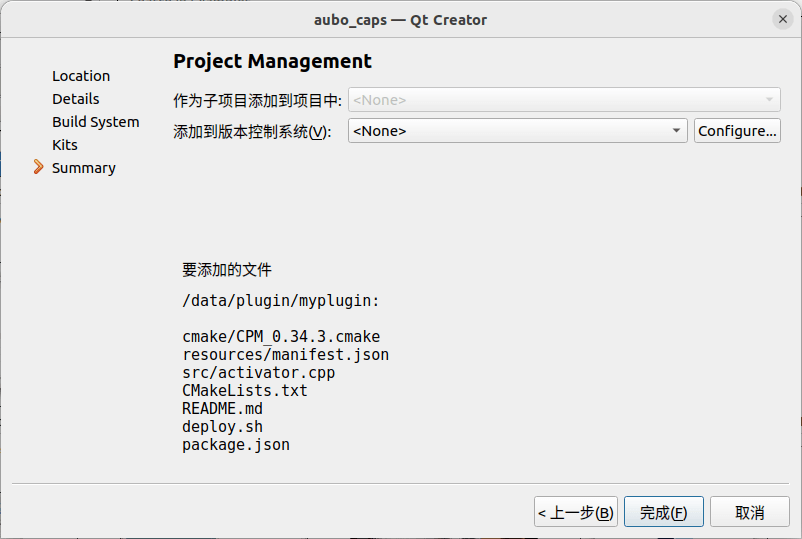
Review the files added to the project and click [Finish].
Building the Project
Click on the project name, right-click to open the dropdown menu, then click [Run CMake].
- CMake will download dependencies online, so the development device must be connected to the internet;
- Depending on the network speed, the CMake process may take some time.
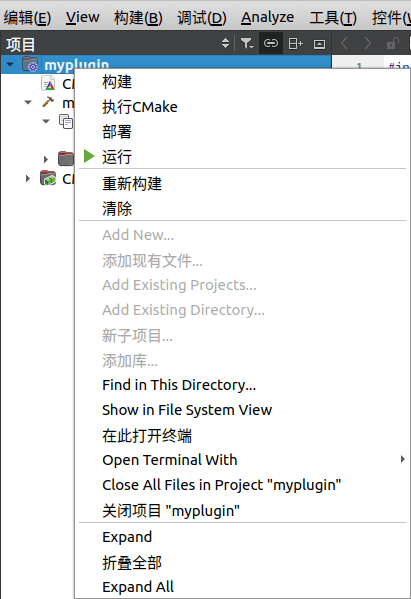
After CMake completes, compile the project by clicking on the project name, right-clicking to open the dropdown menu, then clicking [Build].

Adding New Nodes to Project
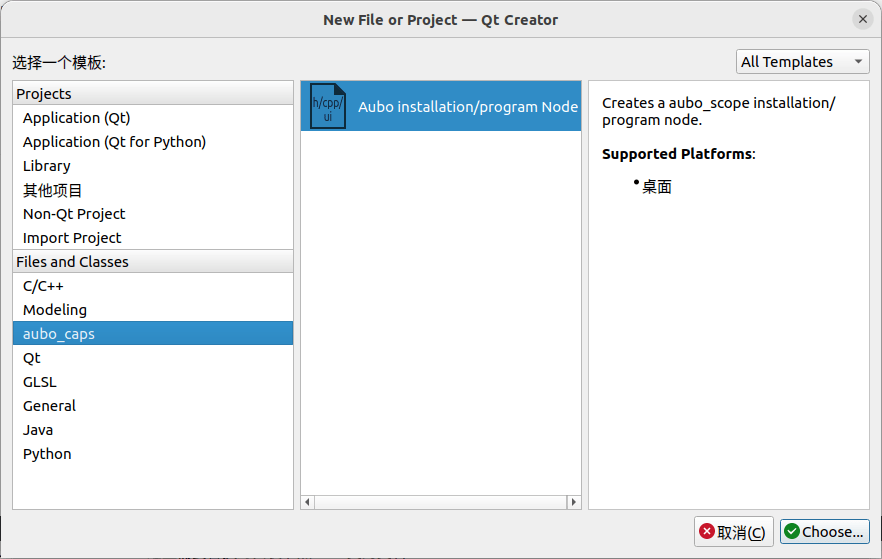
In the menu bar, click on [File > New File or Project], then in the [New File or Project] wizard, click on [aubo_caps > Aubo installation/program Node], and click [Choose].
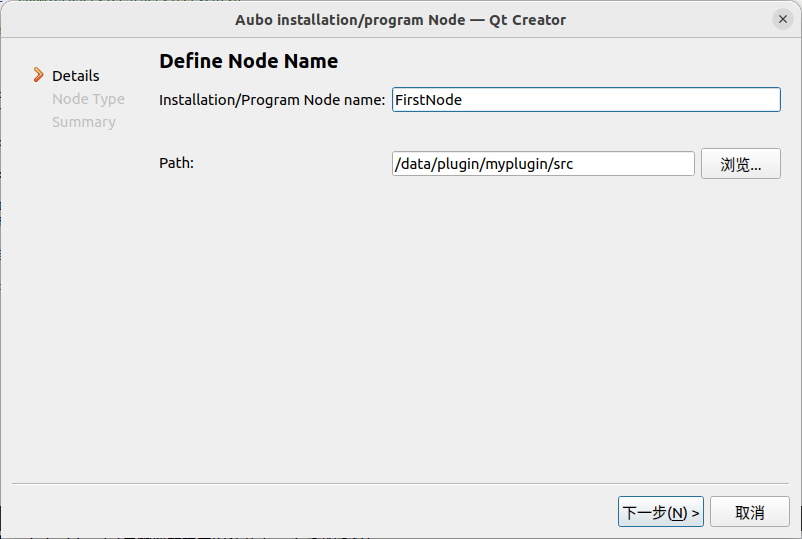
Set the [Installation/Program] node name.
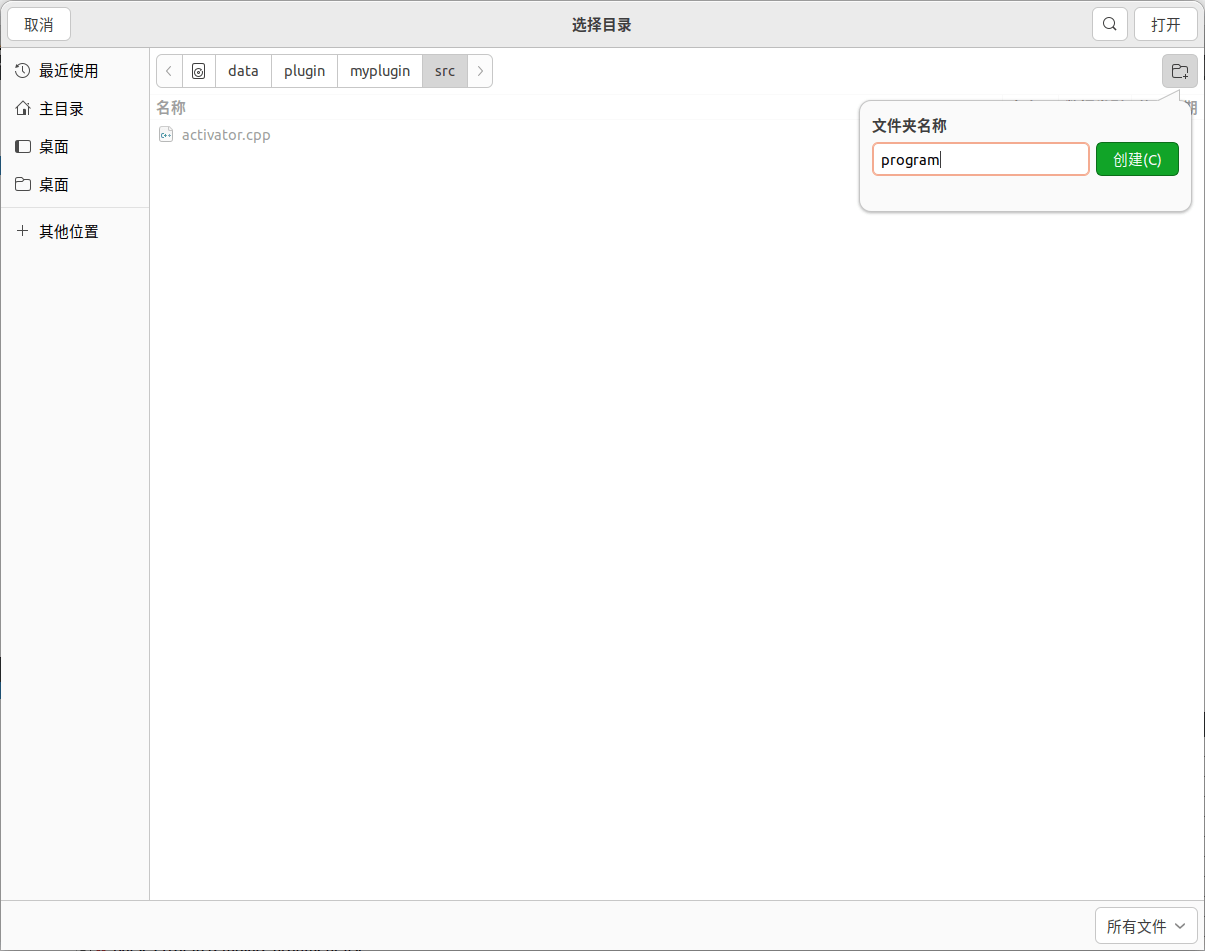
Click [Browse] to set the node path. Create a new folder named [installation] or [program] under the [src] folder,click [Open] to select the folder, and then click [Next].
- Installation nodes correspond to the [installation] folder, and program nodes correspond to the [program] folder.
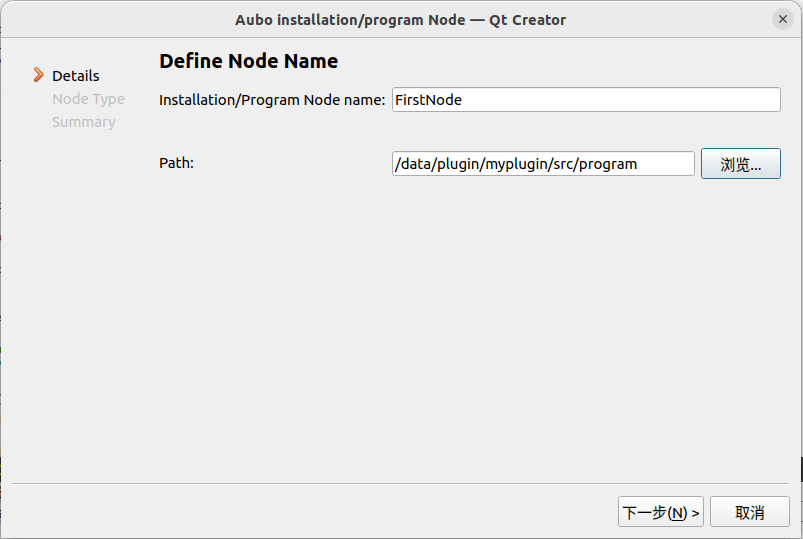
Select the node type and click [Next].
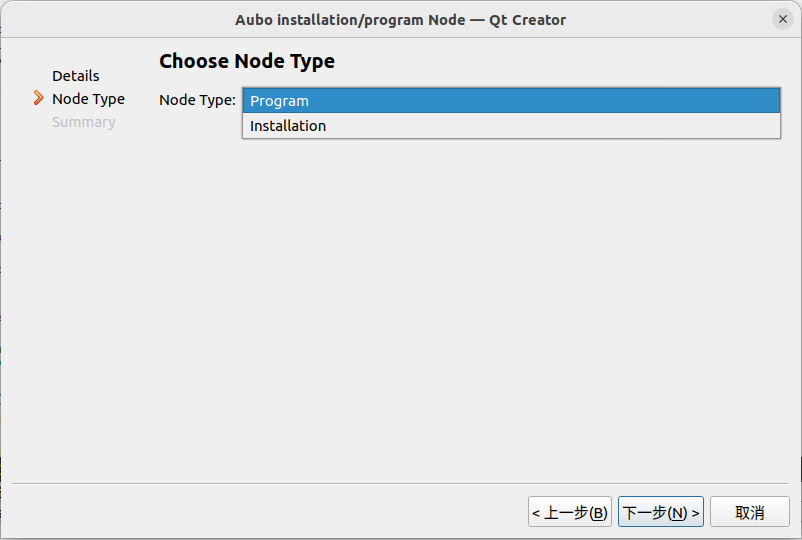
Review the list of files to be added to the project, then click [Finish].
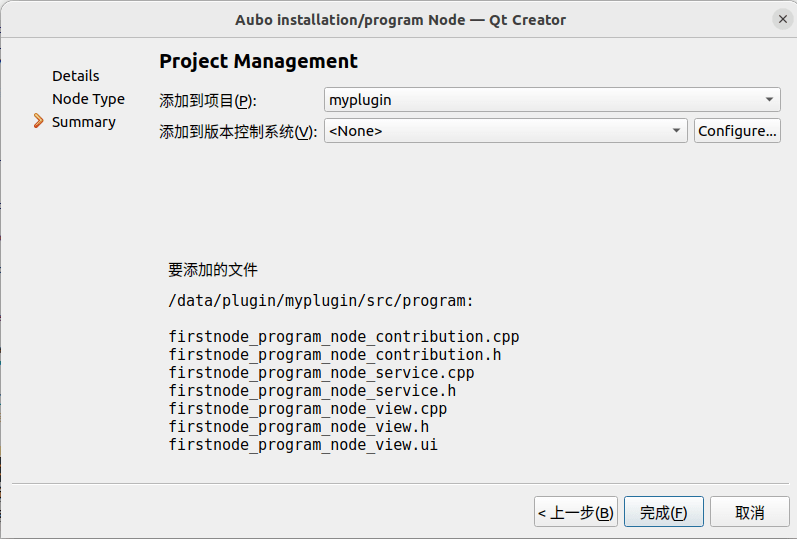
After adding the node, configure [CMakeLists.txt] and [activator.cpp] accordingly:
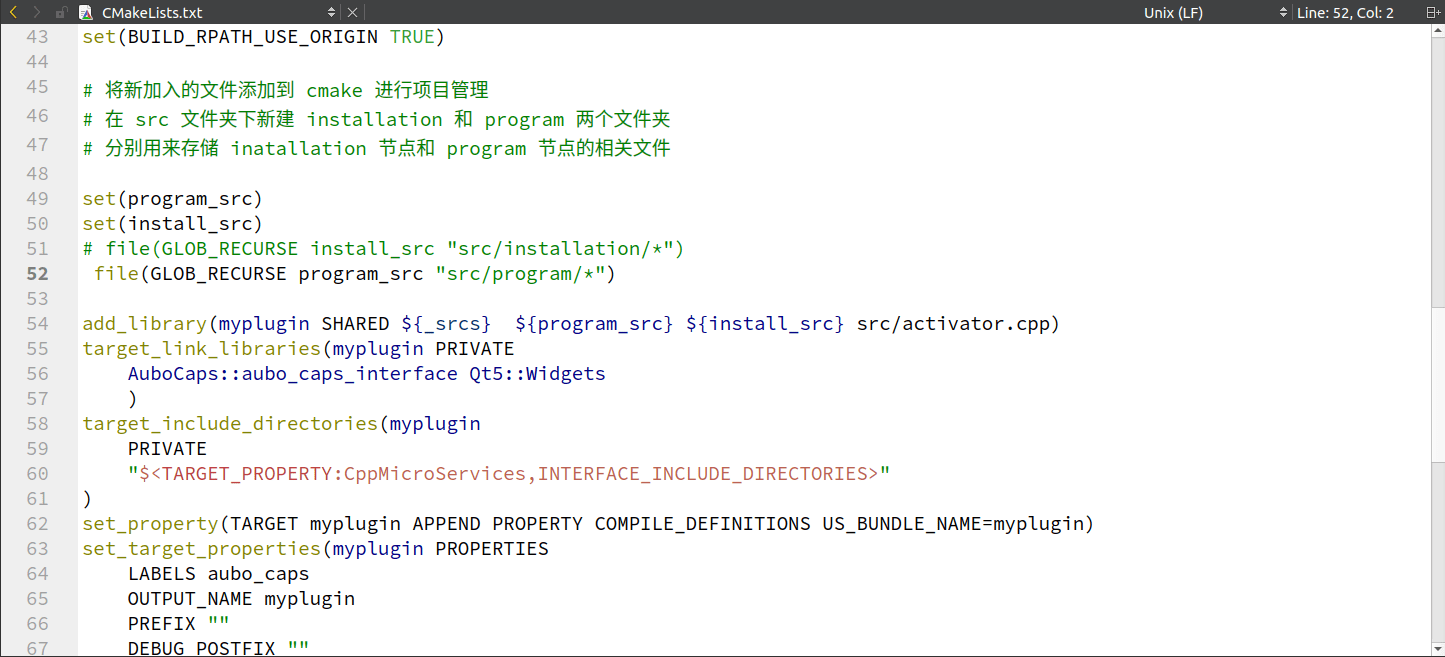
Add the node source code to [CMakeLists.txt]. Since the [installation] or [program] folder has been created under the [src] folder, uncomment the corresponding statement (remove the preceding "#").
...
# file(GLOB_RECURSE install_src "src/installation/*")
# file(GLOB_RECURSE program_src "src/program/*")
...
Add response statements to [activator.cpp]:
Include the corresponding service class header file.
#include "program/firstnode_program_node_service.h"<img class="img-center" src="../../rs_pics/dev/plugin_pendant/qtcreator-cpp-add-include.png"style="width:40em;">
Uncomment the node type that needs to be registered and modify the class name.
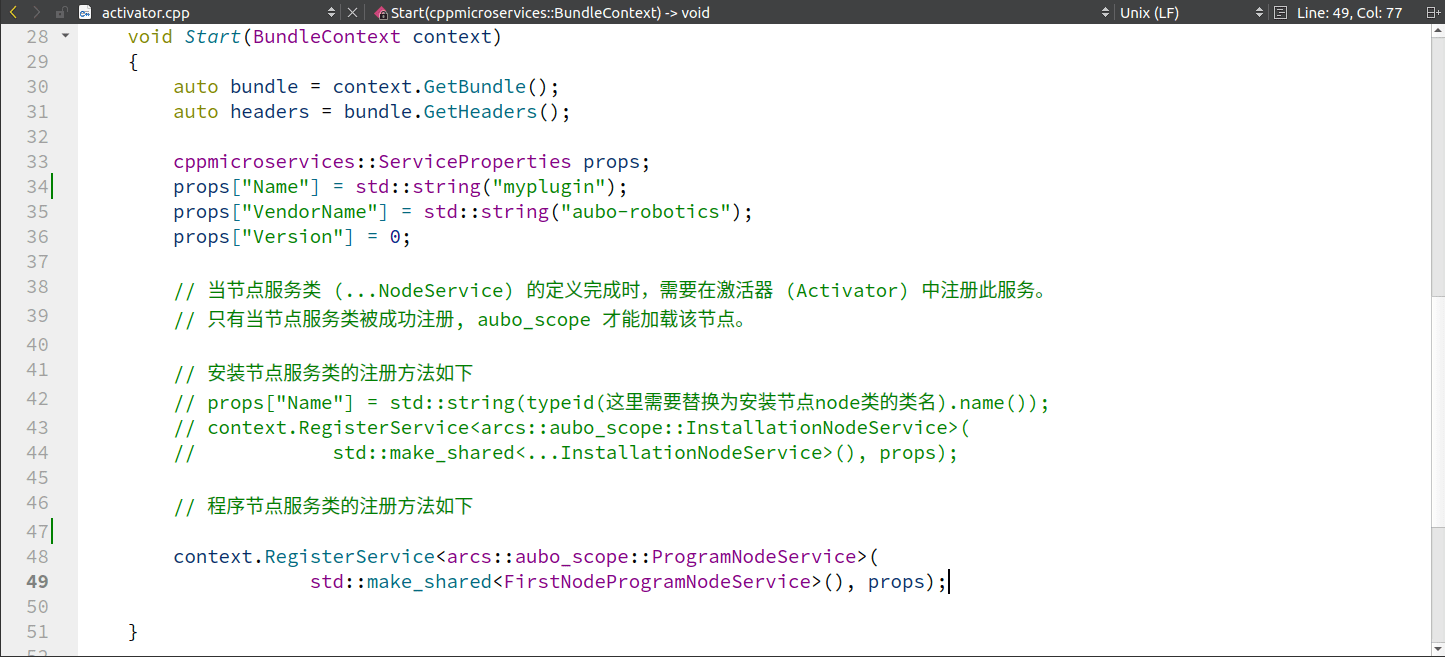
Right-click on the project name, open the dropdown menu, and click [Build].
Packaging Plugin
When loading a plugin into the teach pendant software for the first time, the plugin must first be packaged as a ZIP file in the development environment. Then copy the packaged file to the specified path in the teach pendant software and open the software to load the plugin before it can be used.
After the plugin is loaded into the teach pendant software, if updates are needed, you only need to update the corresponding plugin content in the .../arcs_ws/extensions folder. For specific details, please refer to "5. Plugin Debugging".
Prerequisites
The package.json file in plugins is used to describe plugin information, and it contains the following fields:
"name": "plugin_name", # Plugin Name
"displayName": "plugin_name",
"group": "aubo_scope",
"description": "Visual localization plugin",
"version": "0.1.0",
"publisher": "aubo-robotics",
"url": "https://www.aubo-robotics.com",
"email": "aubo_developer@aubo-robotics.com",
"license": "aubo",
"icon": "",
"api_version": "0.6.0" # Current API Version Used by Plugin
Among these, api_version indicates the version of aubo_caps_interface used to develop the current plugin, which is a mandatory field that must be added before packaging. The teaching pendant software will verify the API version used by the current plugin. If the version used is higher than what the teaching pendant software supports, the plugin cannot be loaded (this loading issue can be resolved by upgrading the teaching pendant software version). If api_version is empty, compatibility issues may render the plugin unusable.
Packaging
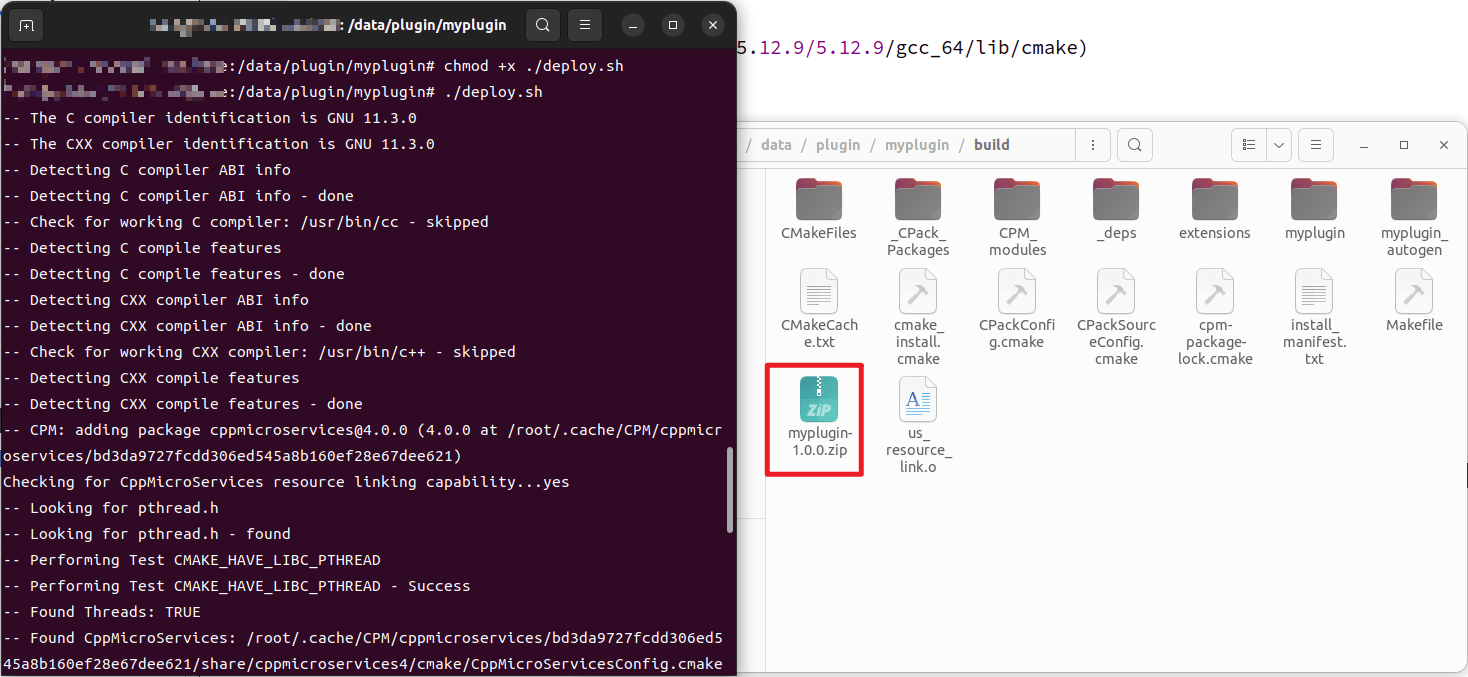
In the plugin development environment, open the terminal and run the following commands to package by executing the
deploy.shscript.cd <project root directory> chmod +x ./deploy.sh ./deploy.sh # The plugin will be generated in the build directoryAfter the script runs successfully, a zip file will be created in the
buildfolder, indicating successful packaging.