SDK PC Communication Settings with Robot
The SDK PC can communicate with the robot in two ways:
- Wireless Network Communication: Wireless network communication is a method of communicating with the robot via a wireless local area network (Wi-Fi). To use the wireless network communication method, it is necessary to configure the corresponding network settings of the PC and the robot so that they are on the same wireless local area network (Wi-Fi). The PC can send commands to the robot, receive data, and interact with it via a wireless network.
- Wired Network Communication: Wired network communication is a method of communicating with the robot via a wired connection (Ethernet). To use this communication method, it is necessary to connect the PC to the control box with a network cable and set the IP address, subnet mask, and gateway so that they are on the same subnet.。 The PC can send commands to the robot, receive data, and interact with it via a wired network.
Wireless Network Communication
You can achieve wireless network communication between the robot and the PC by referring to the following steps:
Connect the control box to the router using an Ethernet cable.
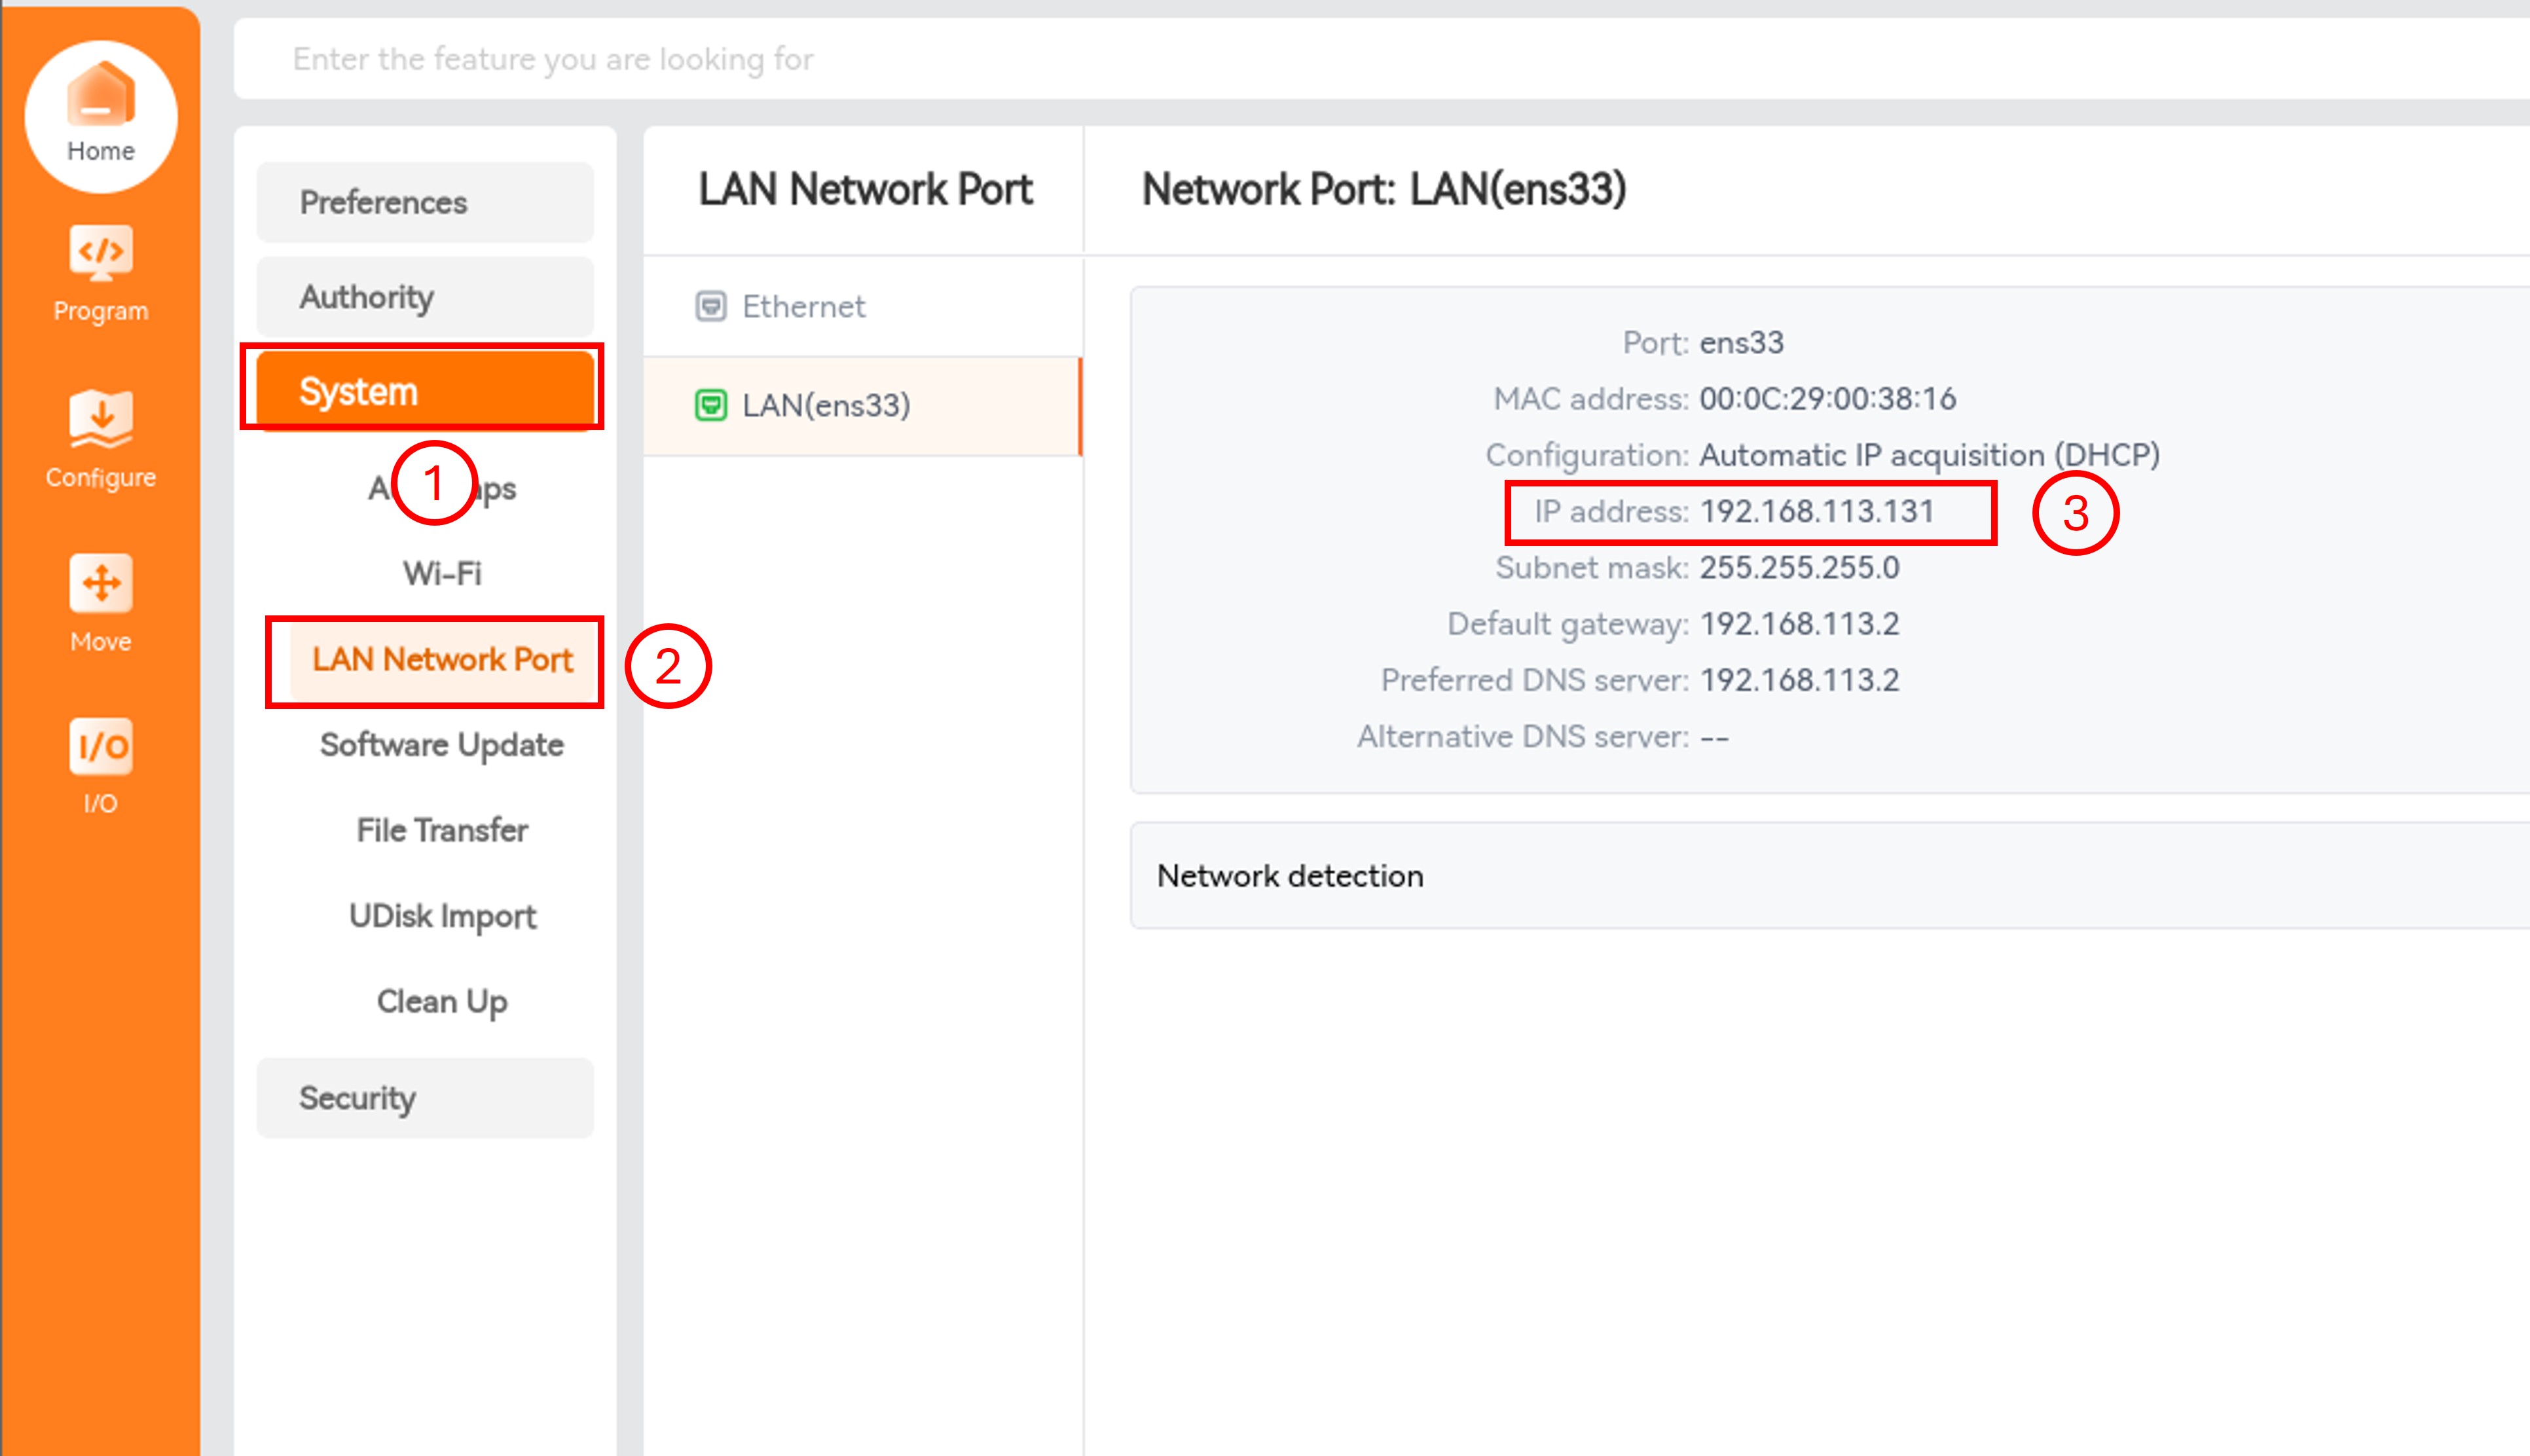
Inside Settings, go in System and use Automatic IP acquisition (DHCP). Then in LAN Network Port you can see the IP address of the robot in the network details.
Connect the PC to the same Wi-Fi as the robot.
Test the network connectivity on the PC.
Windows operating system:
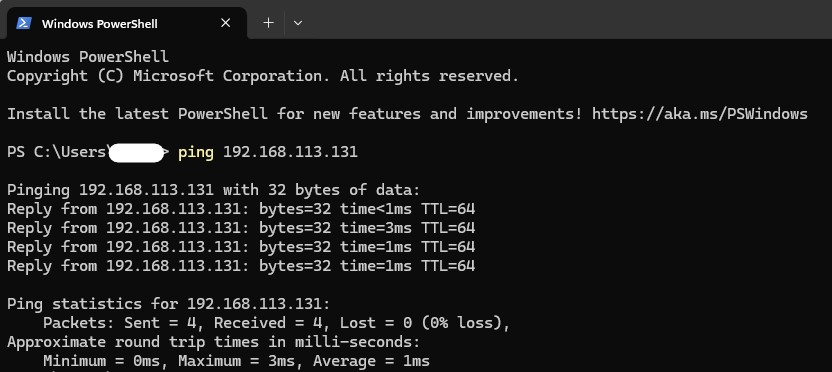
Method 1: Use the ping command. Open the cmd and enter ping 192.168.113.131 (what ever your robot's ip address is). As shown in the figure below, the communication is successful.
Method 2: Use the telnet command. Open the cmd and enter telnet 192.168.113.131 30004. As shown in the figure below, the communication is successful.
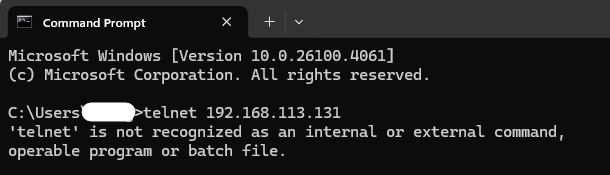
If the prompt shown in the figure below appears, it means telnet is not enabled.
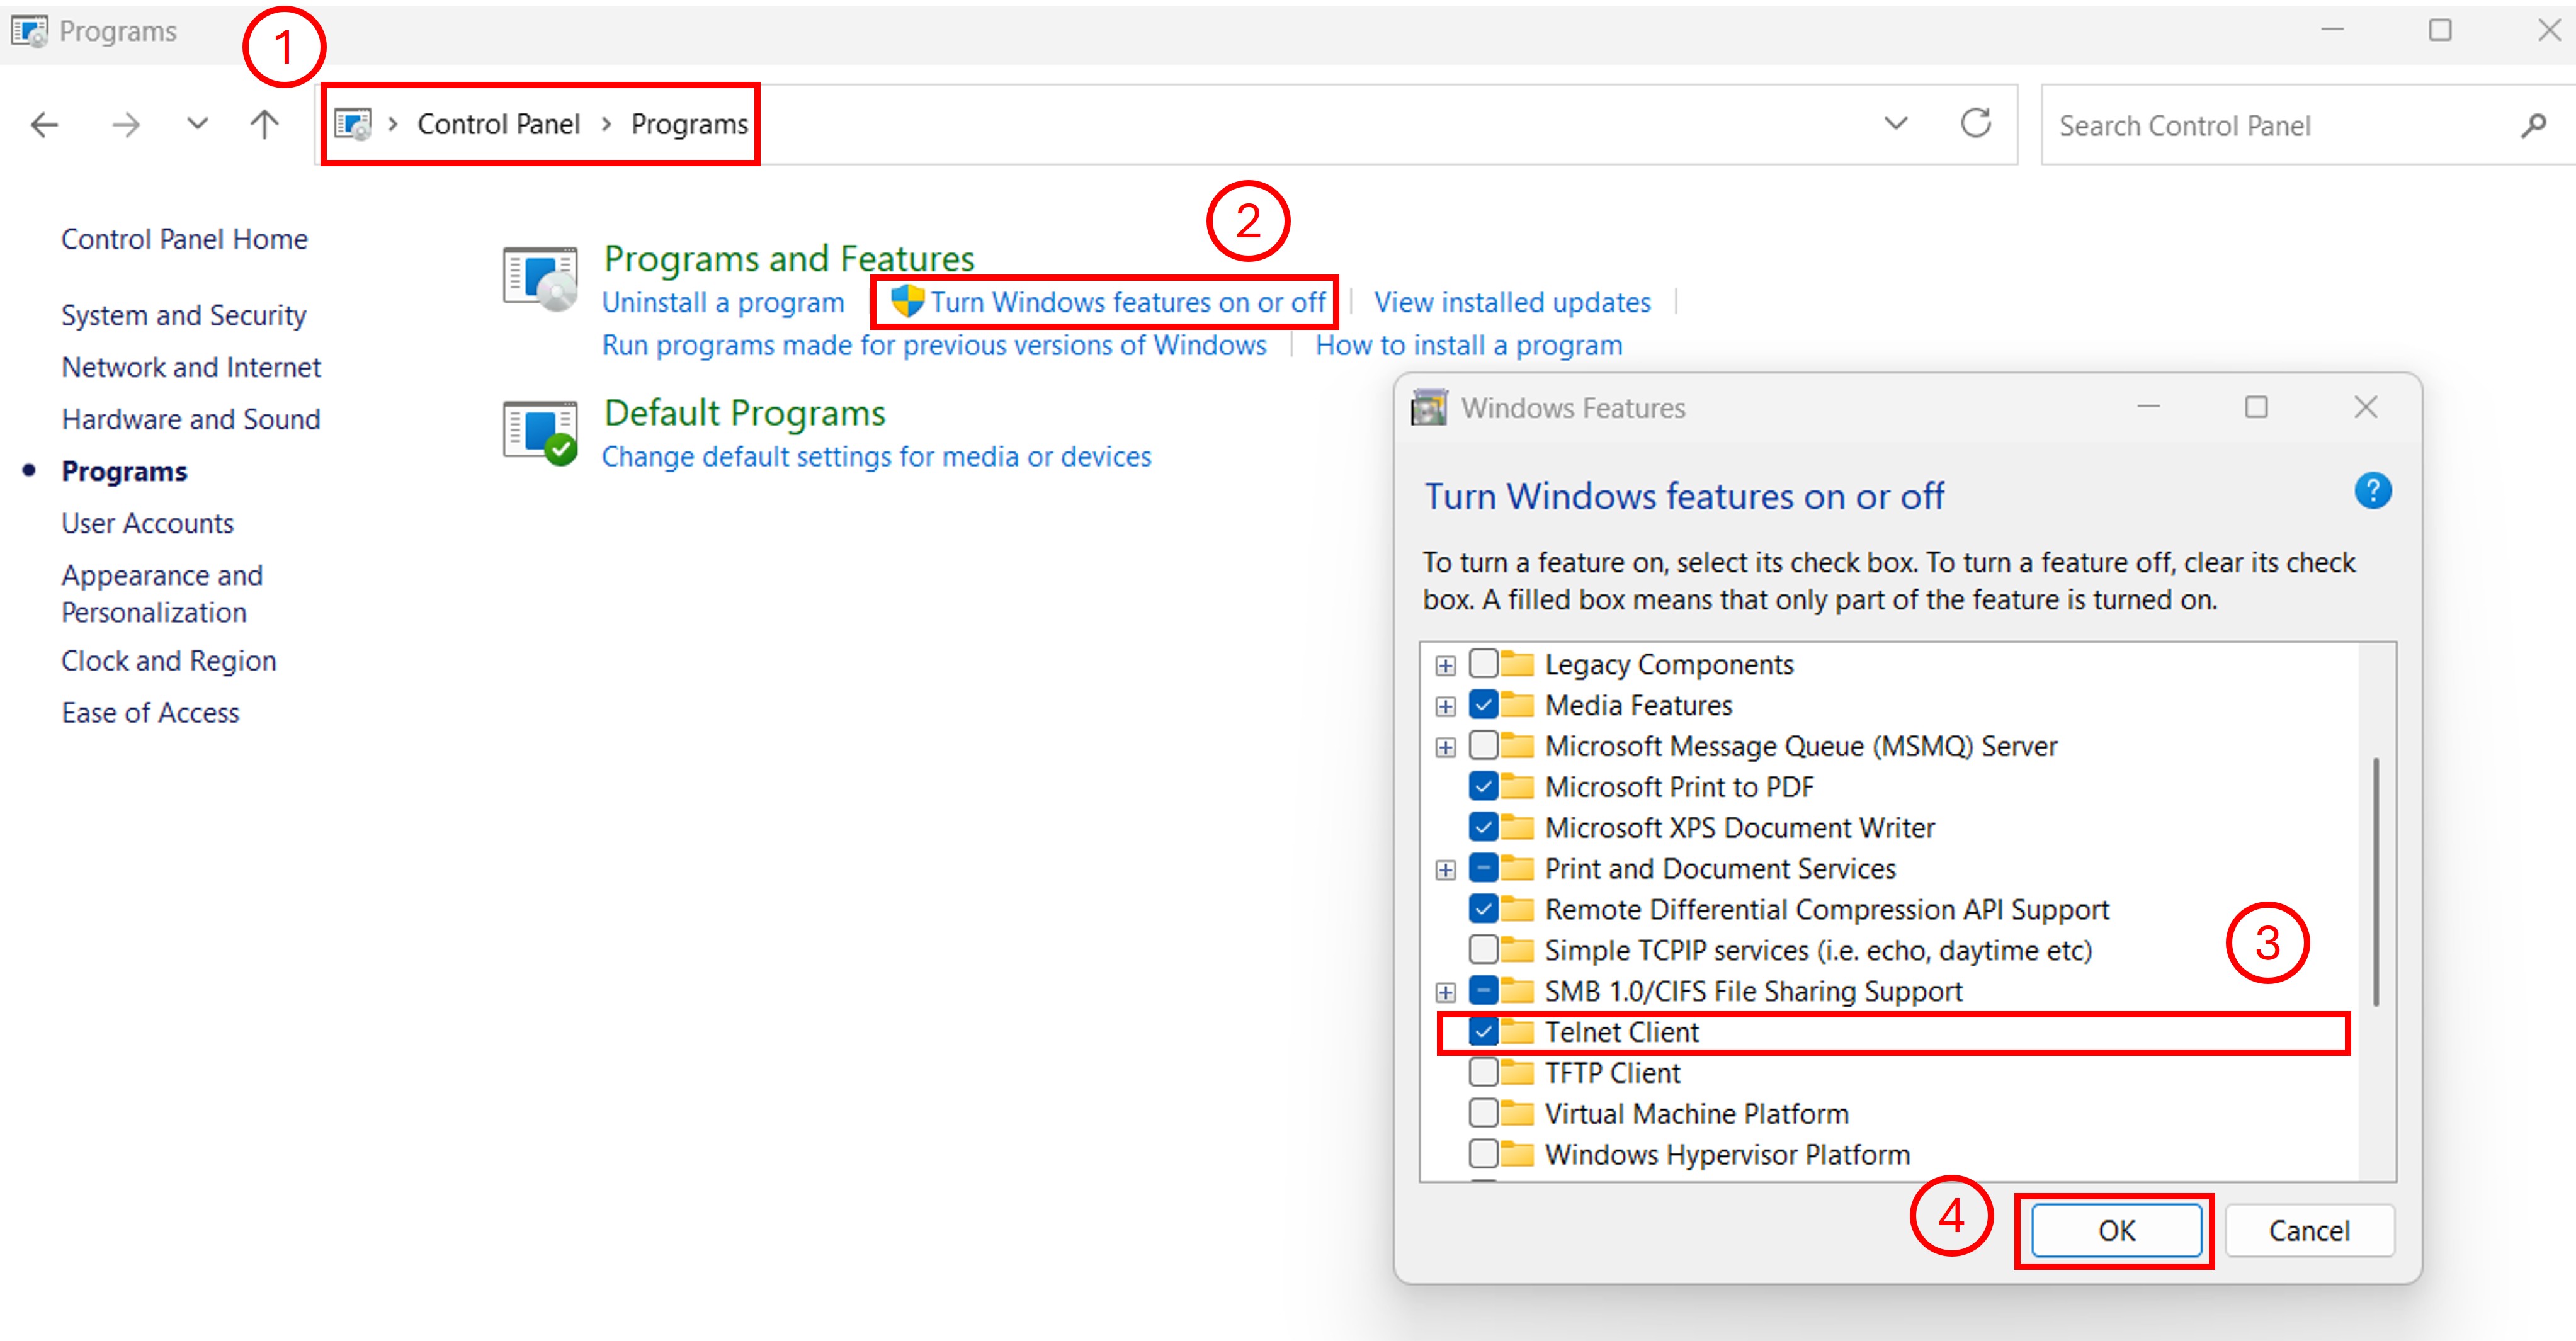
Follow the steps shown in the figure below to enable telnet.
Linux operating system:
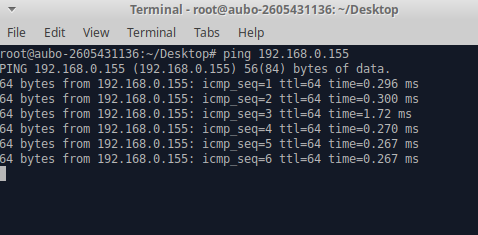
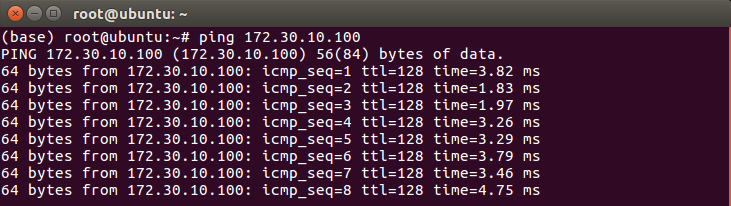
Method 1: Use the ping command. Open the terminal and enter ping 172.30.10.100 (what ever your robot's ip address is). As shown in the figure below, the communication is successful.
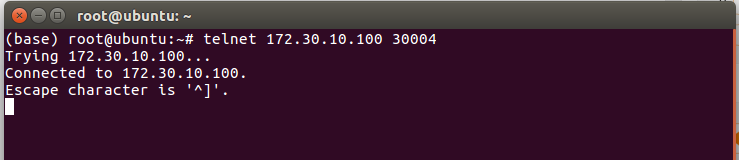
Method 2: Use the telnet command. Open the terminal and enter telnet 172.30.10.100 30004. As shown in the figure below, the communication is successful.
Wired Network Communication
You can achieve wired network communication between the robot and the PC by referring to the following steps:
Connect the control box to the PC using an Ethernet cable.
Go into Settings, System, LAN Network and set the Static IP in the teach pendant. The IP address is the robot's IP. The robot's IP address in the figure below is 192.168.0.155.
The subnet mask must be set to 255.255.255.0.
The host address part of the IP address of the gateway is usually set to 1. For example, if the IP address is 192.168.0.155, its default gateway should be set to 192.168.0.1.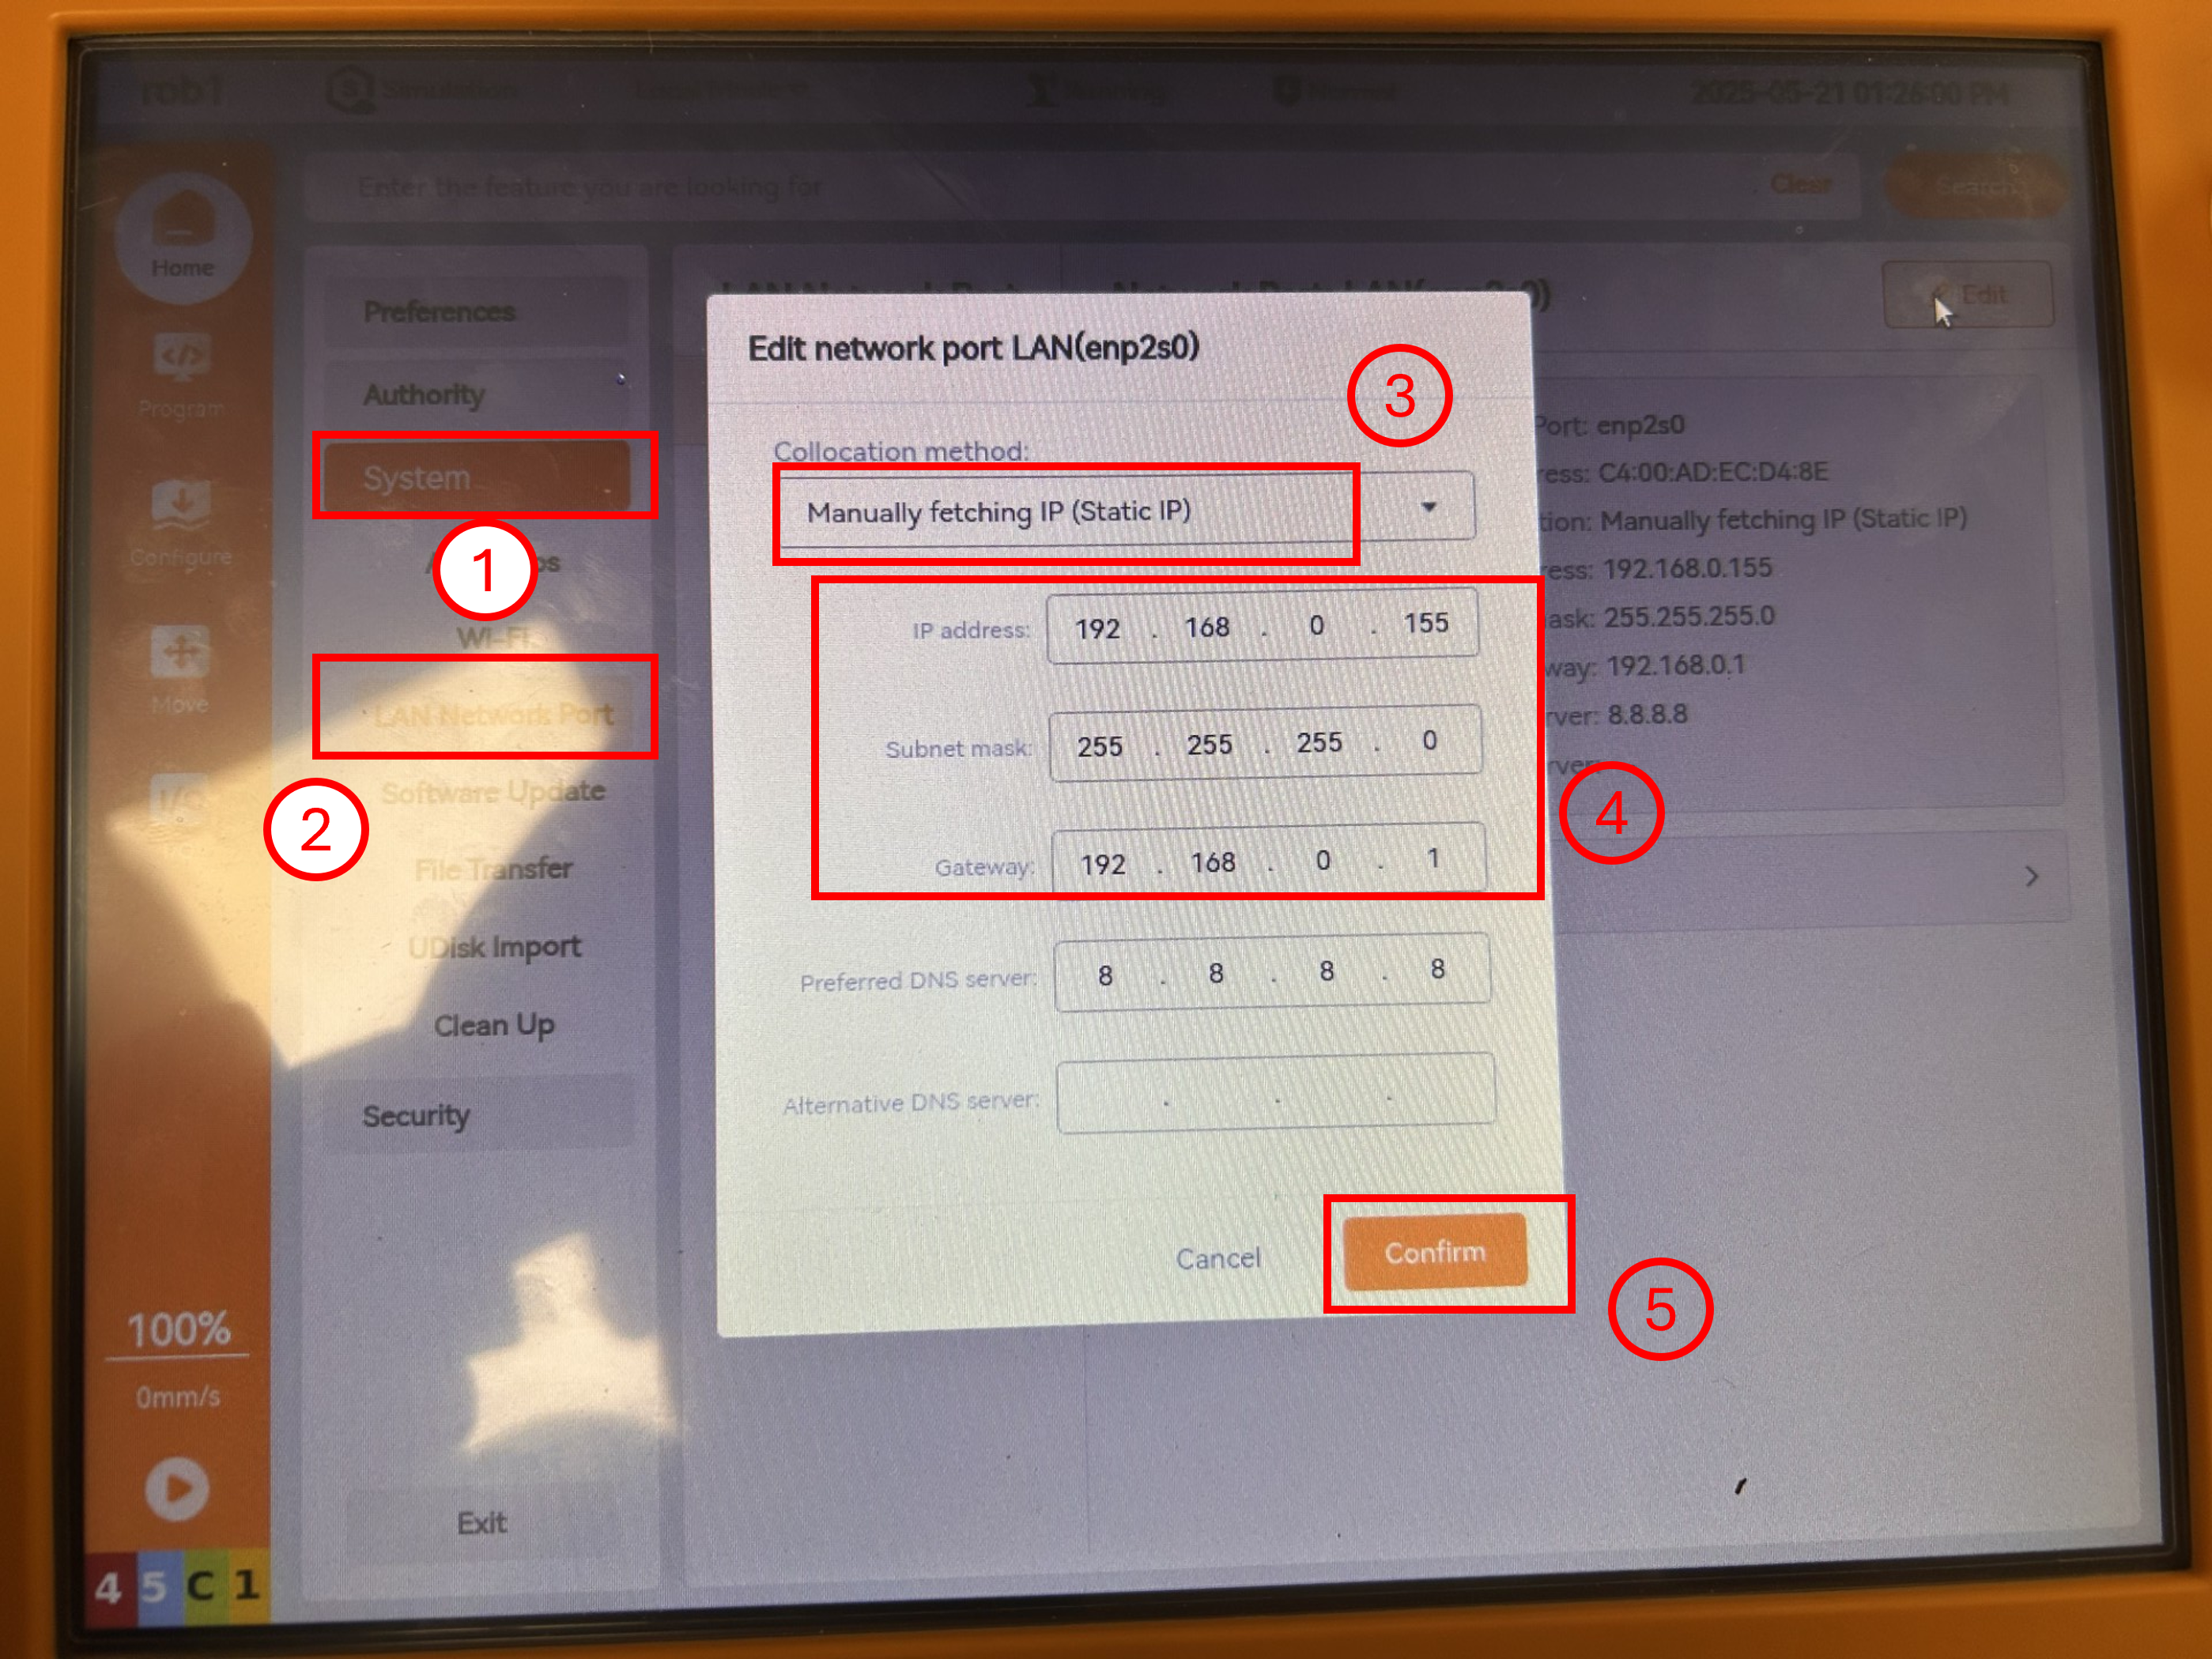
Set the IP address, subnet mask, and gateway on the PC to make it in the same subnet as the robot.
The IP address prefixes of the robot and the PC must be the same. For example, if the robot's IP address is 192.168.0.155, its IP address prefix is 192.168.0, and the PC's IP address prefix must also be 192.168.0.
Both the subnet masks of the robot and the PC must be 255.255.255.0.
The gateways of the robot and the PC must be the same, and the host address part of the gateway's IP address is usually set to 1. For example, if the IP address is 192.168.0.155, the gateway should be set to 192.168.0.1.
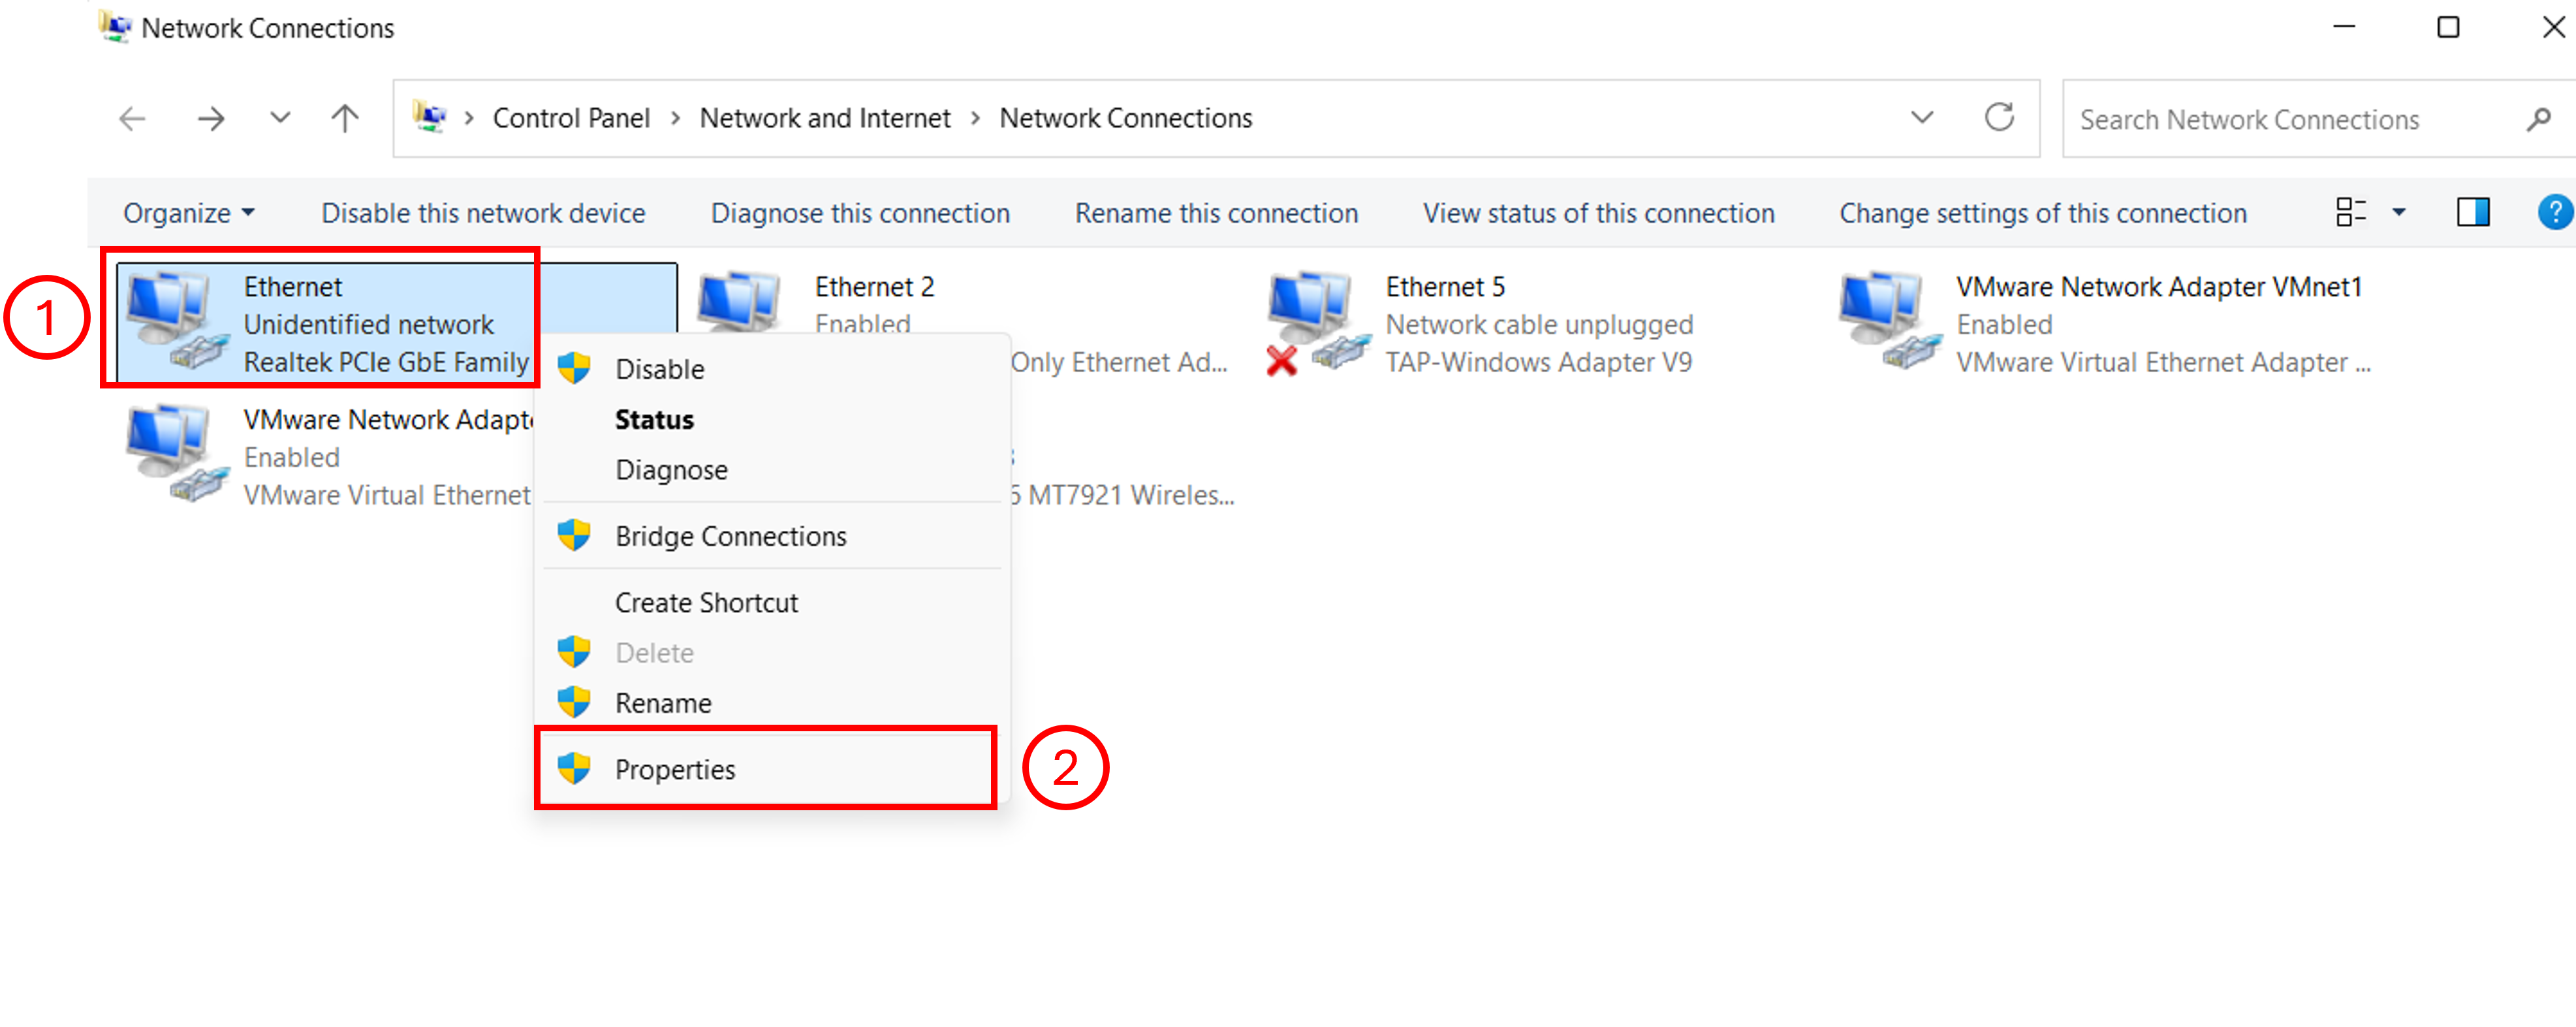
The following describes how to configure in [Windows Operating System] (#windows) and [Linux Operating System] (#Linux).Find Ethernet on the PC ---> Select it ---> Right-click ---> Click Properties.
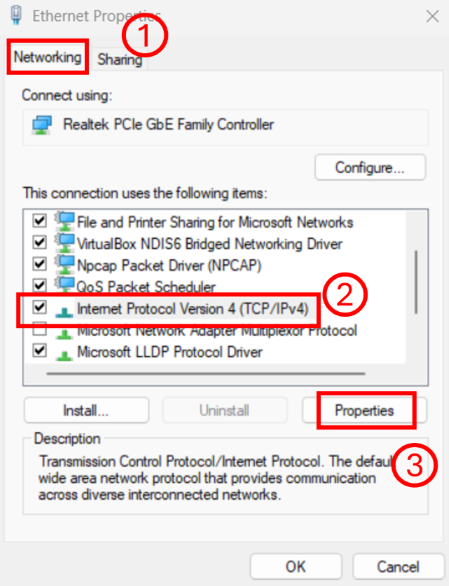
Select Internet Protocol Version 4 (TCP/IPv4) ---> Click Properties.
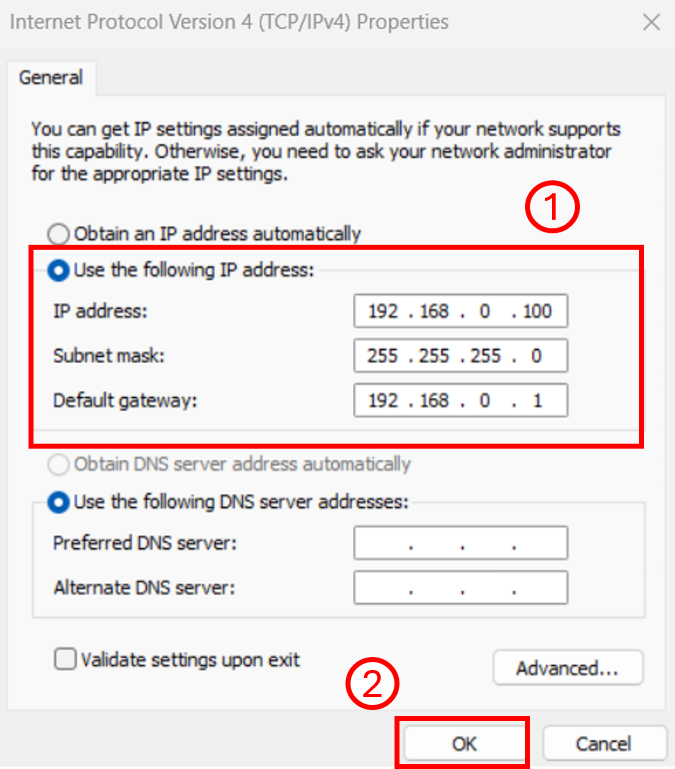
- As shown in the figure below, set the IP address, subnet mask, and gateway ---> Click OK.
In the figure, the host's IP address is 192.168.0.100, and the robot's IP address is 192.168.0.155. They are in the same subnet.
- VMware virtual machine:
On the PC, set the Ethernet's IP address, subnet mask, and gateway so that the host and the robot are in the same subnet.
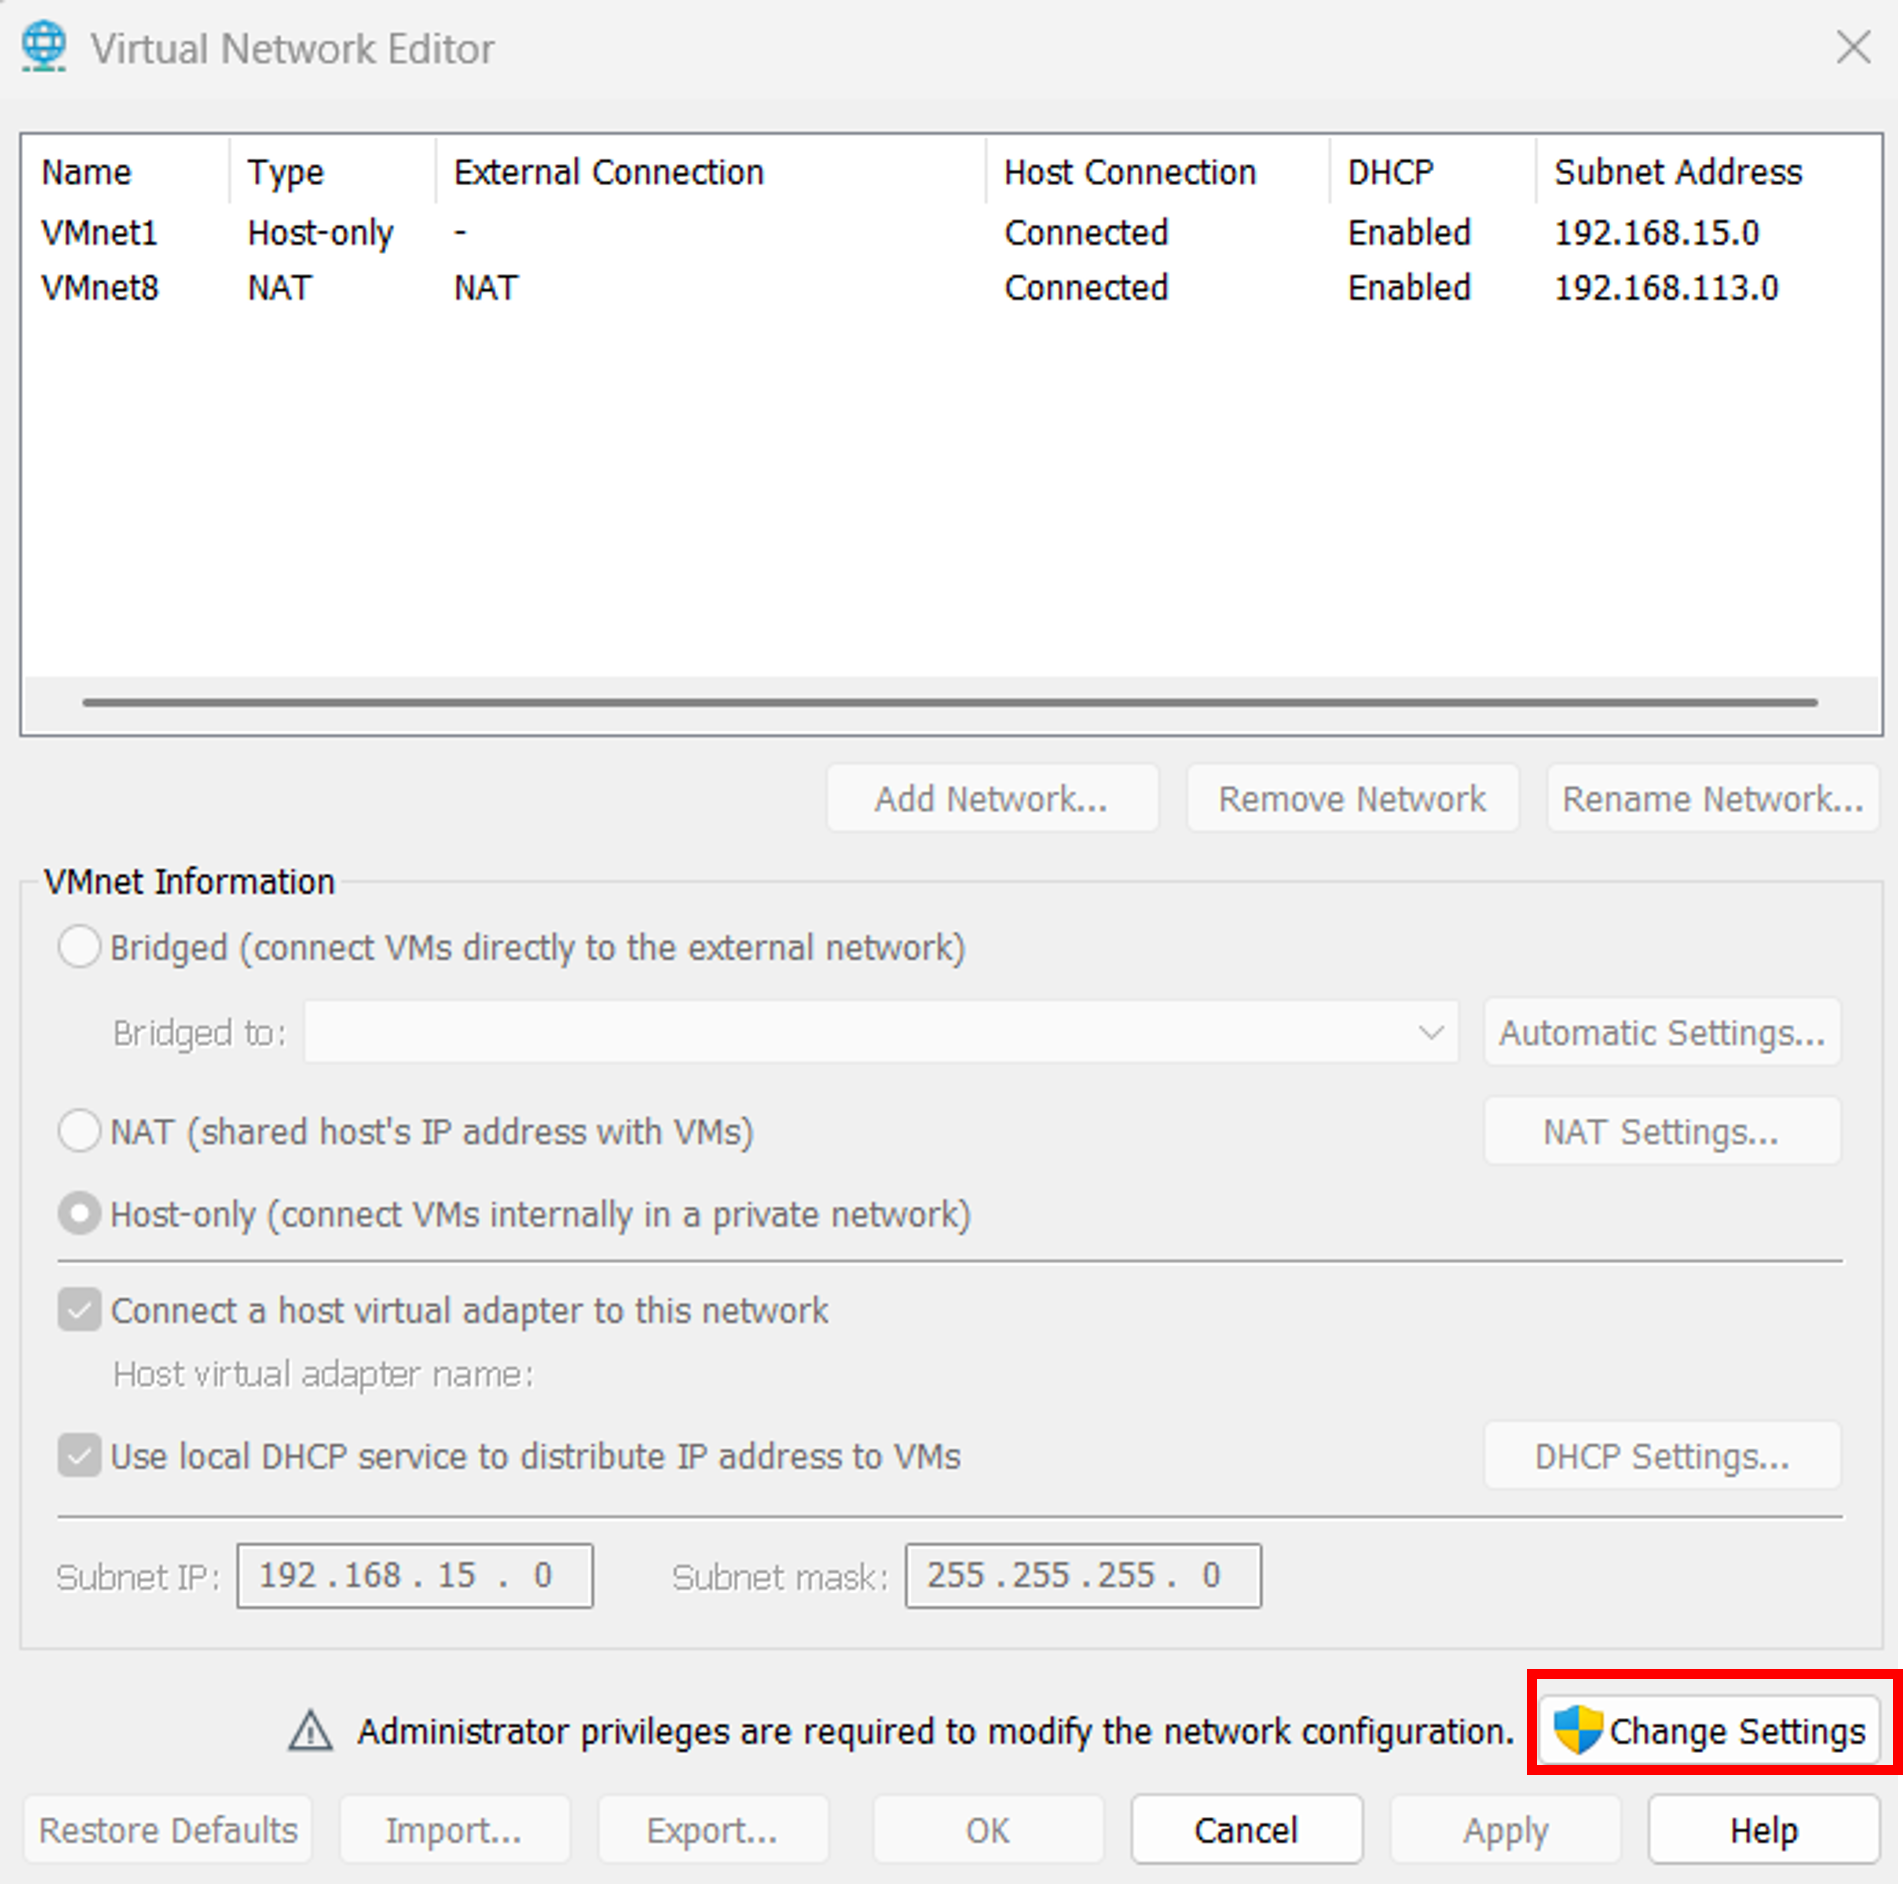
Open the Virtual Network Editor, select VMnet0 if possible (or which ever one available), and click Change Settings.
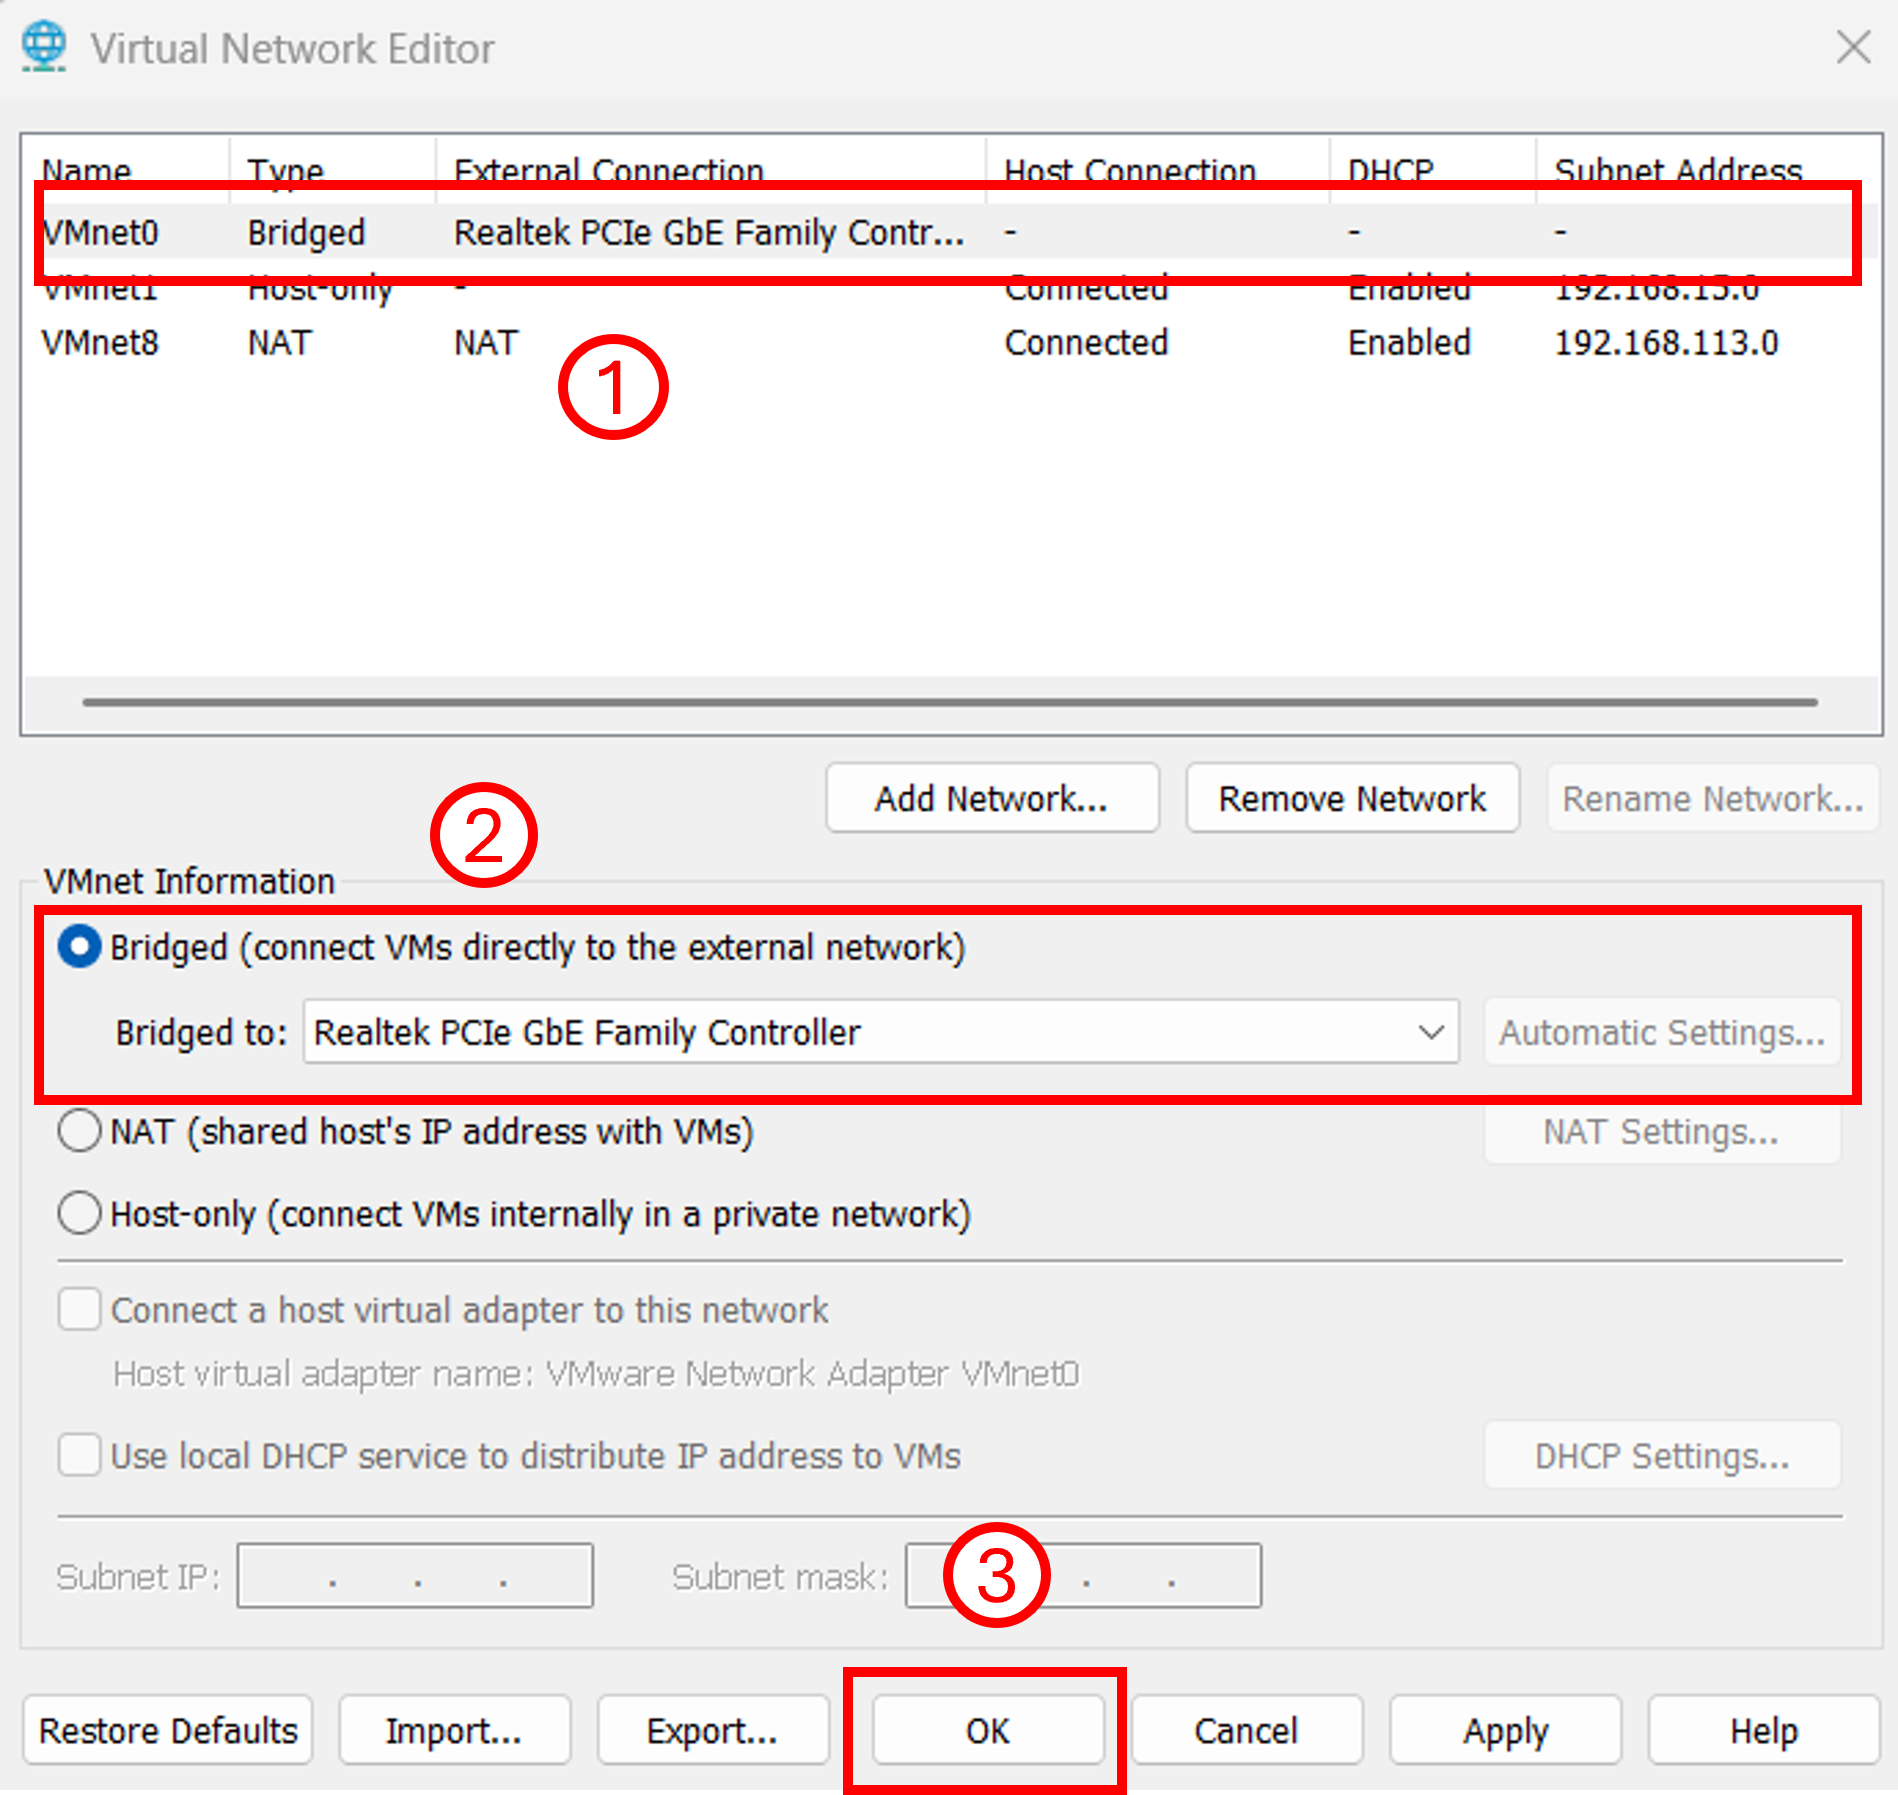
Select VMnet0, choose to bridge to Realtek PCIe GbE Family Controller, and click OK.
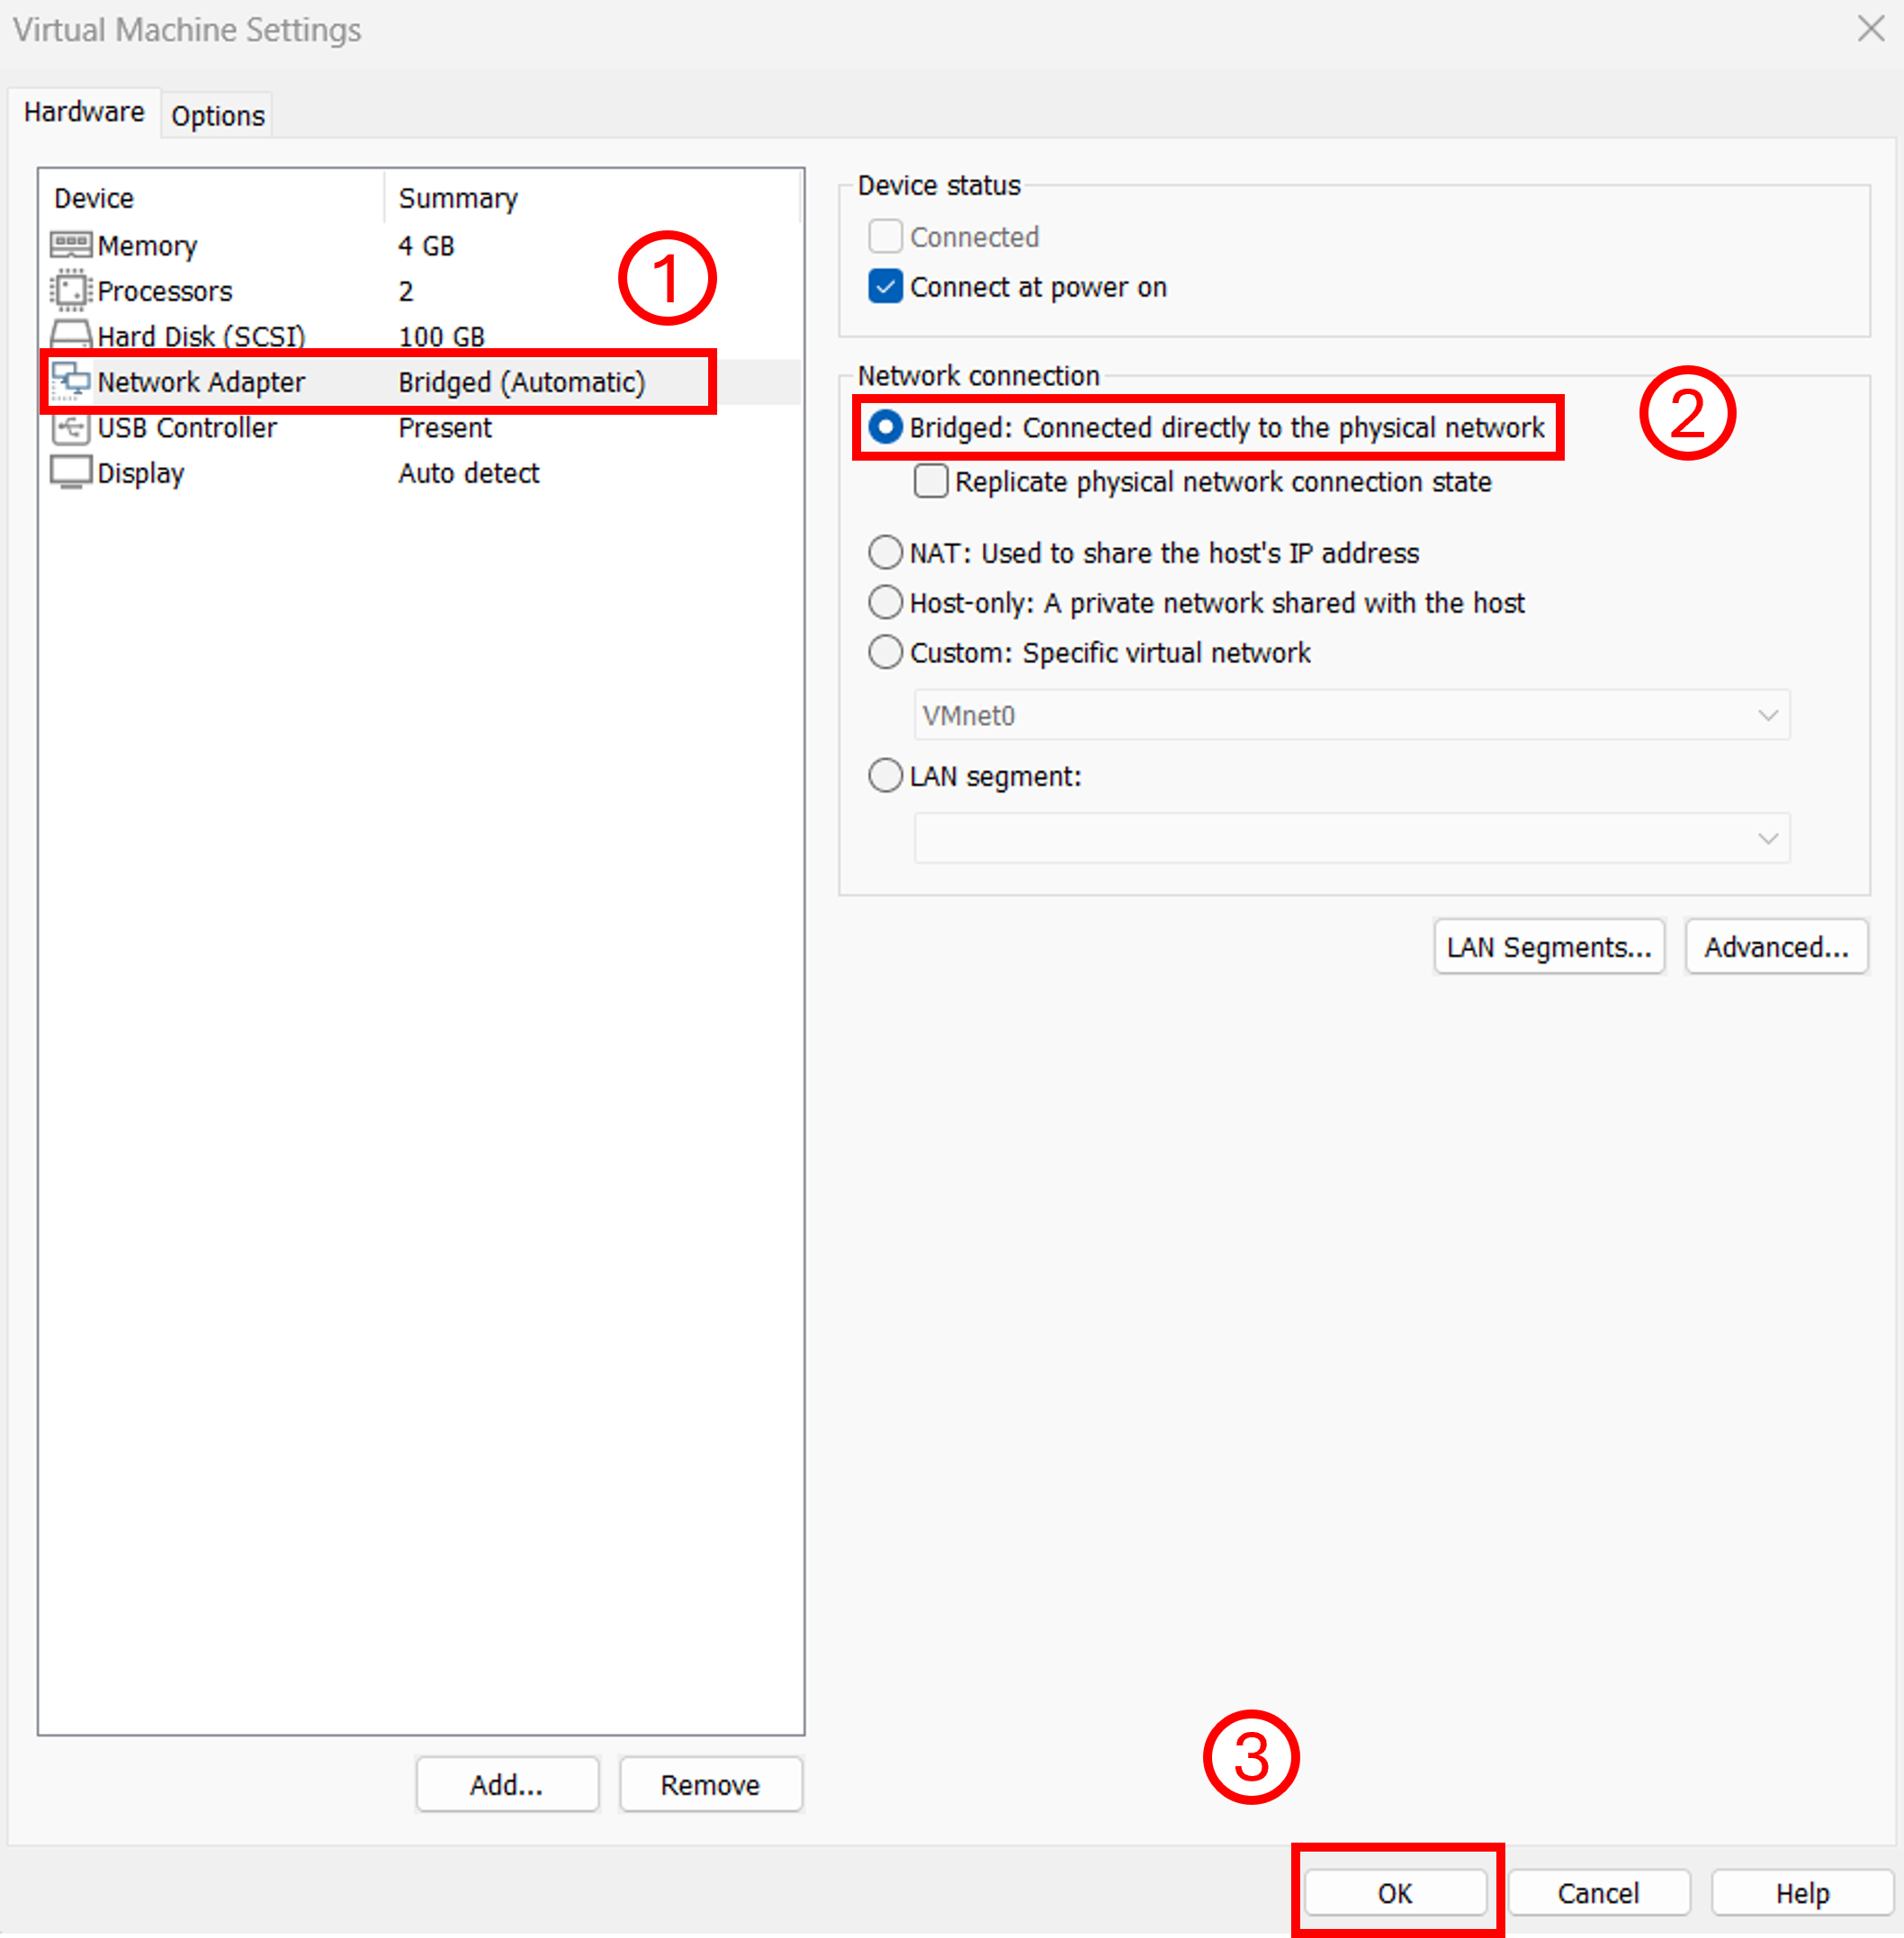
Open the virtual machine settings, set the Network connection in the Network Adapter to the Bridged.
Set the virtual machine's IP address to be in the same subnet as the robot.
In the figure below, the virtual machine's IP address is 192.168.0.120, and the robot's IP address is 192.168.0.155. They are in the same subnet.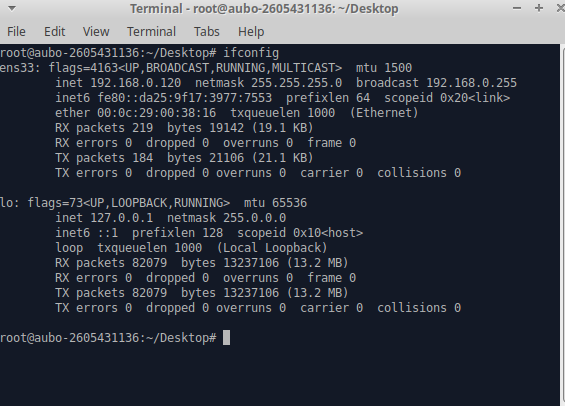
Test the network connectivity on the PC.
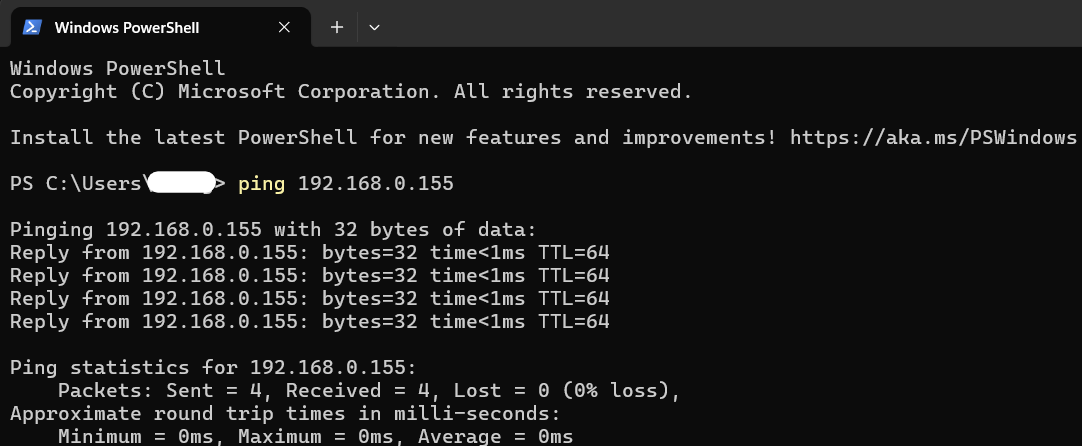
Windows operating system: Open the cmd and enter ping 192.168.0.155. As shown in the figure below, the communication is successful.
Linux operating system: Open the terminal and enter ping 192.168.0.155. As shown in the figure below, the communication is successful.