Plugin Development Guide (v1.1)
1 Preface
AuboCaps provides all necessary interfaces and configurations for plugin development in AUBO robot's ARCS software. Users can develop plugins based on the information provided in this manual, integrate them into ARCS software, and enhance the functionality of AUBO robots.
1.1 ARCS workflow
Plugins ultimately run on the teach pendant, so certain functionalities of plugins (primarily in program nodes) need to coordinate with the teach pendant software.
Within the ARCS software architecture, there are mainly two components: the teach pendant and the controller. ARCS software communicates with the robotic arm through scripts, following these general steps:
- Users perform online programming or configure relevant parameters;
- Programs or configured parameters are recorded in the teach pendant;
- The teach pendant generates script files;
- The teach pendant sends all script files to the controller;
- The controller generates robot control commands, sends them to the robotic arm, and executes the corresponding operations.
(Insert flowchart)
1.2 Main tasks of plugin development
As inferred from the ARCS workflow, the essence of plugin development is to provide scripts to the robotic arm controller through plugins. Within the teach pendant, scripts originate from installation nodes and program nodes. Therefore, the primary tasks of plugin development are to complete the installation node and program node modules of the plugin.
1.2.1 Installation nodes
Installation nodes are mainly responsible for configuring various parameters of the plugin and saving these configurations. Similar to configuring basic parameters of a camera, such as exposure time and camera intrinsics, installation nodes handle setting these parameters.
It's important to note that installation nodes are instantiated only once in the program. This is akin to installing other software applications only once. Since parameters are a global concept, all subsequent physical operations are based on these parameters, necessitating instantiation only once. Additionally, this feature can significantly enhance operational efficiency.
1.2.3 Program nodes
Program nodes primarily generate scripts based on parameters to execute specific functions. For instance, when the robotic arm moves to a certain point, a program node at that point might be responsible for opening the gripper. Similarly, when the robotic arm moves to another point, another program node might be responsible for closing the gripper.
2 Plugin Template Structure
2.1 API
ARCS provides API interfaces that users can directly call during plugin development, reducing development time. Based on the usage restrictions of different APIs in installation nodes and program nodes, APIs can be divided into two main categories: domain_api and aubo_cpa_api. Within domain_api, system_api, user_interface_api, and application_api can be used in both installation nodes and program nodes. The program_api in aubo_cpa_api is only usable in program nodes, while installation_api is exclusive to installation nodes. For detailed descriptions of domain_api and aubo_cpa_api, refer to the diagram below.
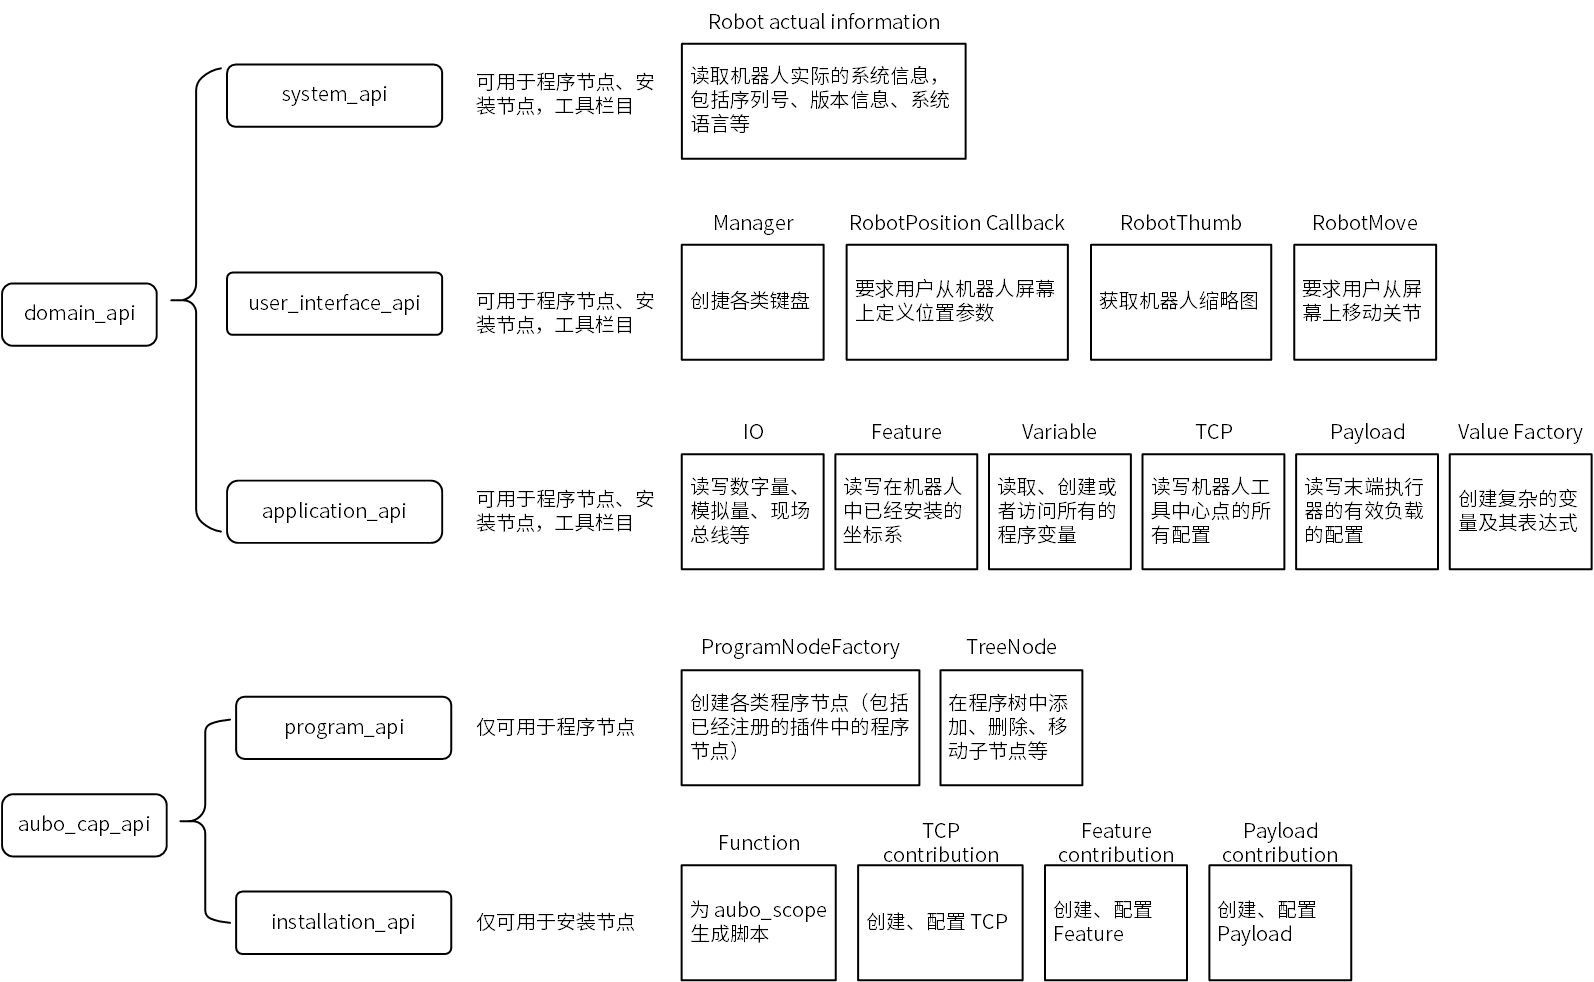
Note: For detailed information on each interface, please refer to the Appendix: aubo_caps API
2.2 Overview of API usage
In the template, both installation nodes and program nodes include three classes: service, contribution, and view. The service class in installation nodes serves to create contribution and view classes. The contribution class contains data-related content, while the view class contains interface-related content. Details are as follows:
Interfaces in the service class of installation nodes:
getTitle、getIcon、createView、configureContribution、createInstallationNodeInterfaces in the service class of program nodes:
getTitle、getIcon、getId、createView、configureContribution、createNodeapi_provider_ interface in the contribution class of installation nodes:
systemApi、userInterfaceApi、installationApiapi_provider_ interface in the contribution class of program nodes:
systemApi、userInterfaceApi、programApiview_api_ interface in both installation nodes and program nodes' view classes:
systemApi、userInterfaceApiAccessing data using DataModel:
- Configuration Data is generally stored in the [/root/arcs_ws/program] folder. When aubo_scope starts, the saved configuration data is loaded into the DataModel.
- The interface DataModelPtr model_{ nullptr } provides a mechanism in both installation and program environments. This interface allows storing data items into the DataModel (currently supporting only specific data types, details in Appendix: aubo_caps API).
- Usage of the interface DataModelPtr model_{ nullptr }:
- Add the header file
#include "aubo_caps++/meta_type.h". - Add
DECLARE_ATTRin the private section of the contribution class.
- Add the header file
3 Plugin Development Process
3.1 Environment configuration
Software environment:
Category Name Recommended Version Operating System Ubuntu 16 and above Software QT Creator 5.0.0 and above Software Configuration QT 5.12.9 and above Software Configuration GCC 7.5 and above Open a terminal and perform the following steps to install aubo_caps:
git clone http://git.aubo-robotics.cn:8001/aubo_plus/template.git
cd template
chmod +x ./INSTALL.sh
./INSTALL.sh
After completing the installation, verify its success by:
Opening QT Creator, clicking on [File > New File or Project].
In the dialog box, select [Library] and check for the presence of aubo_caps.
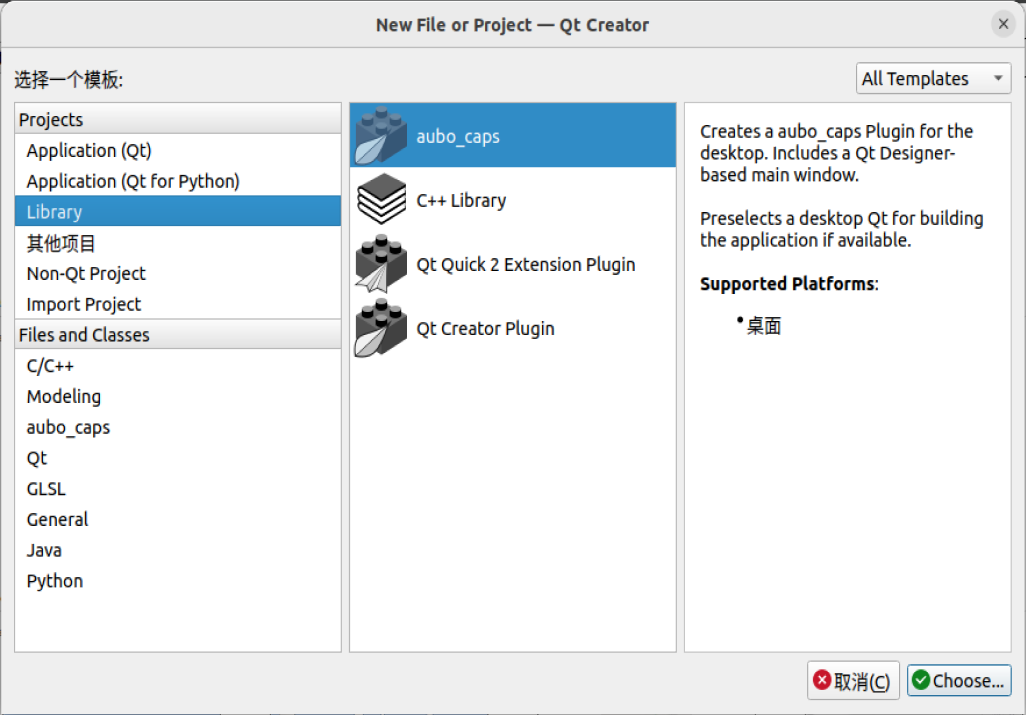
If aubo_caps is not available, retry step 2.
3.2 Creating a new plugin project
Open QT Creator and click on [File > New File or Project] in the menu bar.
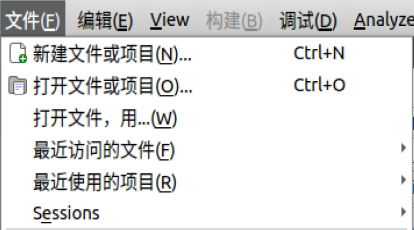
In the [New File or Project] wizard, click on [Library > aubo_caps], then click [Choose].

Set the name and save path for the new project, then click [Next].
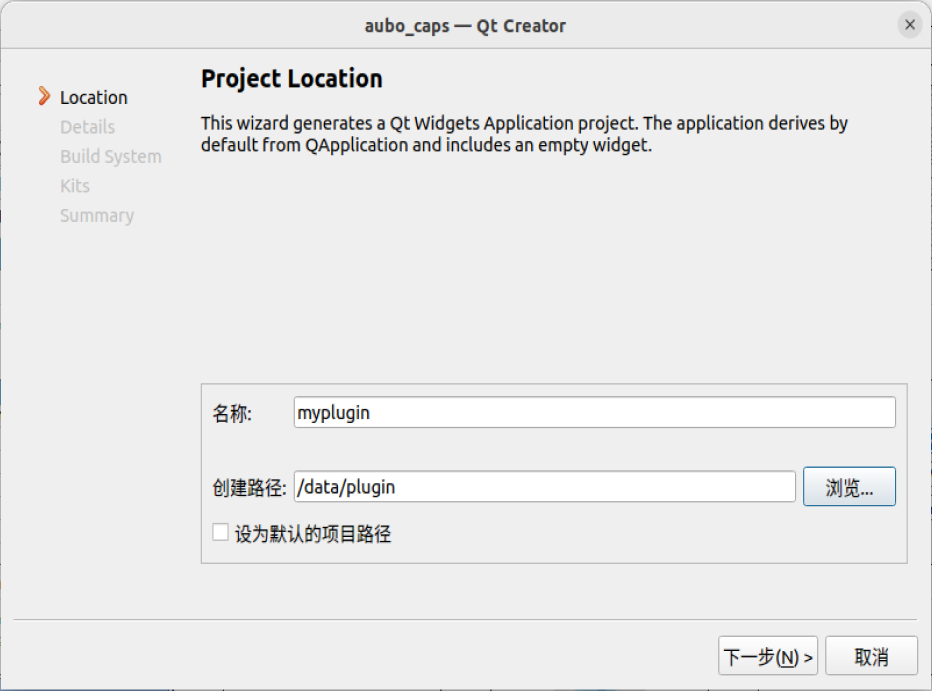
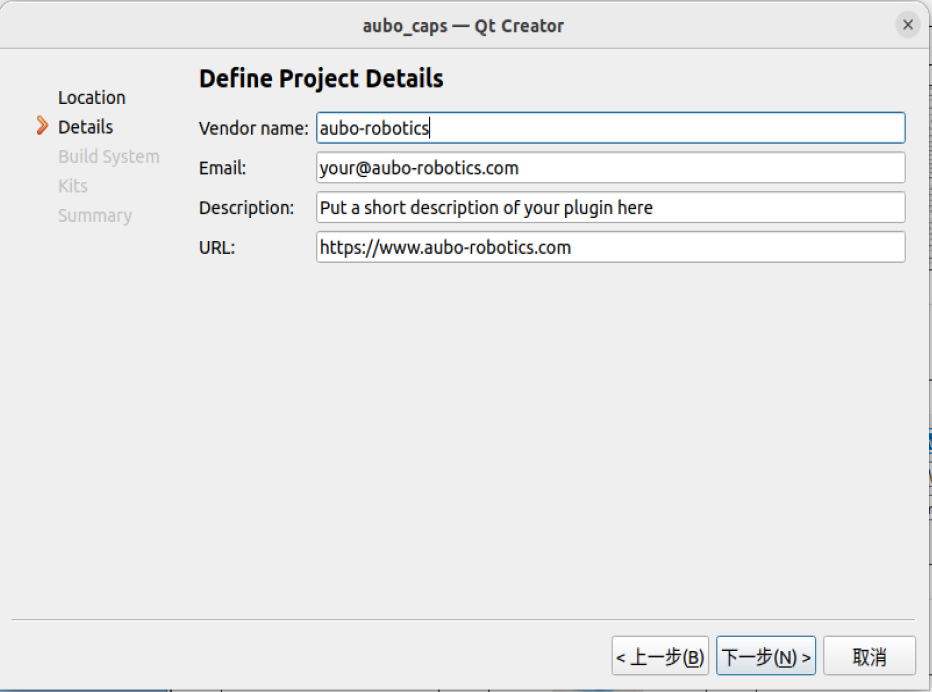
Enter project details: Vendor name, Email, Description, URL, then click [Next].
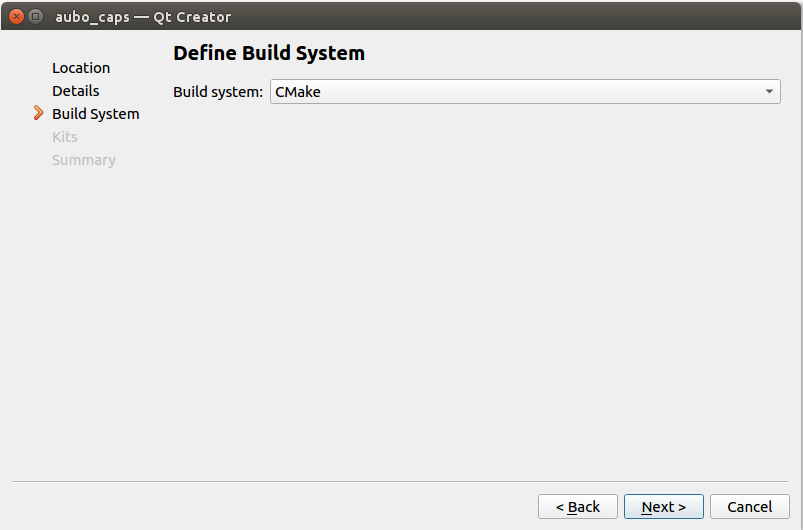
Choose the build system and click [Next]. Currently, only CMake is supported.
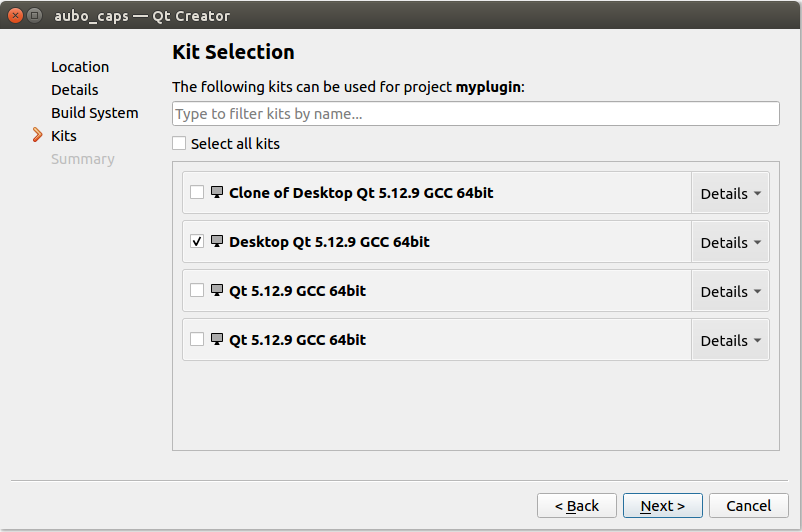
Select the compiler toolchain and click [Next]. Choose Qt 5.12.9 + gcc7.5 toolchain.
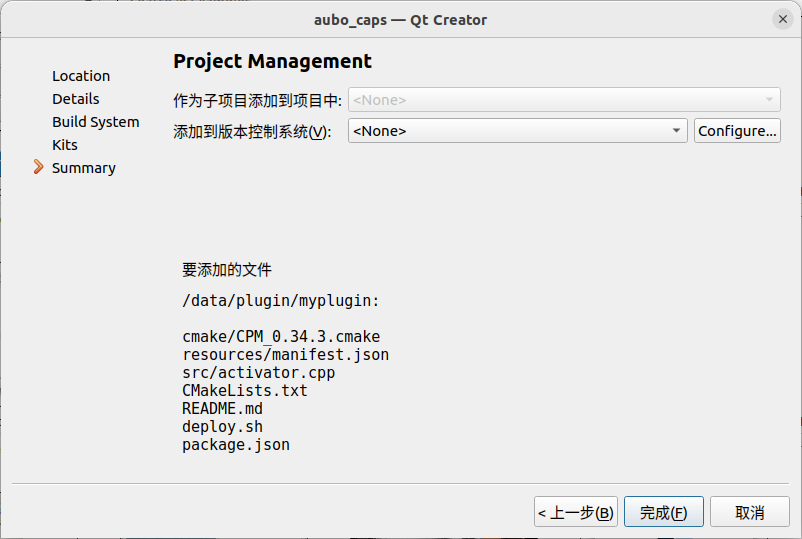
Review the files added to the project and click [Finish].
3.3 Compiling the project
Click on the project name, right-click to open the dropdown menu, then click [Run CMake].
- CMake will download dependencies online, so the development device must be connected to the internet;
- Depending on the network speed, the CMake process may take some time.
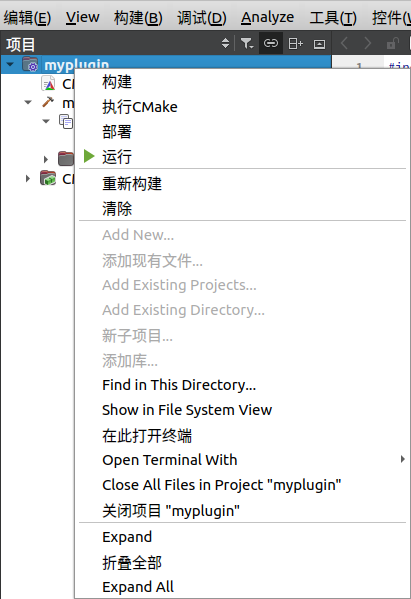
After CMake completes, compile the project by clicking on the project name, right-clicking to open the dropdown menu, then clicking [Build].

3.4 Adding a new node to the project
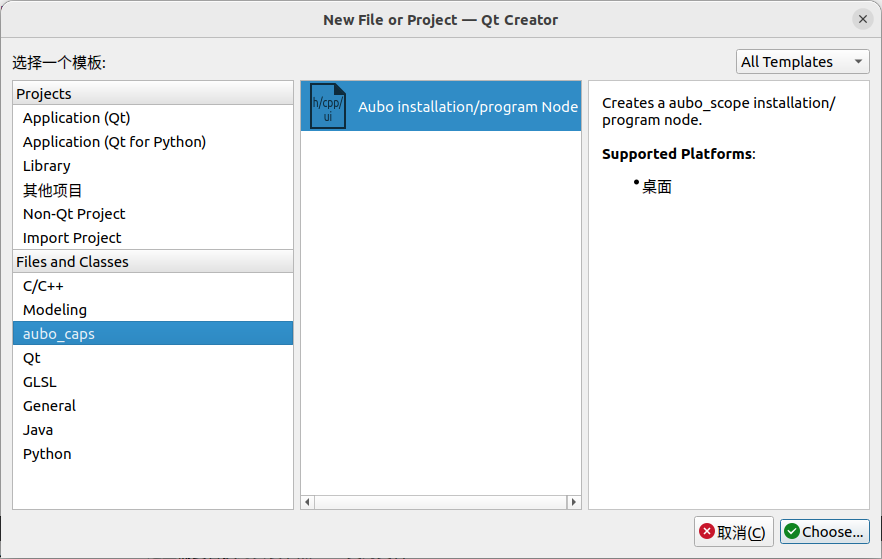
In the menu bar, click on [File > New File or Project], then in the [New File or Project] wizard, click on [aubo_caps > Aubo installation/program Node], and click [Choose].
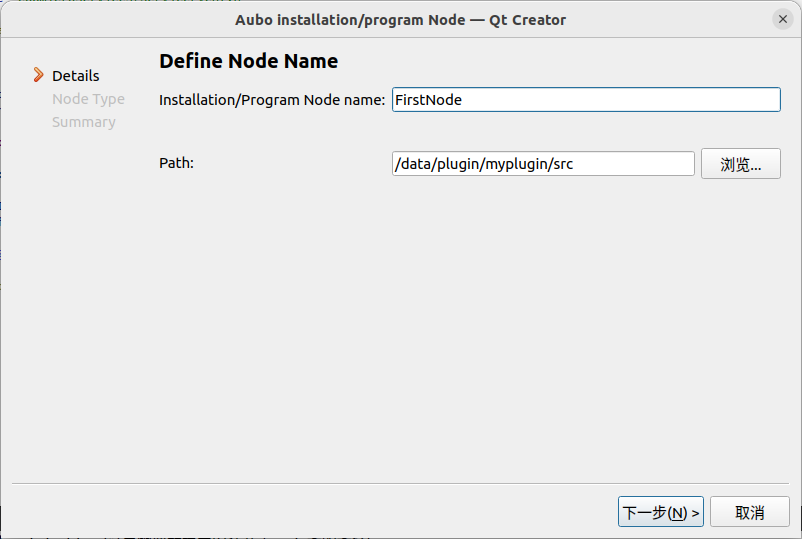
Set the [Installation/Program] node name.
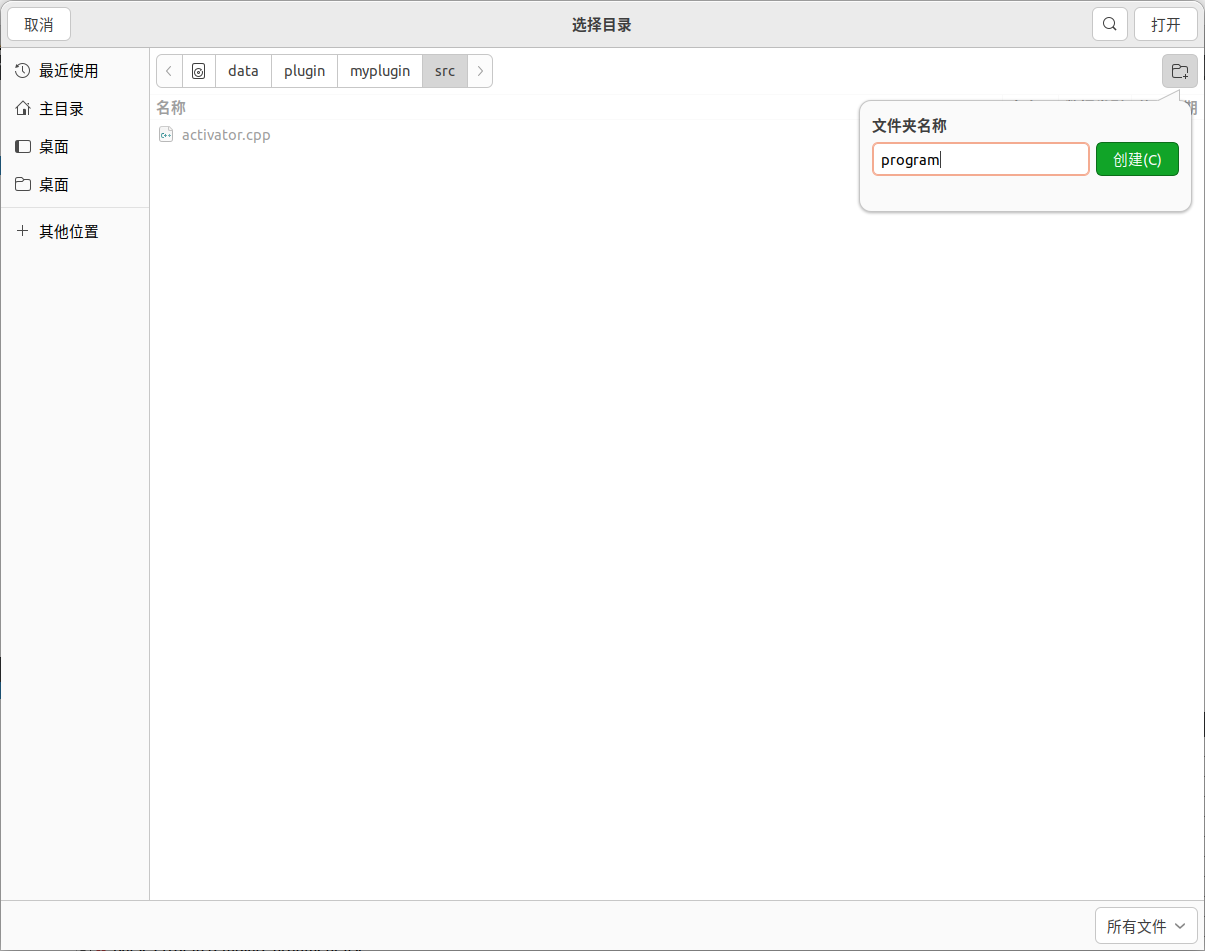
Click [Browse] to set the node path. Create a new folder named [installation] or [program] under the [src] folder,click [Open] to select the folder, and then click [Next].
- Installation nodes correspond to the [installation] folder, and program nodes correspond to the [program] folder.
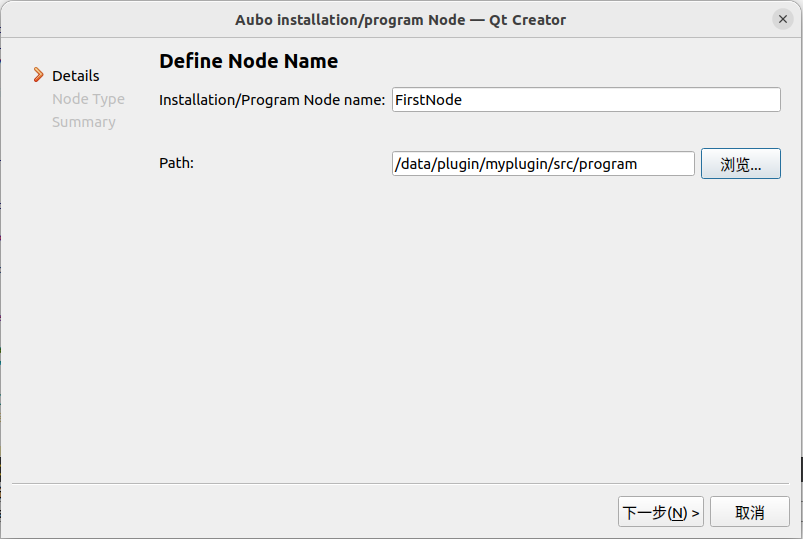
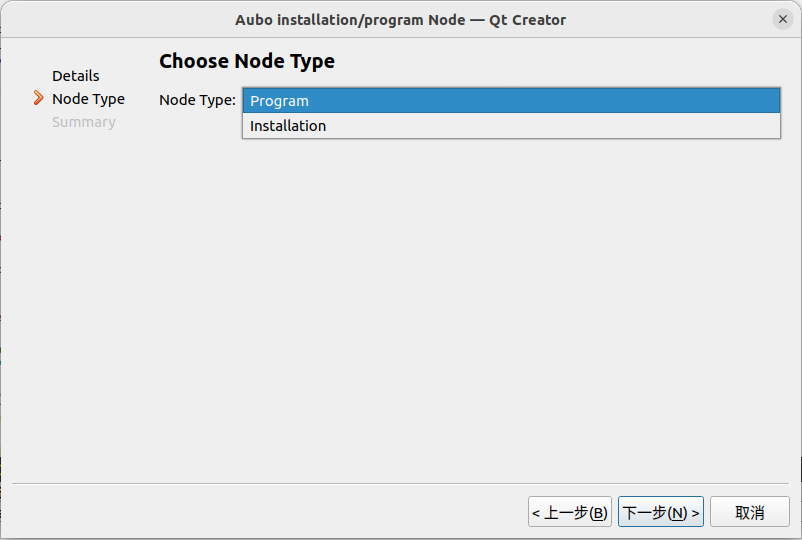
Select the node type and click [Next].
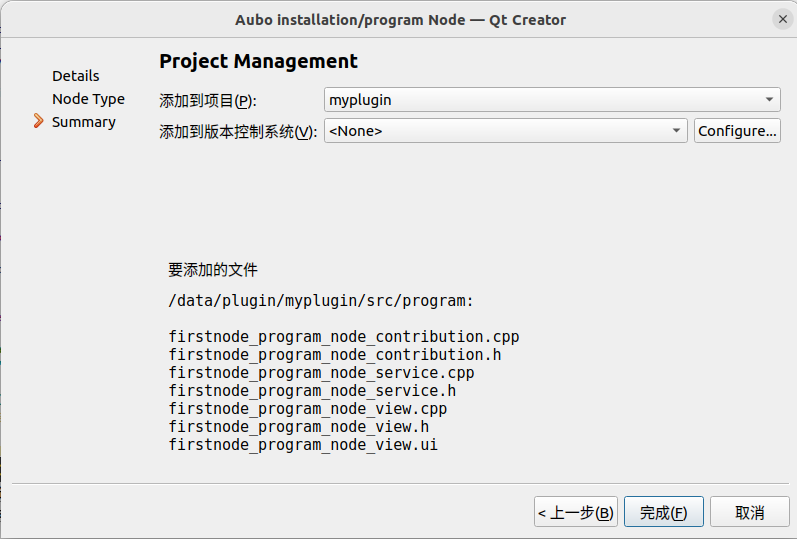
Review the list of files to be added to the project, then click [Finish].
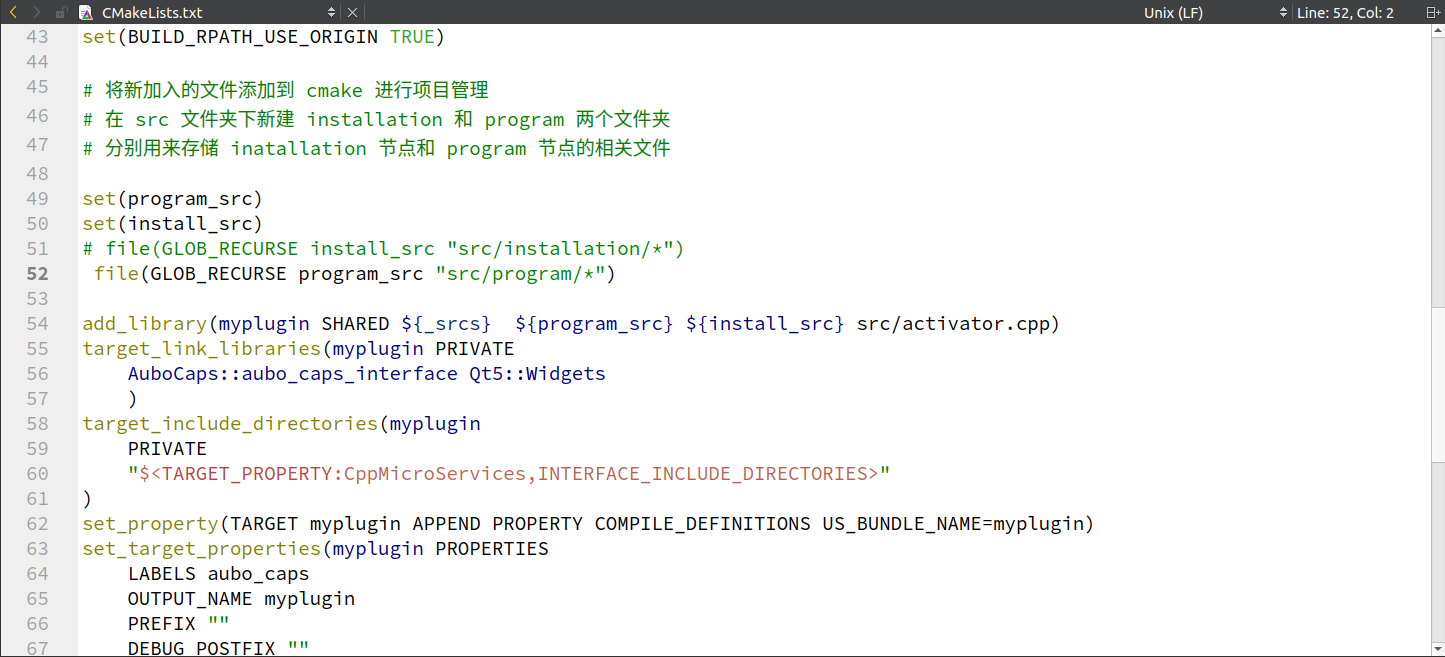
After adding the node, configure [CMakeLists.txt] and [activator.cpp] accordingly:
Add the node source code to [CMakeLists.txt]. Since the [installation] or [program] folder has been created under the [src] folder, uncomment the corresponding statement (remove the preceding "#").
...
## file(GLOB_RECURSE install_src "src/installation/*")
## file(GLOB_RECURSE program_src "src/program/*")
...
Add response statements to [activator.cpp]:
Include the corresponding service class header file.
#include "program/firstnode_program_node_service.h"<img class="img-center" src="./pics/qtcreator-cpp-add-include.png"style="width:40em;">
Uncomment the node type that needs to be registered and modify the class name.
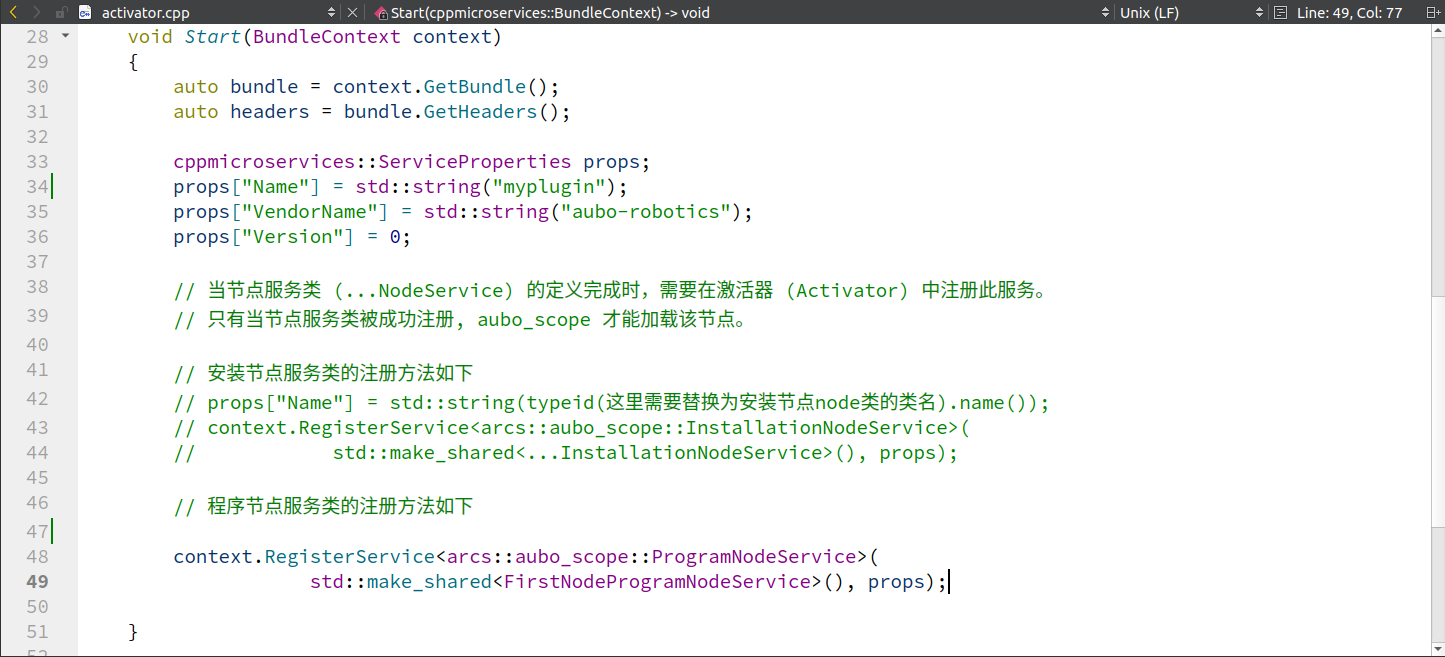
Right-click on the project name, open the dropdown menu, and click [Build].
4 Plugin Packaging and Loading
When loading a plugin into the teach pendant software for the first time, package the plugin as a zip file in the development environment. Copy the packaged file to the specified path in the teach pendant software, open the teach pendant software, and load the plugin to use it.
After the plugin is loaded into the teach pendant software, if updates are needed, simply update the content of the corresponding plugin in the [.../arcs_ws/extensions] folder. For specific details, refer to "5. Plugin Debug".
4.1 Plugin packaging
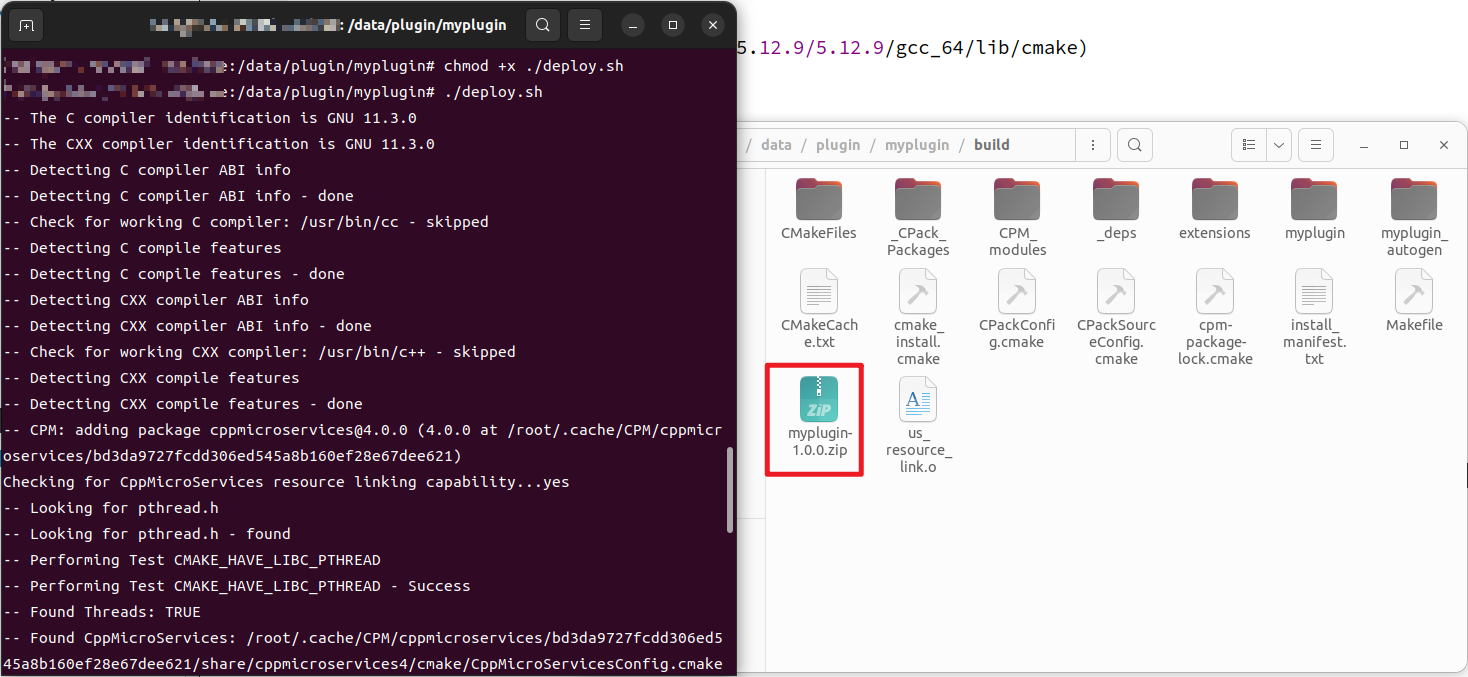
In the plugin development environment, open a terminal and run the following command to package using the [deploy,sh] script.
cd <project_root_directory>
chmod +x ./deploy.sh
./deploy.sh

## The plugin will be generated in the build directory.
Upon successful execution of the script, a zip file will be created in the [build] folder, indicating successful packaging.
4.2 Plugin load and unload
Refer to Loading and Unloading Teach Pendant Plugins .
5 Plugin Debug
Refer to Teach Pendant Plugin Debugging Solutions .
6 Plugins and Resource Files
Refer to Explanation of Plugin Resource Loading Methods .
7 Plugins and ARCS plugin Keyboard
Refer to Instructions for Using Teach Pendant Built-in Keyboard.
8 Plugin Translation
Refer to Usage Instructions for Plugin Localization Files .
9 RPC Interfaces
Refer to Usage Instructions for RPC Interfaces .
Appendix: AuboCaps API Overview
This document provides a detailed introduction to various APIs. Readers can gain an overall understanding of the aubo_scope API system by reviewing this document, enabling better utilization of these APIs during aubo_caps development.
1 Domain API
1.1 System API
getmajorVersion(): Retrieve the main software version.getMinVersion(): Retrieve the minimum software version.getBugfixVersion(): Retrieve the software bug fix version.getBuildNumber(): Retrieve the internal software version number.getLocale(): Retrieve the local language.getlocale for Programming Language(): Retrieve the system's configured language.getUnitType():Retrieve the current system unit type.getSerialNumber(): Retrieve the robot's serial number.isRealRobot(): Return true if controlling a physical robot; false if simulated.
Retrieve the maximum joint radians position.
getJointMaxPositions():Retrieve the maximum joint position.getJointMinPositions(): Retrieve the minimum joint position.getJointDefaultVelocity(): Retrieve the default joint speed.getJointDefaultAcceleration(): Retrieve the default joint acceleration.getJointMaxVelocity(): Retrieve the maximum joint speed.getJointMaxAcceleration(): Retrieve the maximum joint acceleration.getTcpDefaultVelocity(): Retrieve the default TCP speed.getTcpDefaultAcceleration(): Retrieve the default TCP acceleration.getTcpMaxVelocity(): Retrieve the maximum TCP speed.getTcpMaxAcceleration(): Retrieve the maximum TCP acceleration.getTcpMaxDistance(): Retrieve the farthest distance of TCP.getMaxPayloadMass(): Retrieve the maximum payload mass.getMaxPayloadDistance(): Retrieve the maximum payload distance.getHomeDefaultPosition(): Retrieve the default home position.getHomePackagePosition(): Retrieve the home paceage position.getRobotDhParams():Retrieve the robot's Dh parameters (linkage parameters).getMaxPower(): Retrieve the maximum force.getMinPower(): Retrieve the minimum force.getMaxMomentum(): Retrieve the maximum momentum.getMinMomentum(): Retrieve the minimum momentum.getMaxStoppingTime(): Retrieve the maximum stop time.getMinStoppingTime(): Retrieve the minimum stop time.getMaxStoppingDistance(): Retrieve the maximum stop distance.getMinStoppingDistance(): Retrieve the minimum stop distance.getMaxToolForce(): Retrieve the maximum tool force.getMinToolForce(): Retrieve the minimum tool force.getMaxElbowSpeed(): Retrieve the maximum elbow speed.getMaxElbowForce(): Retrieve the maximum elbow force.getMinElbowForce(): Retrieve the minimum elbow force.getStandardDigitalInputConfigure(): Retrieve the standard digital input configuration.getToolDigitalInputConfigure(): Retrieve the Tool's digital input configuration.getConfigureableDigitalInputConfigure(): Retrieve the configurable digital input configuration.getStandardDigitaloutputConfigure(): Retrieve the standard digital output configuration.getToolDigitaloutputConfigure(): Retrieve the Tool's digital output configuration.getConfigureableDigitaloutputConfigure(): Retrieve the configurable digital output configuration.getStandardAnalogoutputConfigure(): Retrieve the standard analog output configuration.getToolAnalogoutputConfigure(): Retrieve the Tool's analog output configuration.getStandardAnaloginputConfigure(): Retrieve the standard analog input configuration.getToolAnaloginputConfigure(): Retrieve the Tool's analog input configuration.getStaticSafetyInputConfigure(): Retrieve the input values for the safety system configuration.getStaticSafetyoutputConfigure(): Retrieve the output values for the safety system configuration.getStaticLinkInputConfigure(): Retrieve the Link input configuration.getStaticLinkOutputConfigure(): Retrieve the Link output configuration.
1.2 Application API
getIoModel(): Retrieve robot IO data.getFeatureModel(): Retrieve robot environment coordinate system configuration information.getTcpModel(): Retrieve all configurations for the robot tool center point.getPayloadModel(): Retrieve configuration information for the robot end effector's valid payload.getVariableModel(): Retrieve all program variables and expression information.getValueFactory(): Create complex variables and expressions.getDeviceManager(): Provide a device manager interface to access all registered devices.
1.3 User interface API
getUserInteraction(): Provide interfaces for requesting input functions, including:
getUserDefinedRobotPosition():  Requesting user-defined robot poses and returning them

getRobotThumb(): Retrieving a thumbnail of the robot:

getKeyboardInputFactory():Creating various types of keyboards

requestUserToMoveJoint(): Moving joints according to user-requested poses
2 Installation API
The Installation API extends the Application API functionality. It includes all functionalities of the Application API and extends with the following:
getFunctionModel(): Providing script functions foraubo_scopet.getTcpContributionModel(): Creating, configuring, retrieving, and updating TCP.getFeatureContributionModel(): Creating, configuring, retrieving, and updating Feature.getPayloadContributionModel(): Creating, configuring, retrieving, and updating Payload.
3 Program API
Program API serves the program nodes within the program domain. Program nodes may need to access system information about the robot (such as serial number, software versions), which involves accessing the System API .Therefore, the Program API provides an interface System API for accessing thegetSystemApi() . Program nodes may also require interactive functionalities with users, which involves accessing the UserInterface API . Thus, the Program API provides an interface UserInterface API or accessing the getUserInterfaceApi()Additionally, the Program API offers functionalities that are meaningful only within the program domain:
getProgramModel():In this interface, the following functionalities are available.
getProgramNodeFactory();   //Create various types of program nodes (including those provided by registered plugins).
getTreeNode(ProgramNodeContribution *root); //Add, delete, and move child nodes in the program tree.getWaypointModel():Create and configure waypoint information.
getUndoRedoManager(): Record program node changes that can be undone.
4 Node Data
4.1 Program node
getId(): Retrieve the unique identifier of the program node.getTitle(): Retrieve the text to display for the program node in the program tree.getIcon(): Retrieve the resource path for the icon to display for the program node in the program tree.configureContribution(): Set configuration items for Contribution.createView(): Create corresponding interfaces for the program node.createNode(): Create Contribution for the program node.
4.2 Installation node
getTitle(): Retrieve the name to display for the installation node on the interface.getIcon(): Retrieve the resource path for the icon to display for the installation node on the interface.configureContribution(): Set configuration items for Contribution.createView(): Create corresponding interfaces for the installation node.createInstallationNode(): Create Contribution for the installation node.
4.3 DataModel
get(): Retrieve the value corresponding to a specified key.set(): Set the value corresponding to a specified key.getKeys(): Retrieve all keys.remove(): Remove a specified key-value pair.
