
G-STICK Handle Instruction Manual
Introduction
The control handle allows quick operation of the robot system. The control handle function can be enabled or disabled in the AuboStudio teaching software, and is enabled by default at the factory. Magnets are provided on the back of the control handle for easy attachment; its structure is shown in Figure 1.
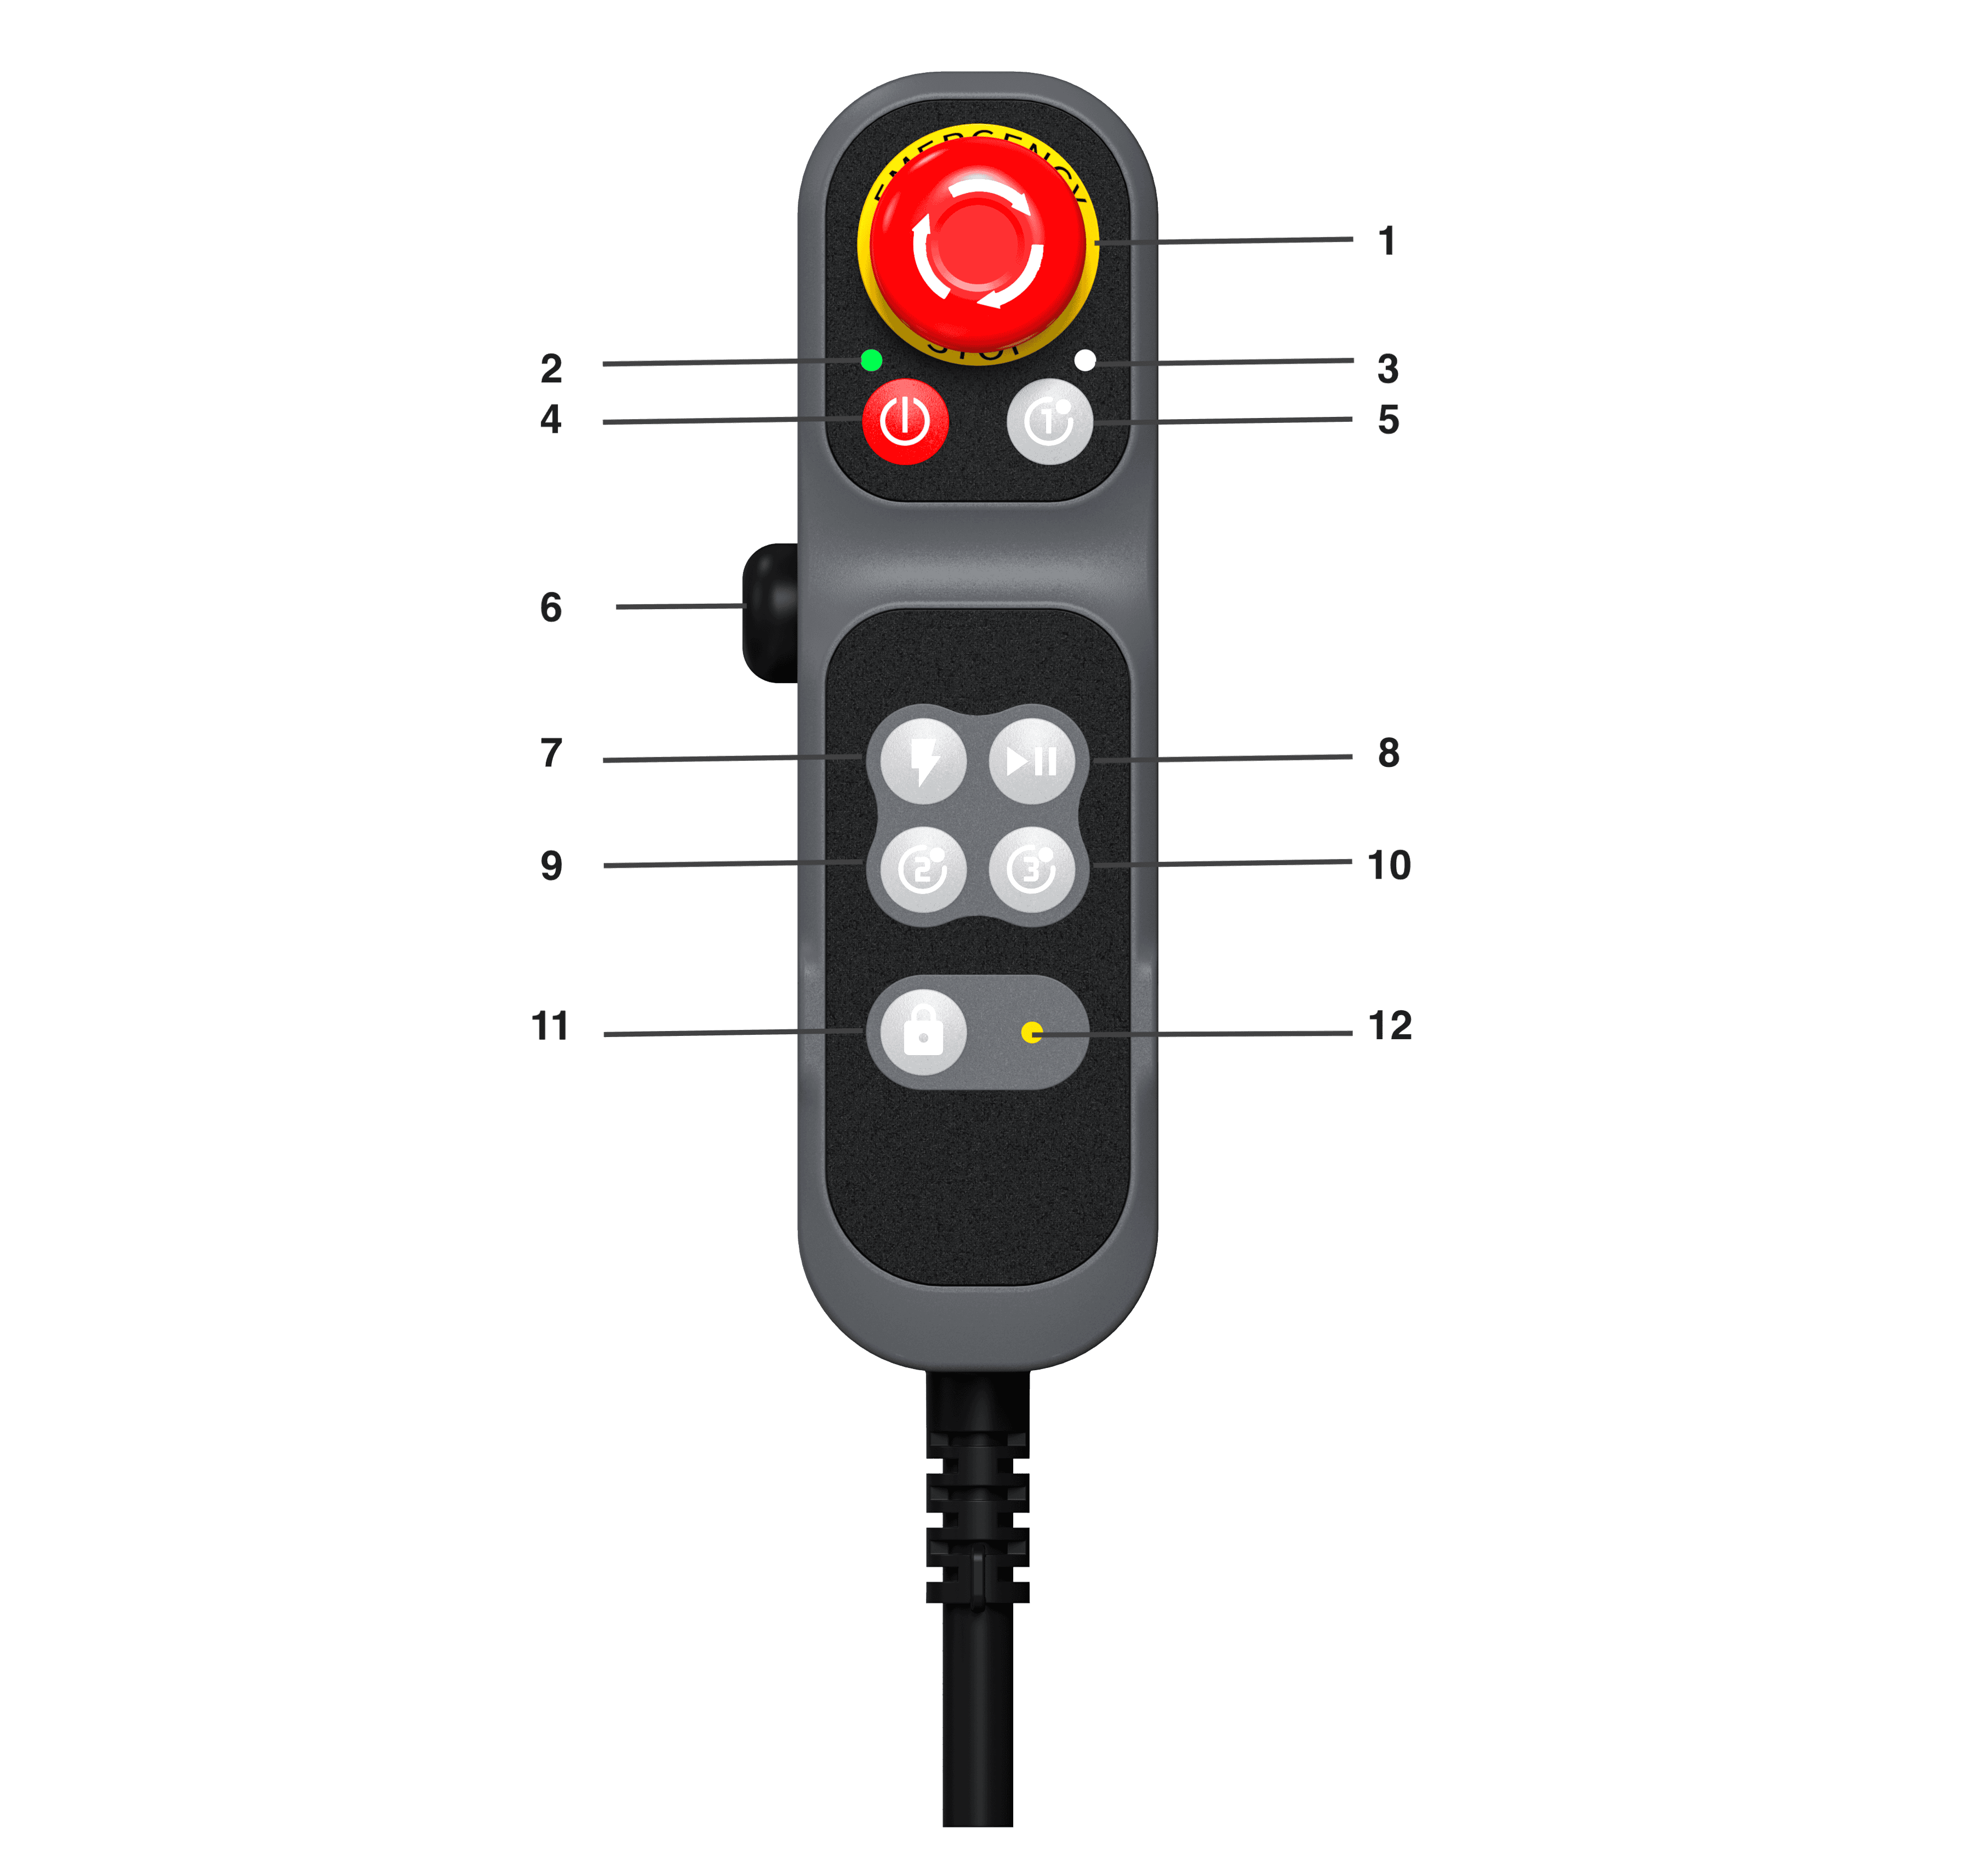
Figure 1 Control Handle Diagram
Table 1 Control Handle Button Functions
| No. | Name | Function |
|---|---|---|
| 1 | Emergency stop button | Pressing it immediately stops the robot. Rotate the button in the direction indicated on it to restore the normal state. |
| 2 | Power indicator | Indicates the controller power state: Off: the controller is not powered on Slow flash 1 Hz: the controller is powering on Fast flash 4 Hz: waiting for the teach pendant to start Steady on: the teach pendant has started and the APP can scan and connect; the robot arm is in standby and not powered Breathing: the robot arm is powered and in standby Fast flash 4 Hz (3 s): searching for the robot (teach pendant control) Slow flash 1 Hz: powering off |
| 3 | Button indicator | Button not pressed: off Any button pressed: steady on |
| 4 | Power on/off button | 1. Power on: press and hold for 2 seconds, then release. The buzzer beeps once and the controller starts up; after about 20 s another beep is heard, the handle power indicator starts flashing, and the controller has finished starting. 2. Power off: press and hold for 2 seconds, then release. The power indicator goes off and the buzzer beeps twice, indicating shutdown is complete. 3. Forced shutdown: press and hold for 10 seconds in any state. The power indicator goes off and the buzzer beeps twice, indicating shutdown is complete. |
| 5, 9, 10 | Custom buttons | Users can configure the function of these buttons in the AuboStudio teaching software. |
| 6 | 3-position enabling switch | The 3-position enabling switch has three positions: 1. Released OFF (initial) 2. Half-pressed ON 3. Fully pressed OFF Default mode: in the default mode it acts as the hand-guiding button; when ON, drag teaching is available. When OFF, the robot performs a safe stop (power is not cut off). Manual mode: the software can switch to manual mode; when ON, the robot arm can be jogged normally, and when OFF the robot performs a safe stop. |
| 7 | Robot power on/off button | Controls robot arm power and enabling: 1. Power on the robot arm: when the robot arm is powered off, short-press the button. The buzzer beeps once and the robot arm starts powering up; after about 20 s another beep is heard, the power indicator changes from flashing to steady on, and power-on is complete. 2. Enable the robot arm (release brakes): when the robot arm is powered but not enabled, short-press the button. The robot arm vibrates and the six joints click in sequence as the brake system is released; the robot arm can then be operated normally. 3. Power off the robot arm: when the robot arm is powered on, press and hold the button for 2 seconds, then release. The robot arm is disabled and powered off; the power indicator changes from steady on to flashing and the buzzer beeps twice, indicating power-off is complete. |
| 8 | Program start/stop button | This button starts, stops, pauses, and resumes robot programs, enabling quick operation without the teach pendant for on-site work, machine deployment, and maintenance. 1. Start program: press and hold the button for 2 seconds, then release to start the default program. The buzzer beeps once, indicating the program is running; if no default program is set, the robot arm does not move and the buzzer does not beep. 2. Pause/resume program: while a program is running, short-press the button to pause or resume. The buzzer beeps once. 3. Stop program: press and hold for 2 seconds, then release. The program stops (it cannot be resumed and must be restarted). The buzzer beeps twice, indicating the program has stopped. |
| 11 | Handle lock button | Controls enabling and locking of the handle to prevent accidental operation during program execution. 1. Lock: when the handle is unlocked, press and hold for 2 seconds, then release. The buzzer beeps once, the handle lock indicator turns steady on, and all buttons except the emergency stop are disabled. 2. Unlock: when the handle is locked, press and hold for 2 seconds, then release. The buzzer beeps twice, the handle lock indicator goes off, and the handle buttons work normally again. |
| 12 | Handle lock status indicator | Indicates the handle lock status: 1. Steady on: the handle is locked and other buttons are ineffective. 2. Off: the handle is unlocked and other buttons are effective. |
Custom Handle Functions
- Users can configure the functions of the custom buttons in the teaching software. The configurable functions are listed in the table below; for details, refer to the AuboStudio software manual.
Table 2 Custom Button Functions
| Button | Function |
|---|---|
| Custom button | Return to home, long press |
| Hand-guiding (drag teaching), long press | |
| Record feature point, short press | |
| Trajectory playback, short press |
G-STICK Handle Kit
The G series handle comes with a tablet back clip kit, as shown in the figure. This accessory connects and assembles the handle and the tablet for an improved operating experience.
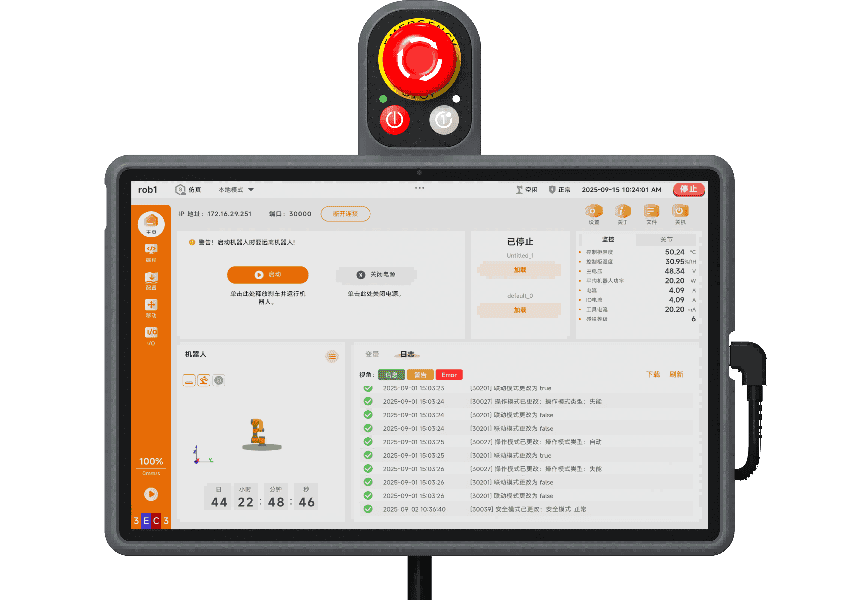
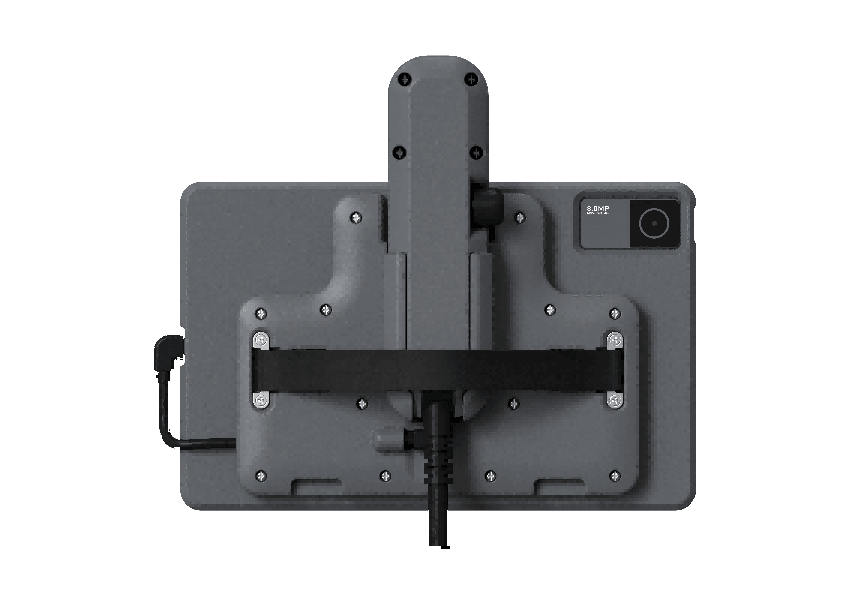
Figure 2 G-STICK Handle Kit