Jog Teaching
Basic mode
The robot is controlled in basic mode by default.
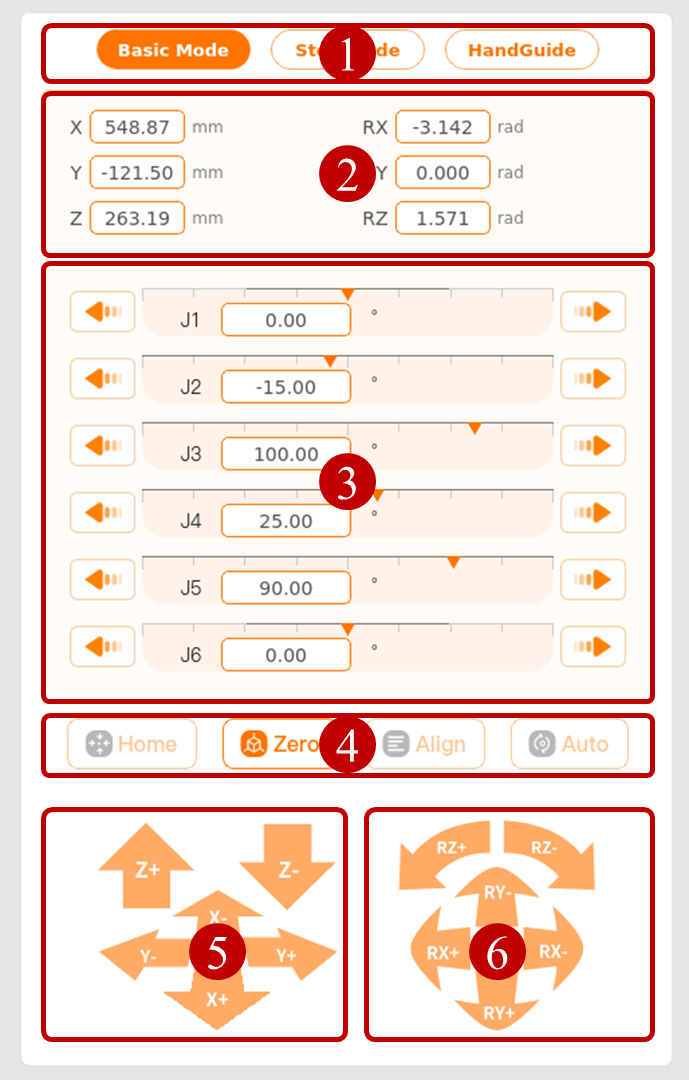
Mode tab: Select a mode to control the [Robot] or [External Axis].
Note:
Only the wireless teach pendant supports the [External Axis] function.
Position and pose display/setting: Display or set the coordinates of the current position of the simulation model in the base coordinate system. Once set by the user, the orange parameter displayed on the right side of the input box is the movement amount of the robot.
Joint control: Joint 1 (J1) ~ Joint 6 (J6) correspond to the six joints of the robot arm from bottom to top. The user controls the robot by pressing and holding

 .
.Shortcut control button: Press and hold the button to control the robot to the specified position.
Home: The default value set in the installation configuration. Press and hold the [Home] button to move the robot to the home position defined under the installation settings. Please refer to "Home" for the settings of home.
Zero: All positions where the joint is 0 degrees. Press and hold the [Zero] button to move the robot to the upright position/pose.
Alignment: Press and hold to adjust the end of the arm to the negative direction of the selected coordinate system's Z axis.
Auto: After setting in the position and pose input box, press and hold the [Auto] button to control the robot to the set position.
Position control button: Press and hold the button to control the robot. (X+, X-, Y+, Y-, Z+, Z-) indicate the translation movement of the robot.
Pose control button: Press and hold the button to control the robot. (RX+, RX-, RY+, RY-, RZ+, RZ-) change the orientation of the robot tool.
Step mode
In the step mode, you can set the step value. Default step setting: position 5 mm, pose 0.0175 rad, and joint 1 deg.
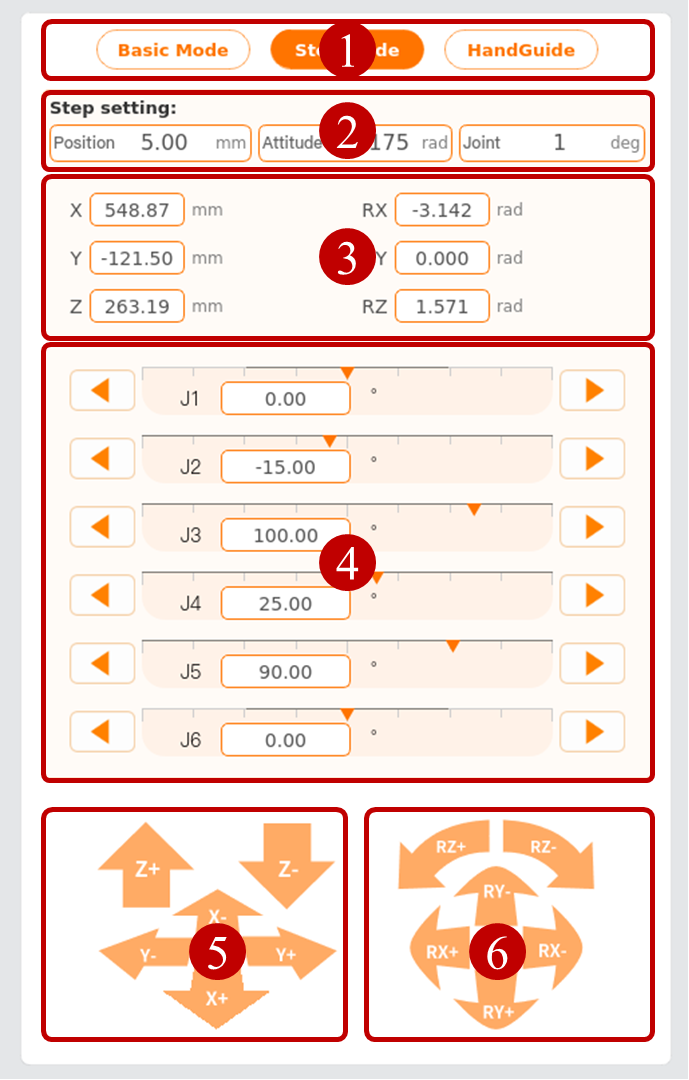
Mode tab: Select a mode to control the robot.
Step setting: Set the step. The position range is 0.01 mm ~100 mm, the pose range is 0.001 rad ~ 0.2 rad, and the joint range is 0.1 deg ~ 10 deg.
Position/pose parameter display: Display the coordinates of the current position of the robot in the base coordinate system.
Joint control: Joint 1 (J1) ~ Joint 6 (J6) correspond to the six joints of the robot arm from bottom to top. The user controls the robot by clicking < class="inline-img" src="/icon/move/left_normal_button.png" />
 buttons at both ends. Each click moves the robot once according to the step size.
Position control button: Click the button to control the robot. (X+, X-, Y+, Y-, Z+, Z-) indicate the translation movement of the robot.
Pose control button: Click the button to control the robot. (RX+, RX-, RY+, RY-, RZ+, RZ-) change the orientation of the robot tool.