
Authority - Advanced Mode
Advanced Mode Introduction
[Advanced mode] provides more detailed user management functions, allowing users with different roles to log in and operate the software within their authorities. After logging in, the administrator can create, set, or cancel accounts, and the authorities of other accounts are assigned by the administrator account.
After [Advanced mode] is turned on in the Advanced page of classic mode, AuboStudio enters the advanced mode login page, and the AuboStudio home page appears after login.
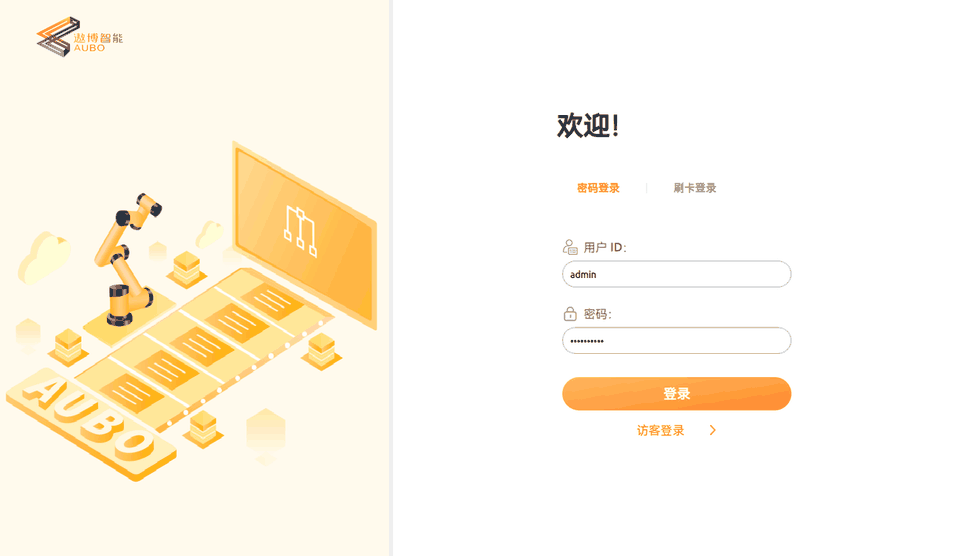
- Password login:
- First login after advanced mode is turned on: The default user ID is [admin], and the default password is the [admin password] set in classic mode. It is recommended to change the password immediately after the first login.
- Non-first login of the admin account / login of a normal user: Enter the user ID and password of the account. Normal user accounts are created in advance by the administrator.
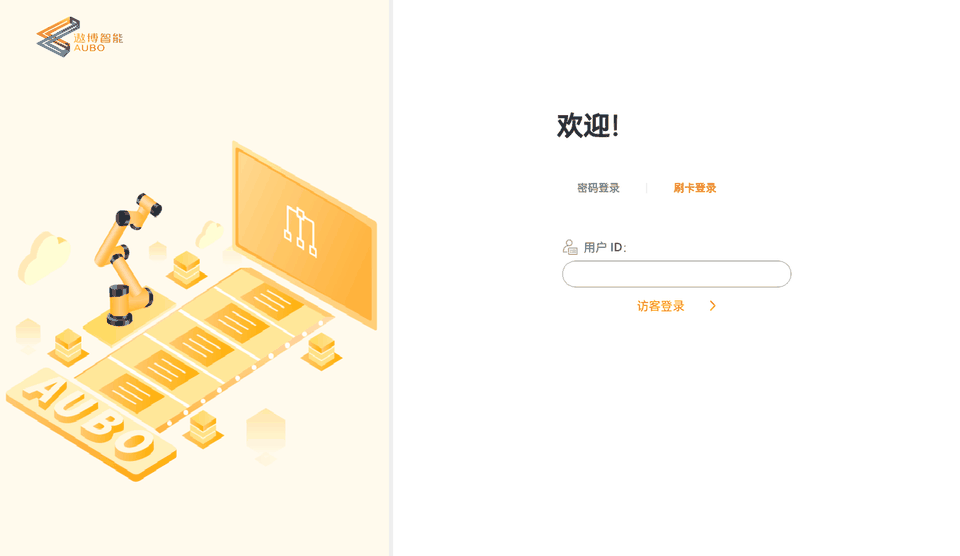
- Swipe card login: After a swipe card user is created on the user management page, only the user ID needs to be entered.
- Guest login: Enter the teach pendant interface without a password, but only the authority to enter the home page is retained.
Note:
After advanced mode is turned on, the scenarios in classic mode that originally require various passwords only require verification of the password of the logged-in user.
Personal Information
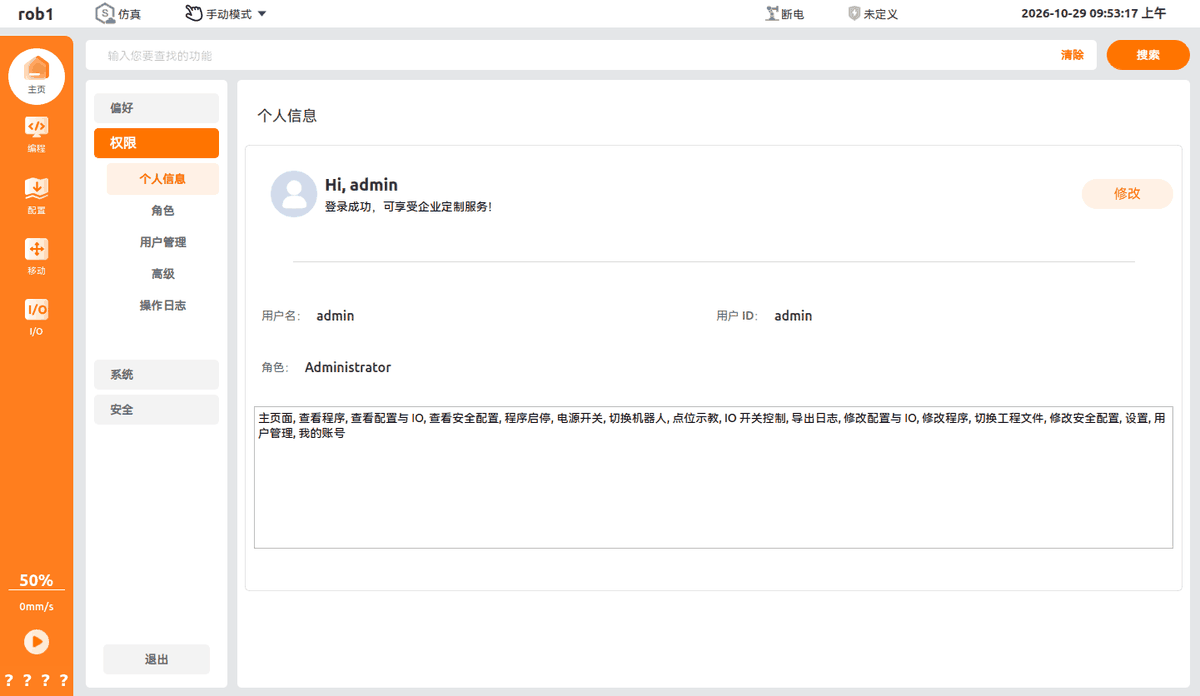
The personal information page displays the information and authorities of the currently logged-in user.
Role
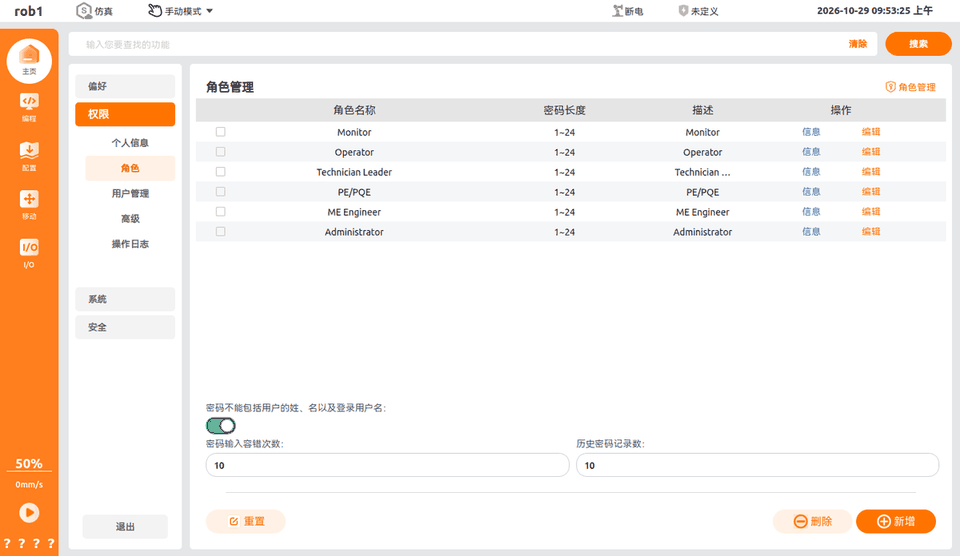
On the [Role Management] page, system authorities can be grouped and managed as templates. A role is the carrier of a permission set: a group of function permissions is packaged in advance. After a user account is created, you only need to assign the corresponding role to the account, and the account obtains all permissions in that role, so that permissions can be assigned in batches.
Role Page Description
- Default role names: AuboStudio provides 6 preset roles, which are divided into the following 6 types according to the number of authorities.
- Administrator: the admin, with the highest authority in AuboStudio.
- ME Engineer: the equipment administrator.
- PE/PQE: the quality administrator.
- Technician Leader: the technical team leader.
- Operator: the operator.
- Monitor: the inspector, with the minimum authority.
- Default password length: 8~24.
- Default description: the role name, which can be modified later.
- Operations
- Info: Click to view role information.
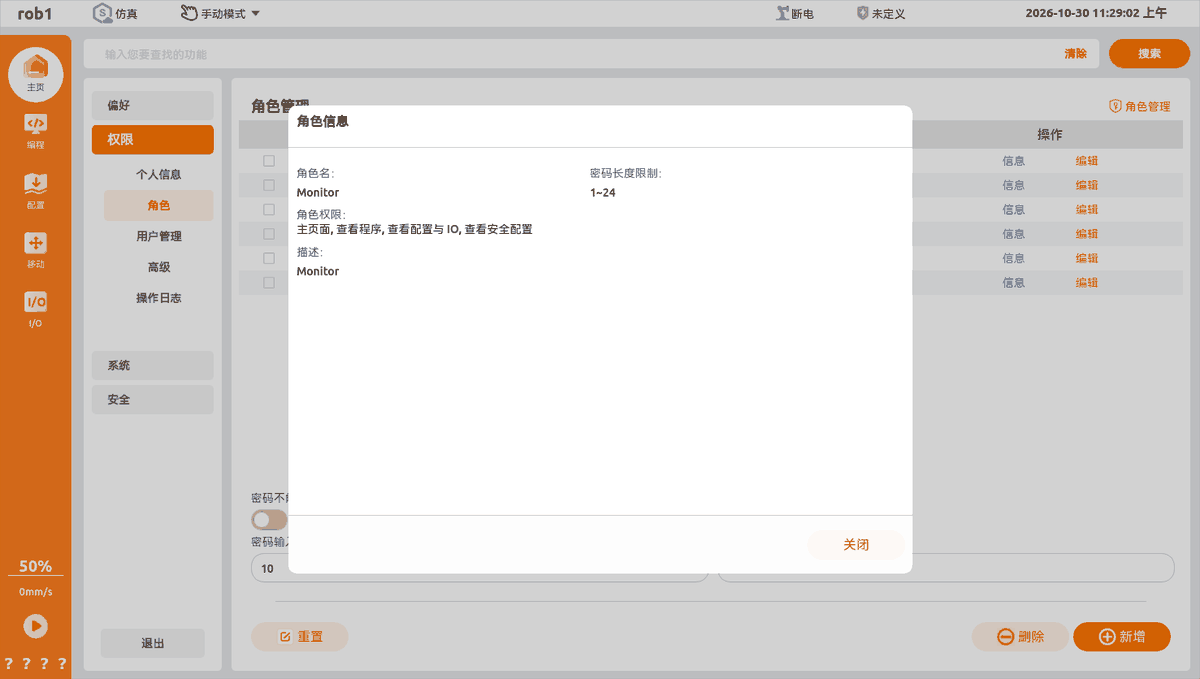
- Edit: Click to modify the role name, permission settings, password length, and description of the target role.
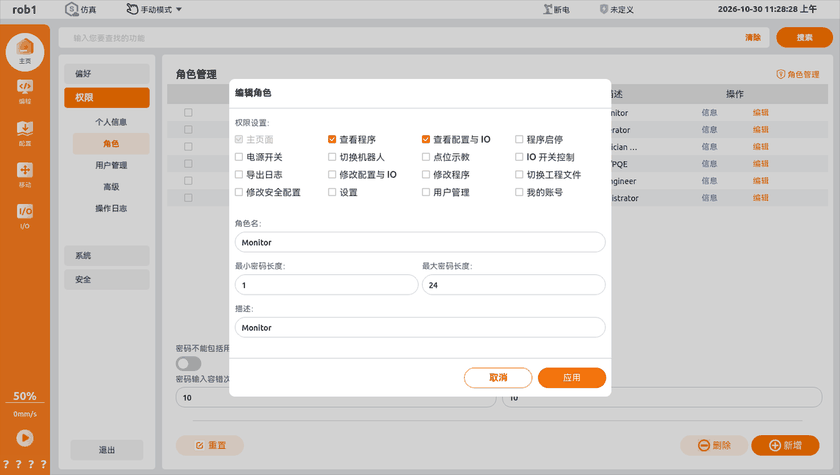
- Info: Click to view role information.
- Password restriction switch: When enabled, the password cannot contain the user's last name, first name, or login user name; when disabled, this check is not performed.
- Password error tolerance count: After the number of consecutive incorrect password entries reaches this setting, the user account is locked.
- Number of historical passwords recorded: The default value is 10, which means that a user cannot reuse any of the 10 historical passwords previously used.
Viewing Role Authorities
On the role management page, click [Role Management] in the upper right corner to view the authorities of all current roles.
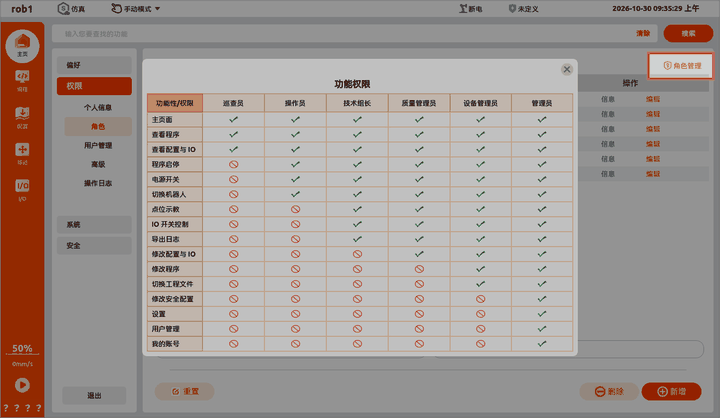
Authority Description
| Authority | Description |
|---|---|
| Home page | Allow access to the home page. All roles have this authority by default. |
| View programs | Allow viewing programs on the Programming page. |
| View configuration and IO | Allow viewing the parameter page. |
| Program start/stop | Support [Start], [Stop], [Pause], and [Resume] operations on programs. |
| Power switch | Allow [Power on], [Power off] and other operations on the device on the home page. |
| Switch robot | Allow disconnecting from and connecting to the device. |
| Point teaching | Support drag teaching on the Move page. |
| IO switch control | Allow access to the IO page and control of IO switches. |
| Export logs | Allow access to the Log Center and log download. |
| Modify configuration and IO | Allow the following operations on the configuration page: access and modify the Configuration - General page; modify IO definitions on the General page; access and modify the Configuration - Fieldbus page; access and modify the Configuration - Plugin page; open only the [General] parameters in the imported installation file. |
| Modify programs | Allow modification of programs: modify programs; run and debug programs; perform program file operations; run the emulation function in the status bar. |
| Switch project files | Allow project file migration: open and switch project files; select and import general configuration, safety configuration, and programs. |
| Modify safety configuration | Allow modification of safety parameters: access the Configuration - Safety subpage and modify its content; open only the [Safety] parameters in the imported installation file. |
| Settings | Allow all functions on the Settings page except user management: access all functions on the Home - Settings page except [User Management]; perform [Clear logs] on the Home - Log page. |
| User management | Allow switching the management mode, roles, adding, deleting, and modifying users, and importing and exporting on Home - Settings. |
| My account | Allow access to Settings - Authority - Personal Information and operations such as changing the password. |
User Management
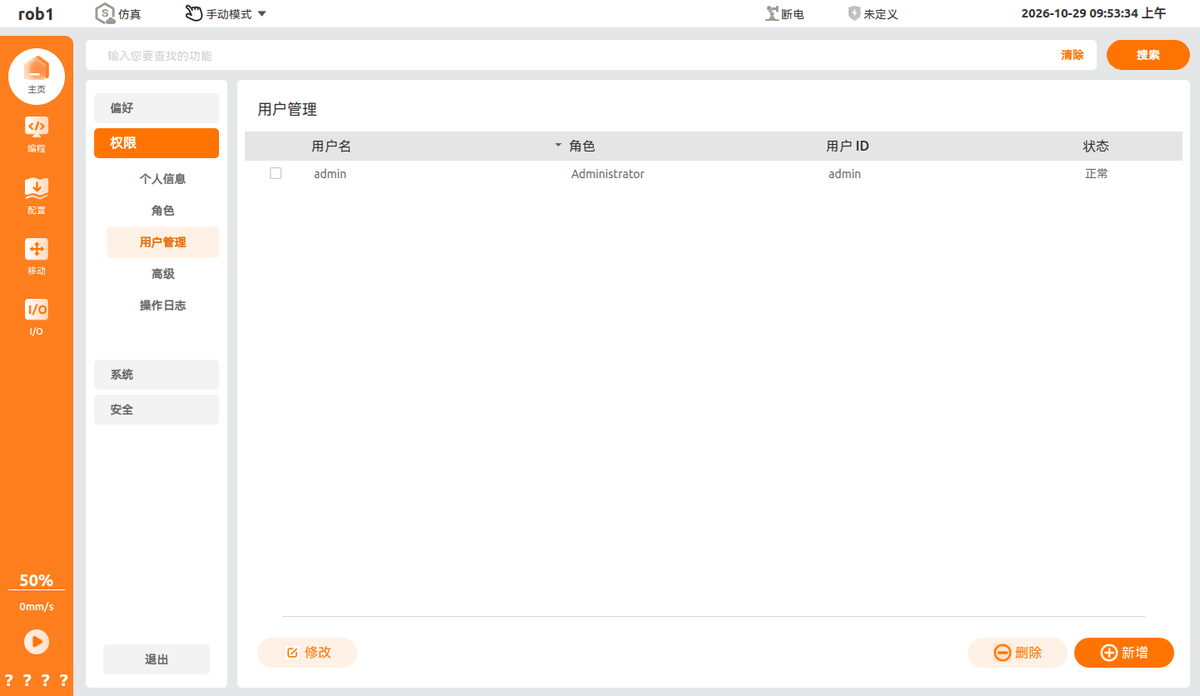
On the [User Management] page, you can [Add], [Delete], and [Modify] login users, and directly assign the corresponding roles, without configuring permissions for each user separately.
Adding a User
Click [Add] in the lower right corner of the [User Management] page.
Adding a user is divided into adding an account password user and a swipe card user:
Account password user: In the dialog box, assign a [Role] to the new user in sequence and set the [User ID], [User Name], [Initial Password], and other information.
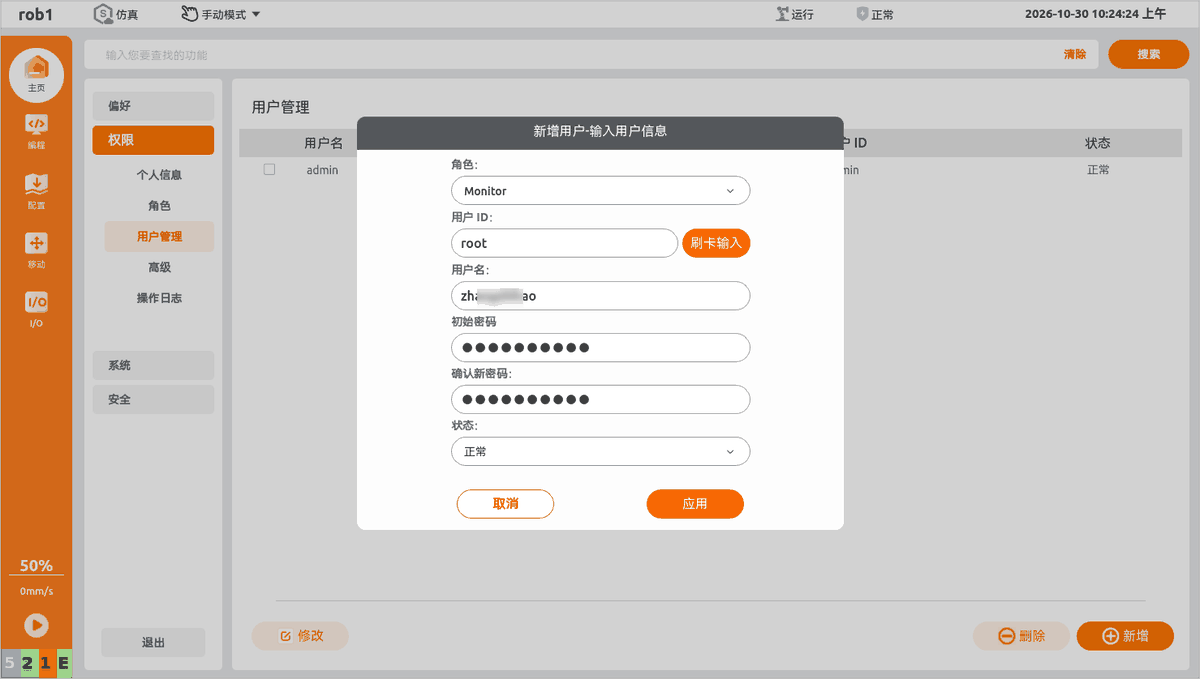
Swipe card user: In the Add User dialog box, click [Swipe Input] to enter the user ID, and then set the [Role] and other information.
After confirming that the information is correct, click [Apply] to add the user successfully.
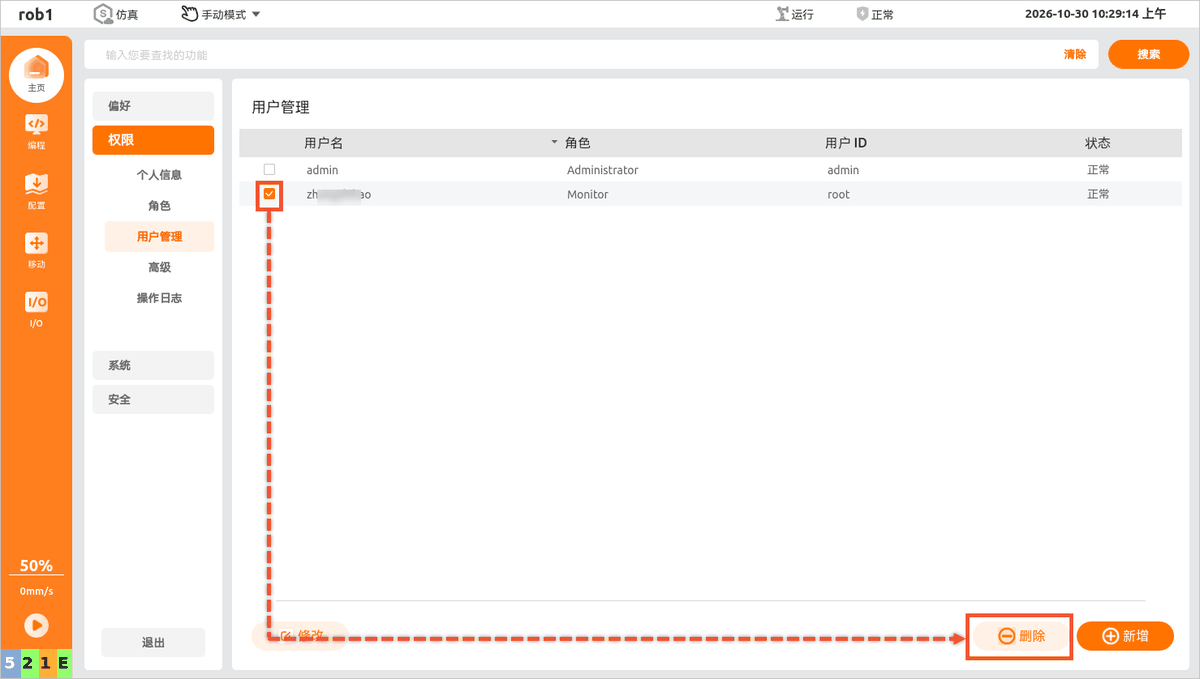
Deleting a User
On the [User Management] page, select the target user and click [Delete] in the lower right corner of the page.
Modifying a User
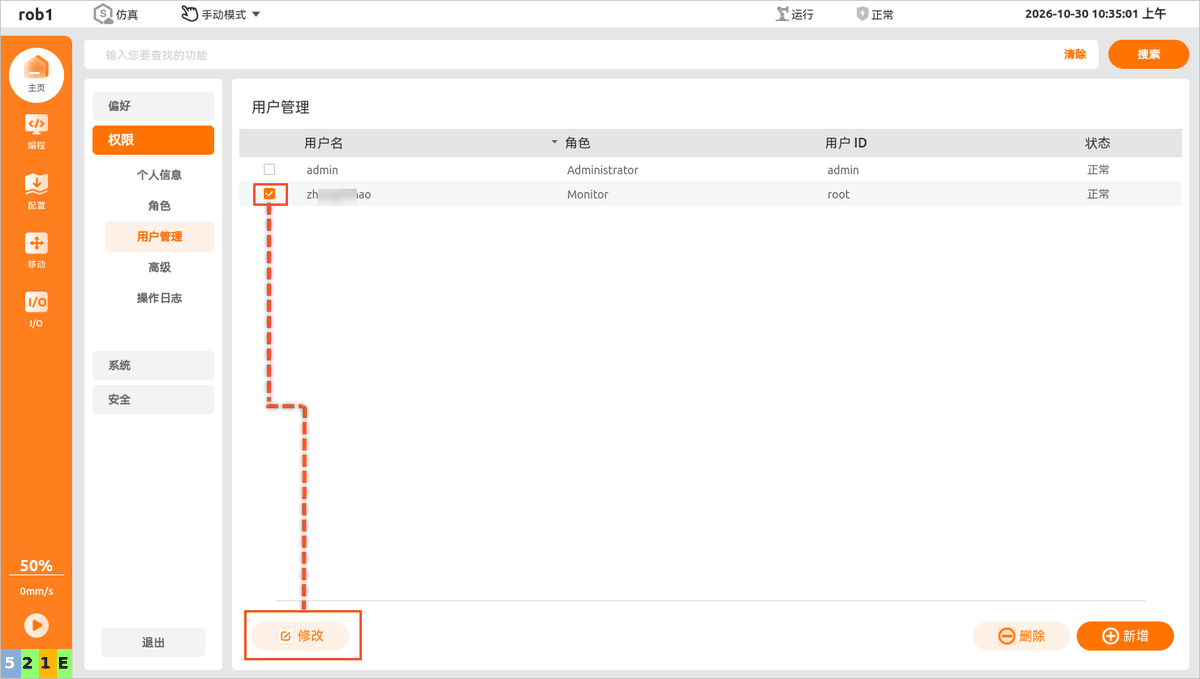
- On the [User Management] page, select the target user and click [Modify] in the lower left corner.
- In the dialog box, modify the [Role], [User ID], [User Name], and other information of the user.
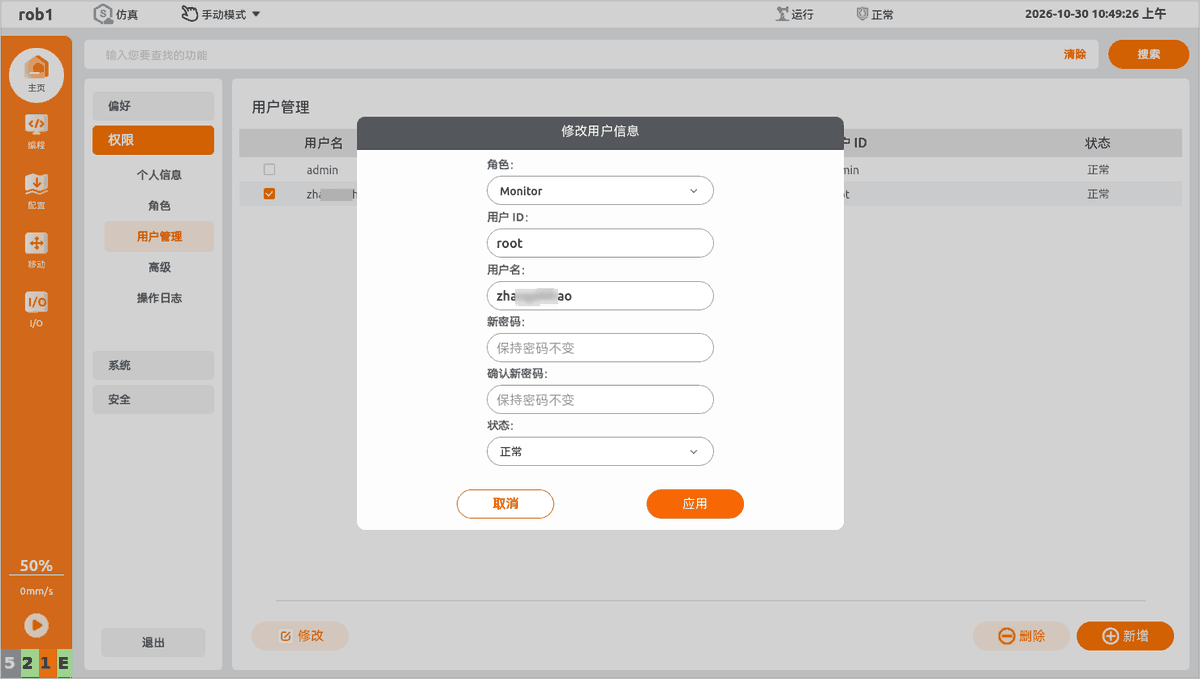
- After confirming that the information is correct, click [Apply].
Advanced
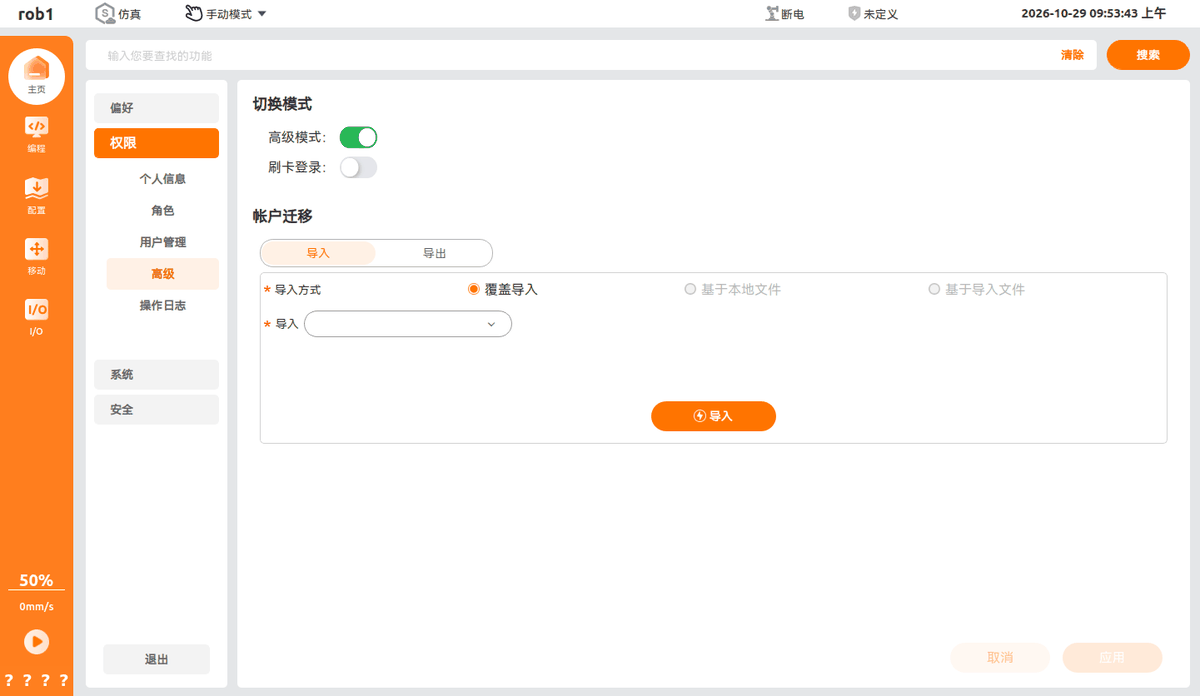
On the [Advanced] page, you can turn off [Advanced mode], turn on or off [Swipe card login], and perform [Account Migration].
Turning Off Advanced Mode
Click the Turn off advanced mode button to turn off advanced mode and enter classic mode.
Swipe Card Login
After it is enabled, the login page is affected as follows:
Note:
[Swipe card login] is supported only on wired teach pendants.
- The login page displays the swipe card login page first.
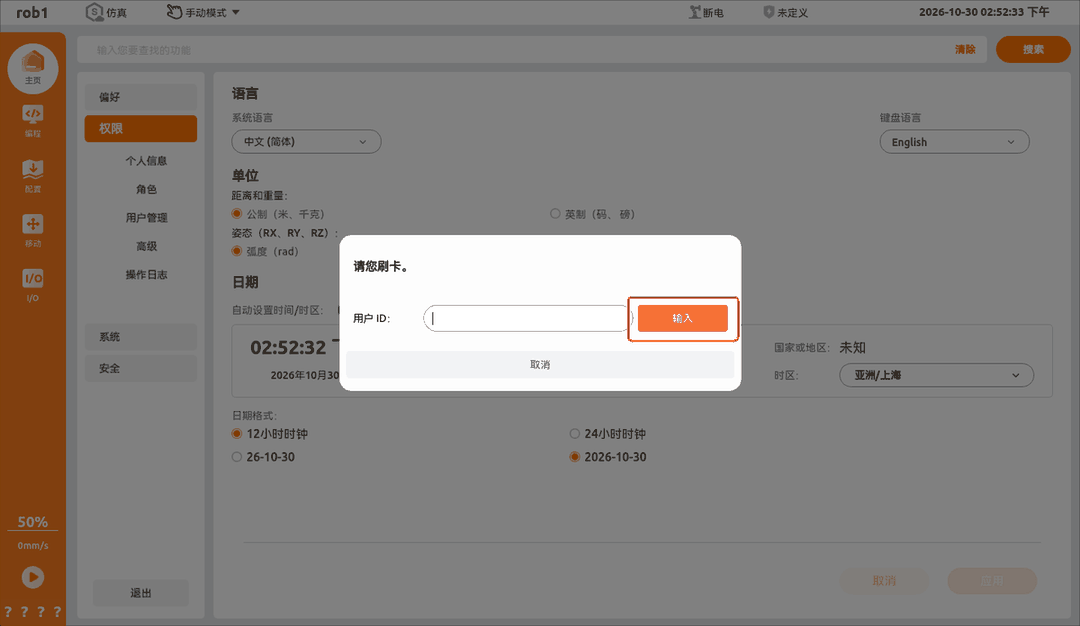
- Swipe card login takes precedence when entering an interface that requires a password. You can click [Input] in the swipe card dialog box to switch to password entry.
Account Migration
Import an existing user setting sql file into AuboStudio, or export the local user information as an sql file.
Operation Log
The [Operation Log] function in advanced mode is the same as that in classic mode.
Note:
[Operation Log] is supported only on wired teach pendants.