Remote Control Cabinet Connection Guide via MobaXterm
During robot development, logging into the control cabinet via SSH lets you more intuitively grasp the control cabinet's current status and more easily perform diagnostics, log copying, configuration changes, and other operations. MobaXterm is a mainstream remote access tool currently on the market; a free personal edition is available for trial download. The following explains in detail how to use MobaXterm to log into the control cabinet via SSH.
1 Enabling SSH Connection on the Control Cabinet
The following uses ARCS v0.29 as an example.
From the teach pendant home page, enter the
Settingsfunction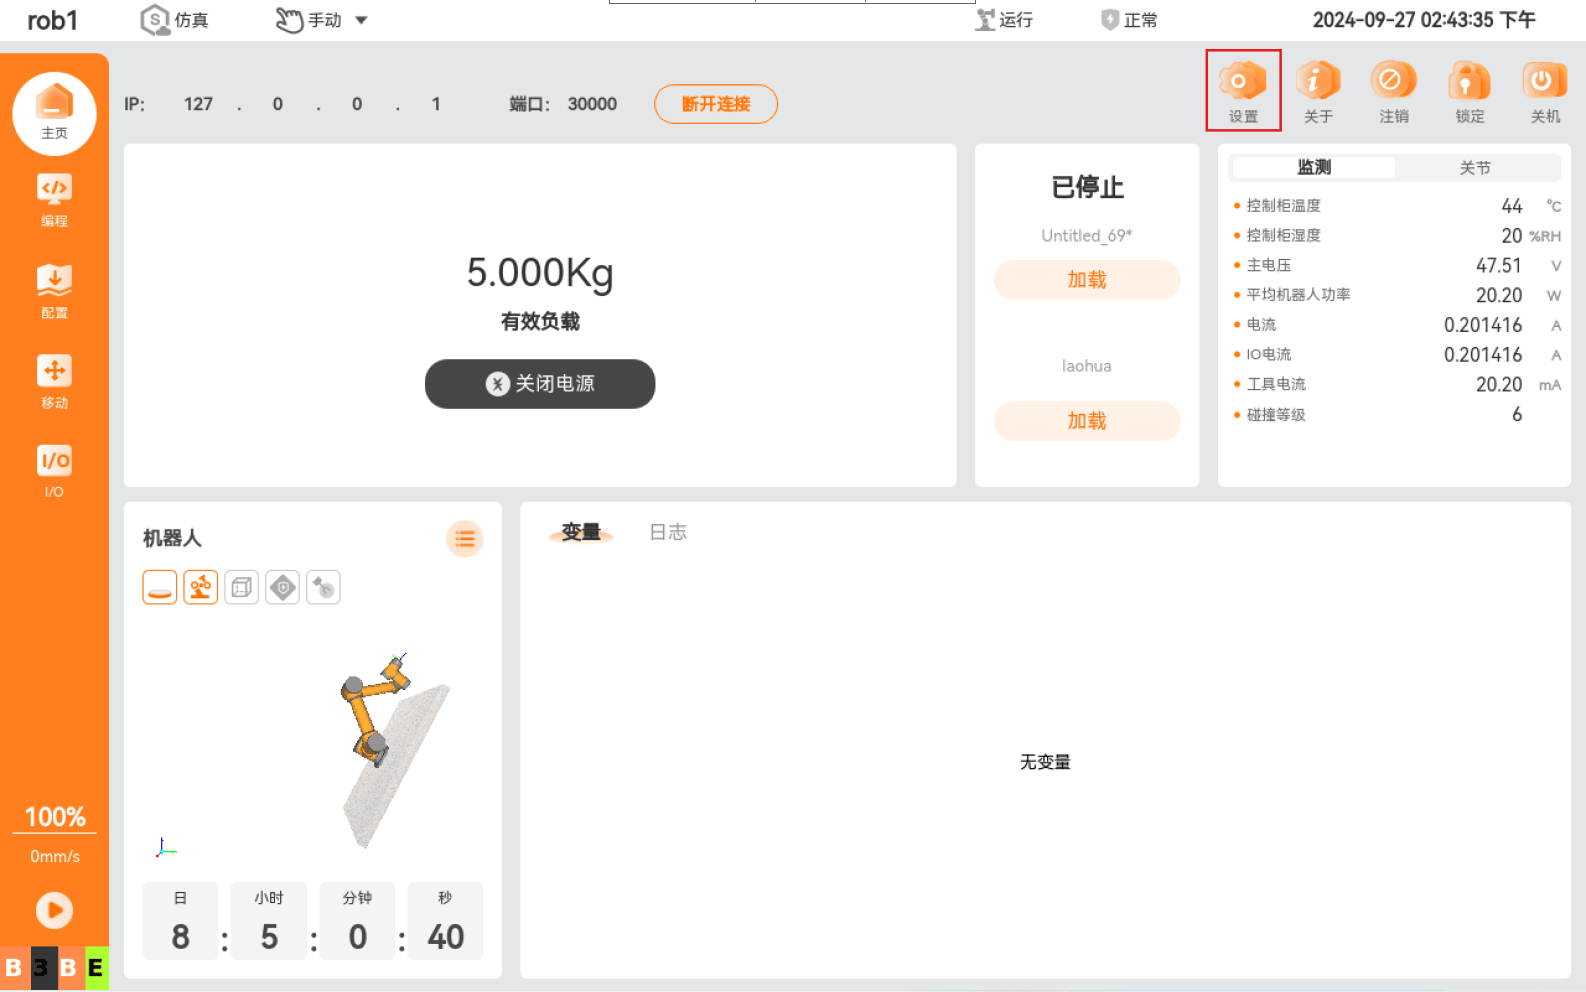
Select
Security - Secure Shell, checkEnable SSH access, and configure the port and authentication method.In the example below,
Portis configured as8822, and bothPassword-basedandKey-basedauthentication methods are checked.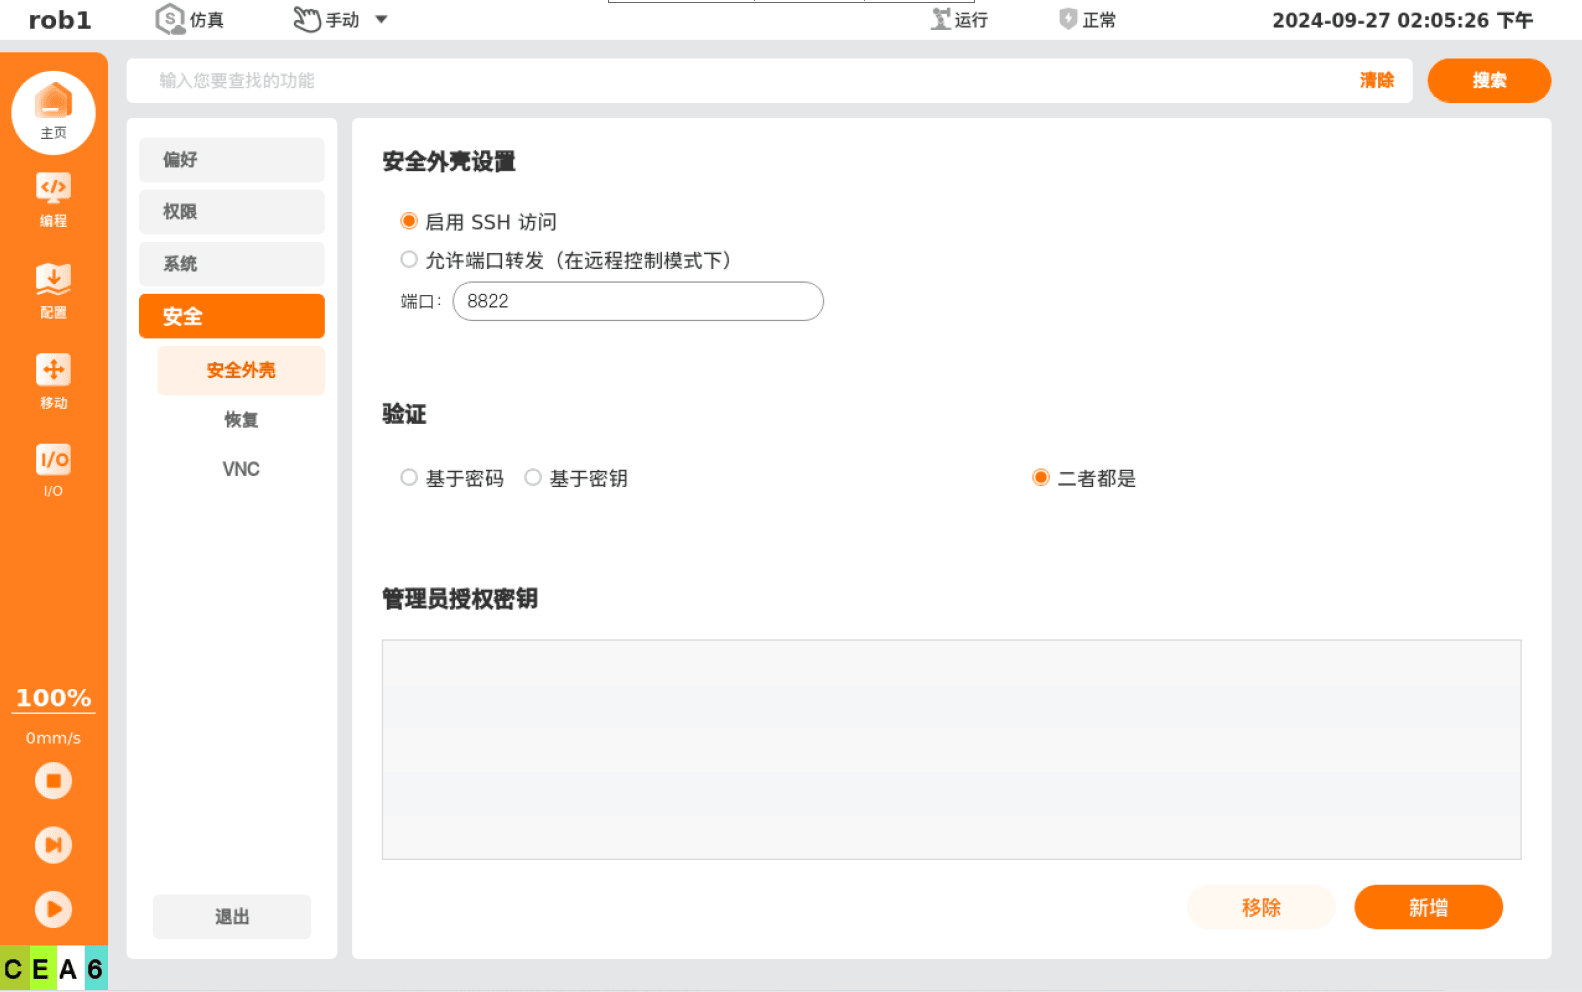
2 Logging into the Control Cabinet via SSH
Password-based authentication and key-based authentication are two ways the SSH server authenticates a client:
Password-based authentication
Advantages: lower barrier to entry, no upfront configuration required
Disadvantages: risk of brute-force password cracking, so
rootaccount login is usually disabled
Key-based (publickey) authentication
Advantages: high security, suitable for
rootaccount remote loginDisadvantages: higher barrier to entry; requires understanding the principle and usage of key pairs
The following uses MobaXterm Home Edition v24.2 as an example to explain the password authentication login and key authentication login methods respectively.
2.1 Password Authentication Login
Open
MobaXterm, and selectSessionfrom the toolbar at the top of the interface to create a new remote session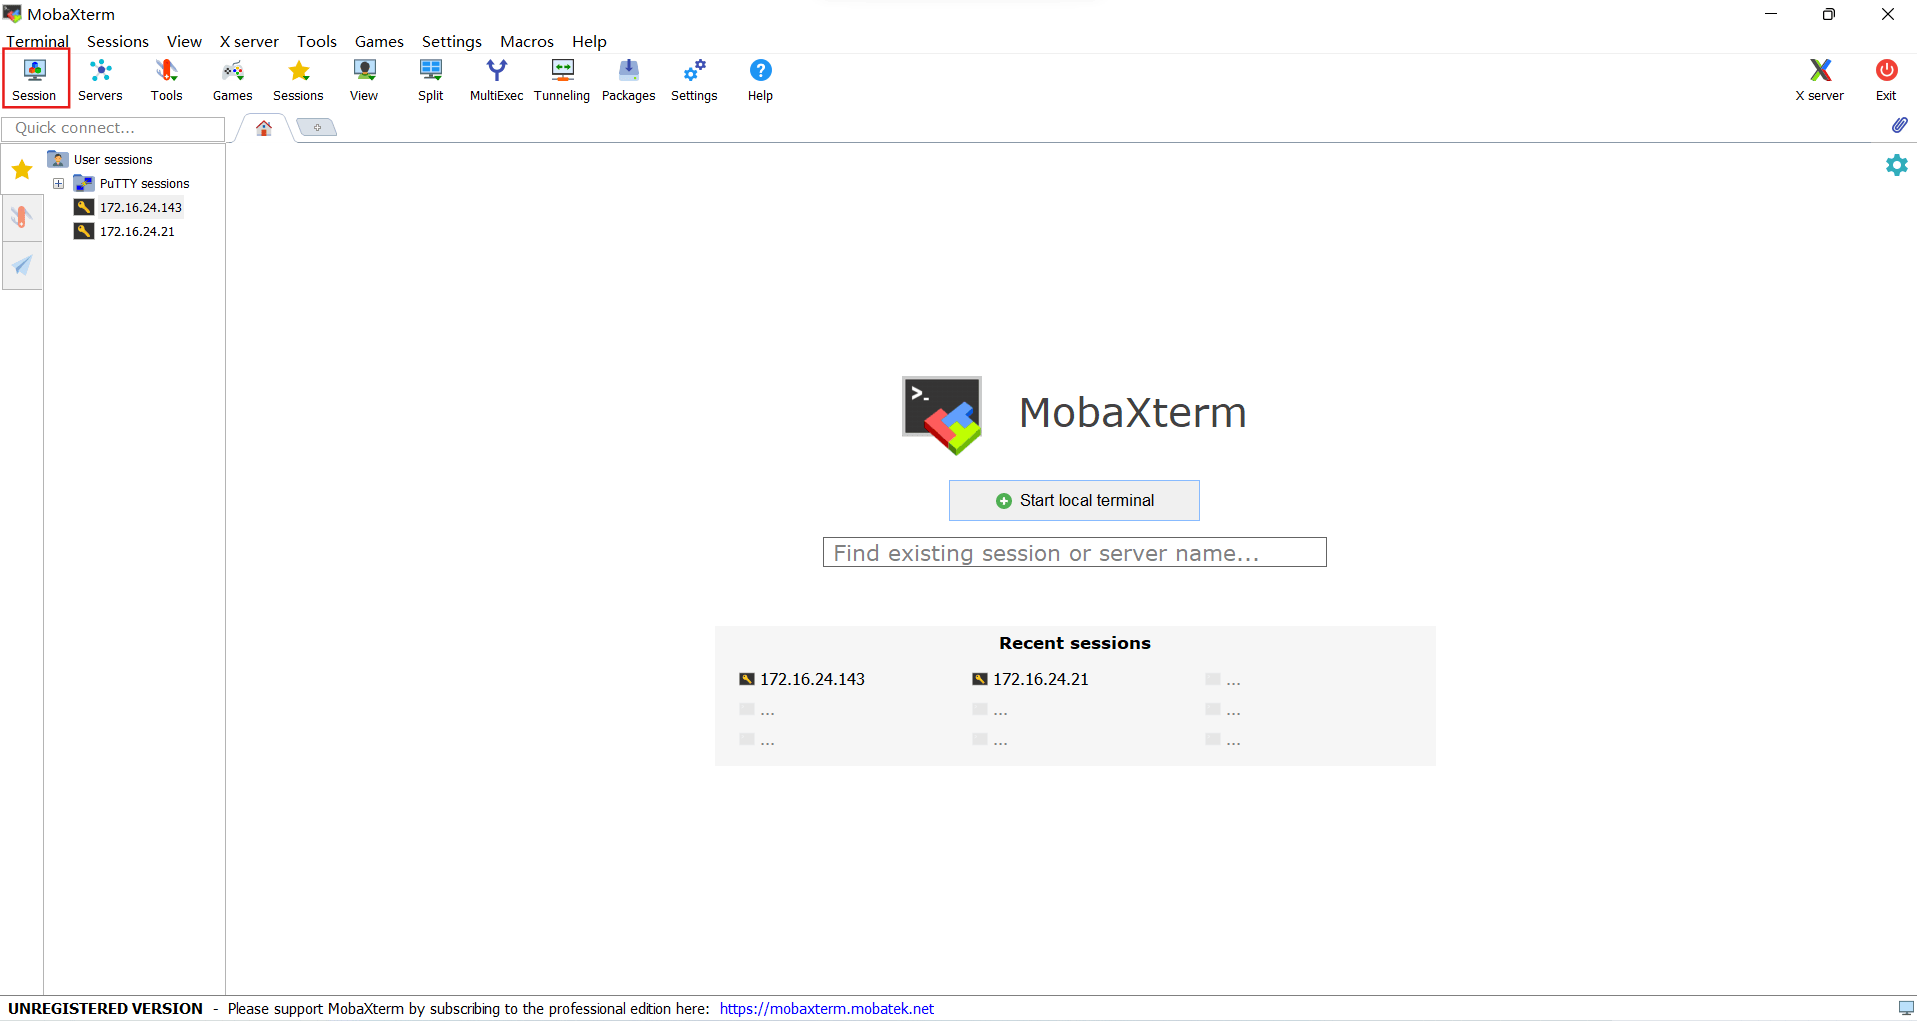
In the popup window, select the
SSHsession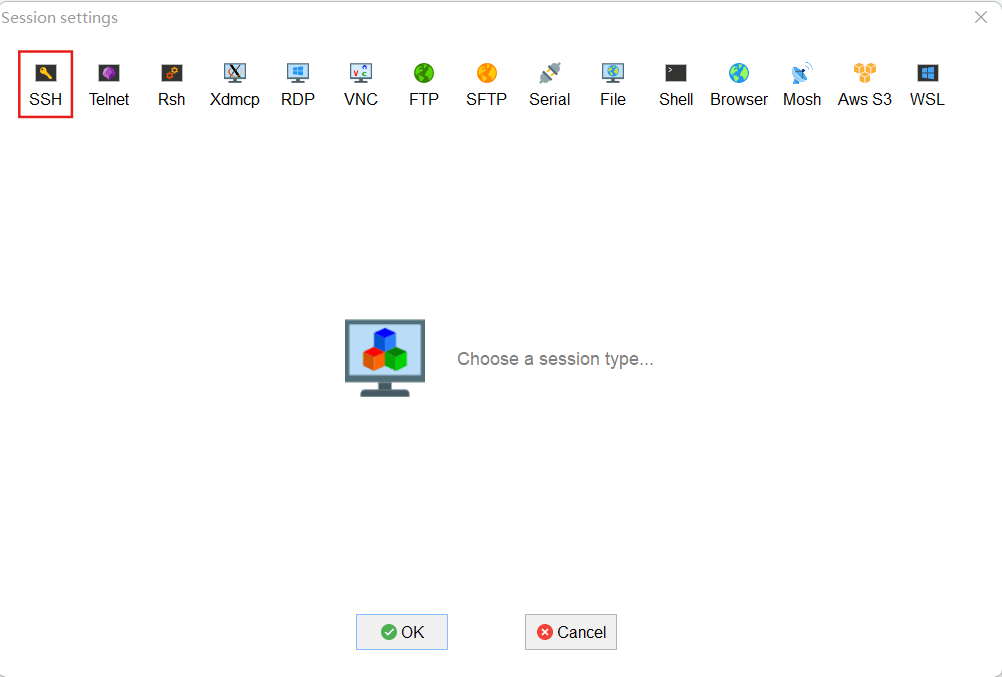
Enter the remote host IP in
Remote host, and enter the port number configured in Step 1: Enabling SSH Connection on the Control Cabinet inPort, then clickOK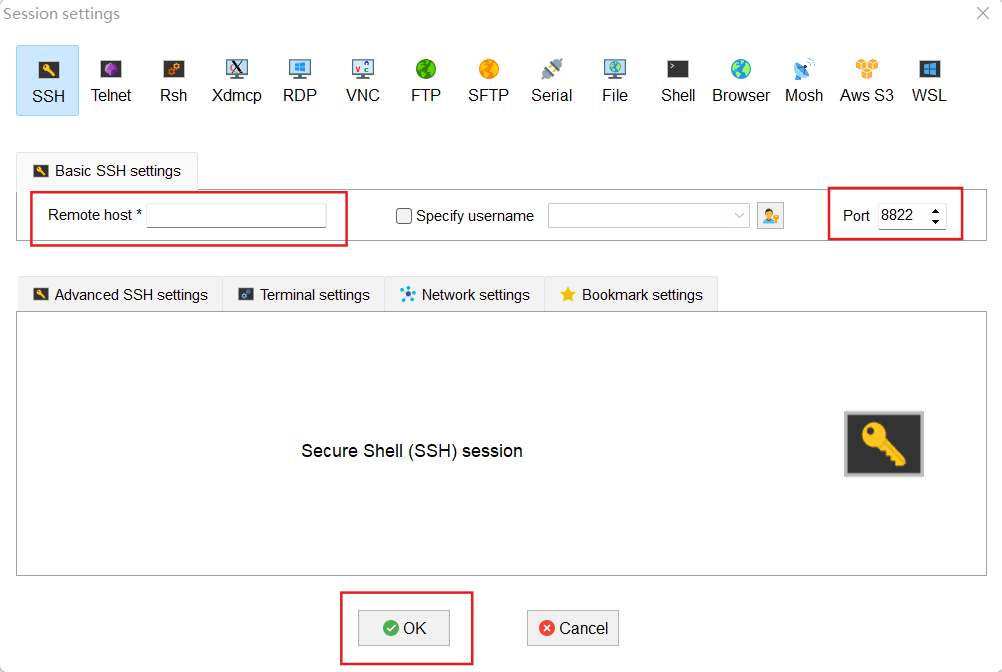
The session is created successfully; enter the username to log in. The
rootuser is generally used for login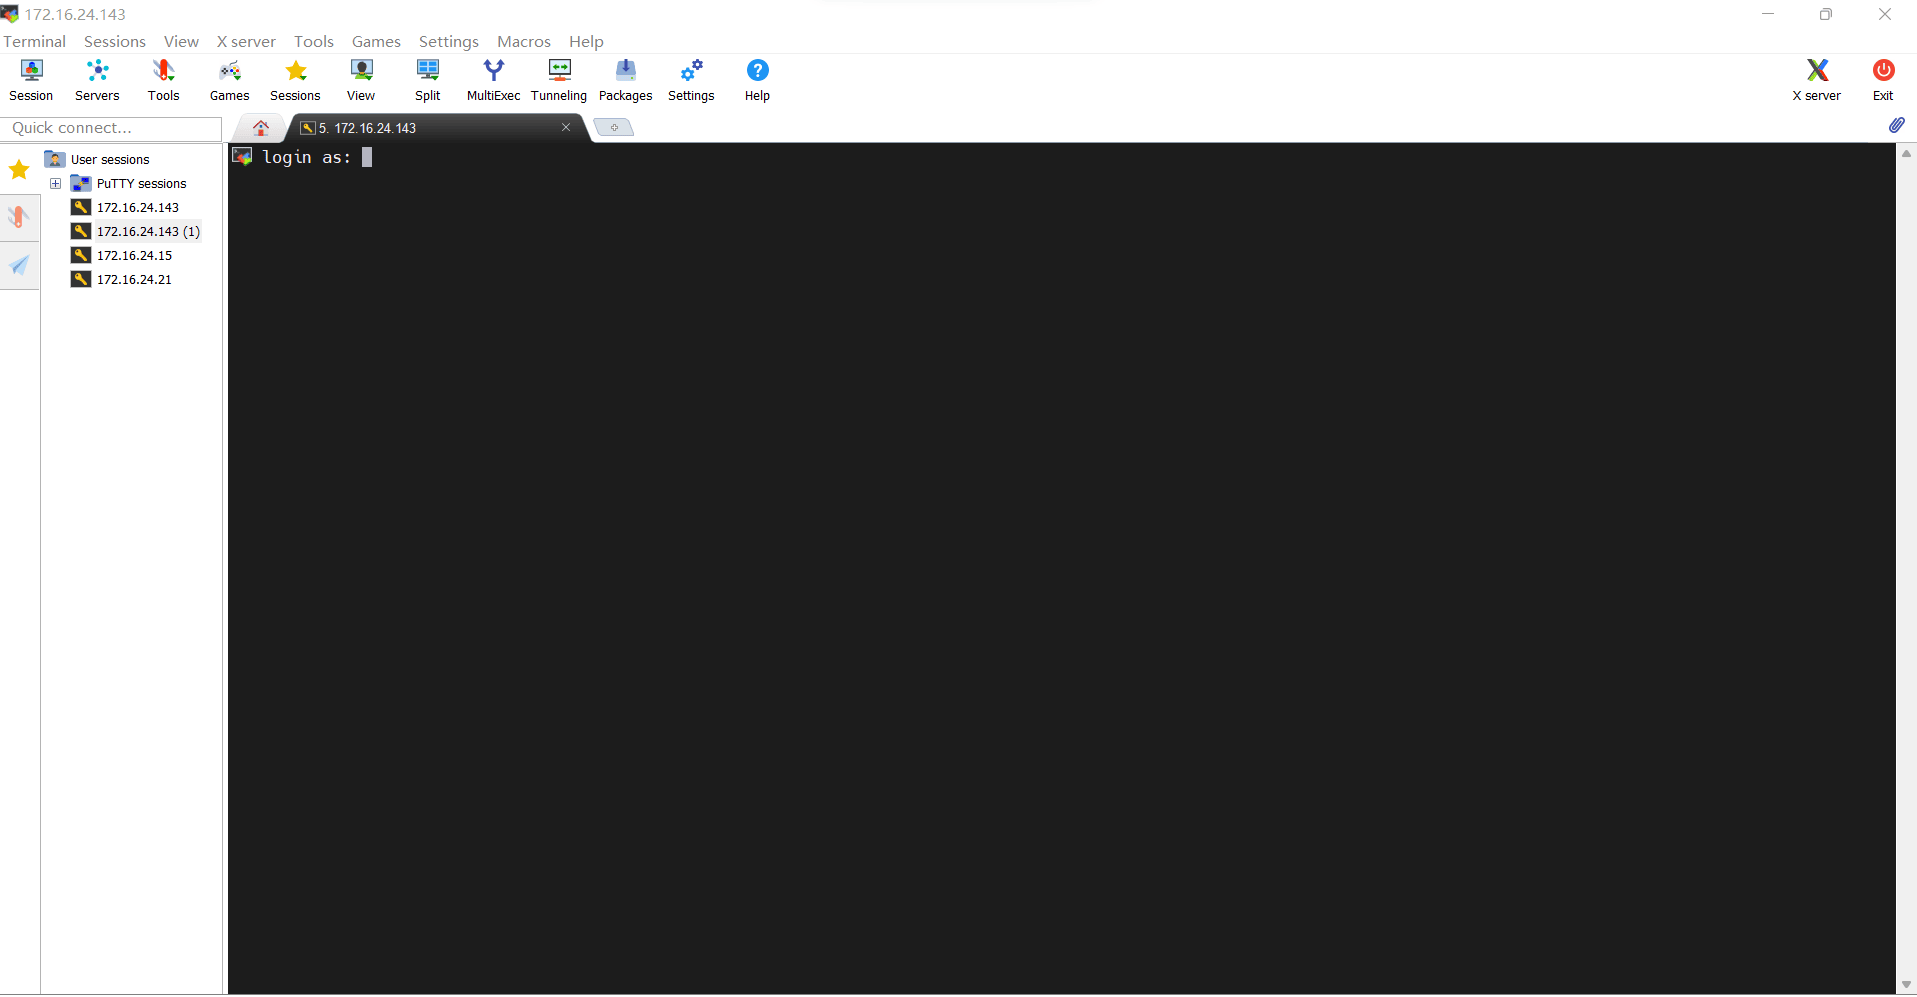
Enter the password; the default password for
rootisrootorbestcobot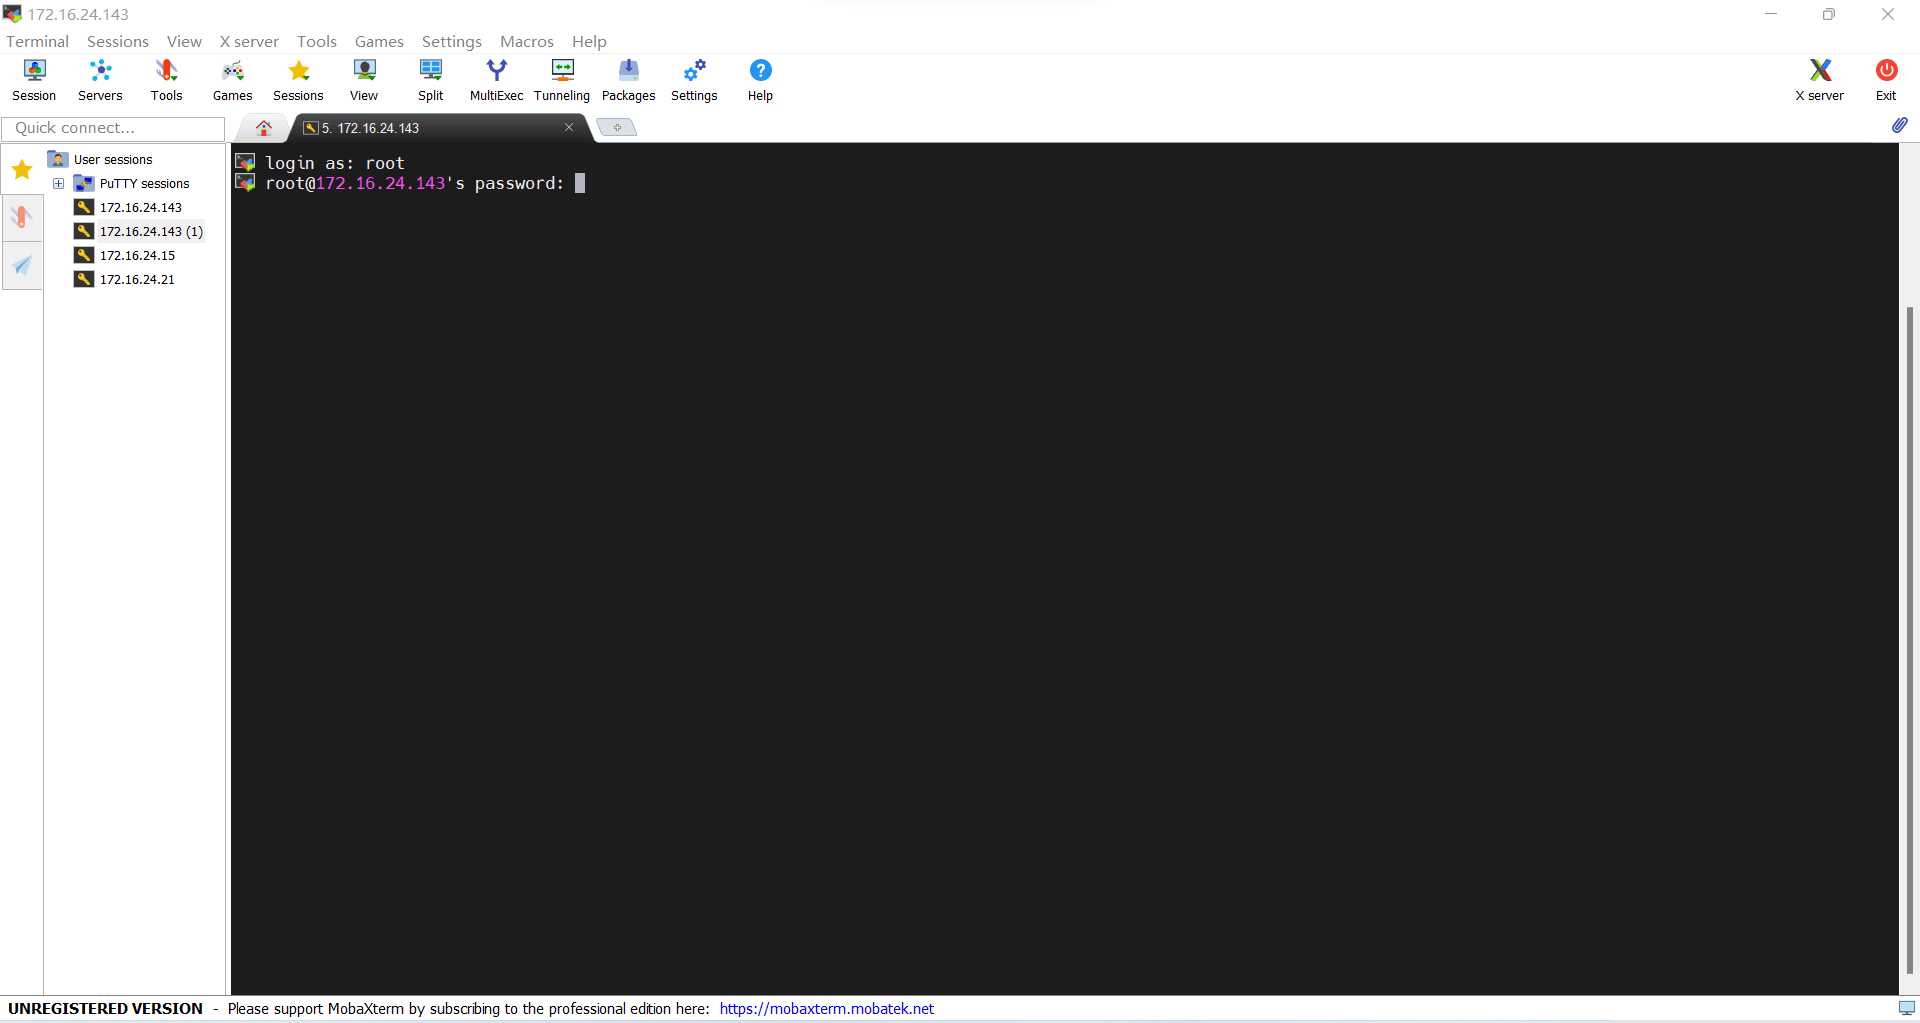
Login successful
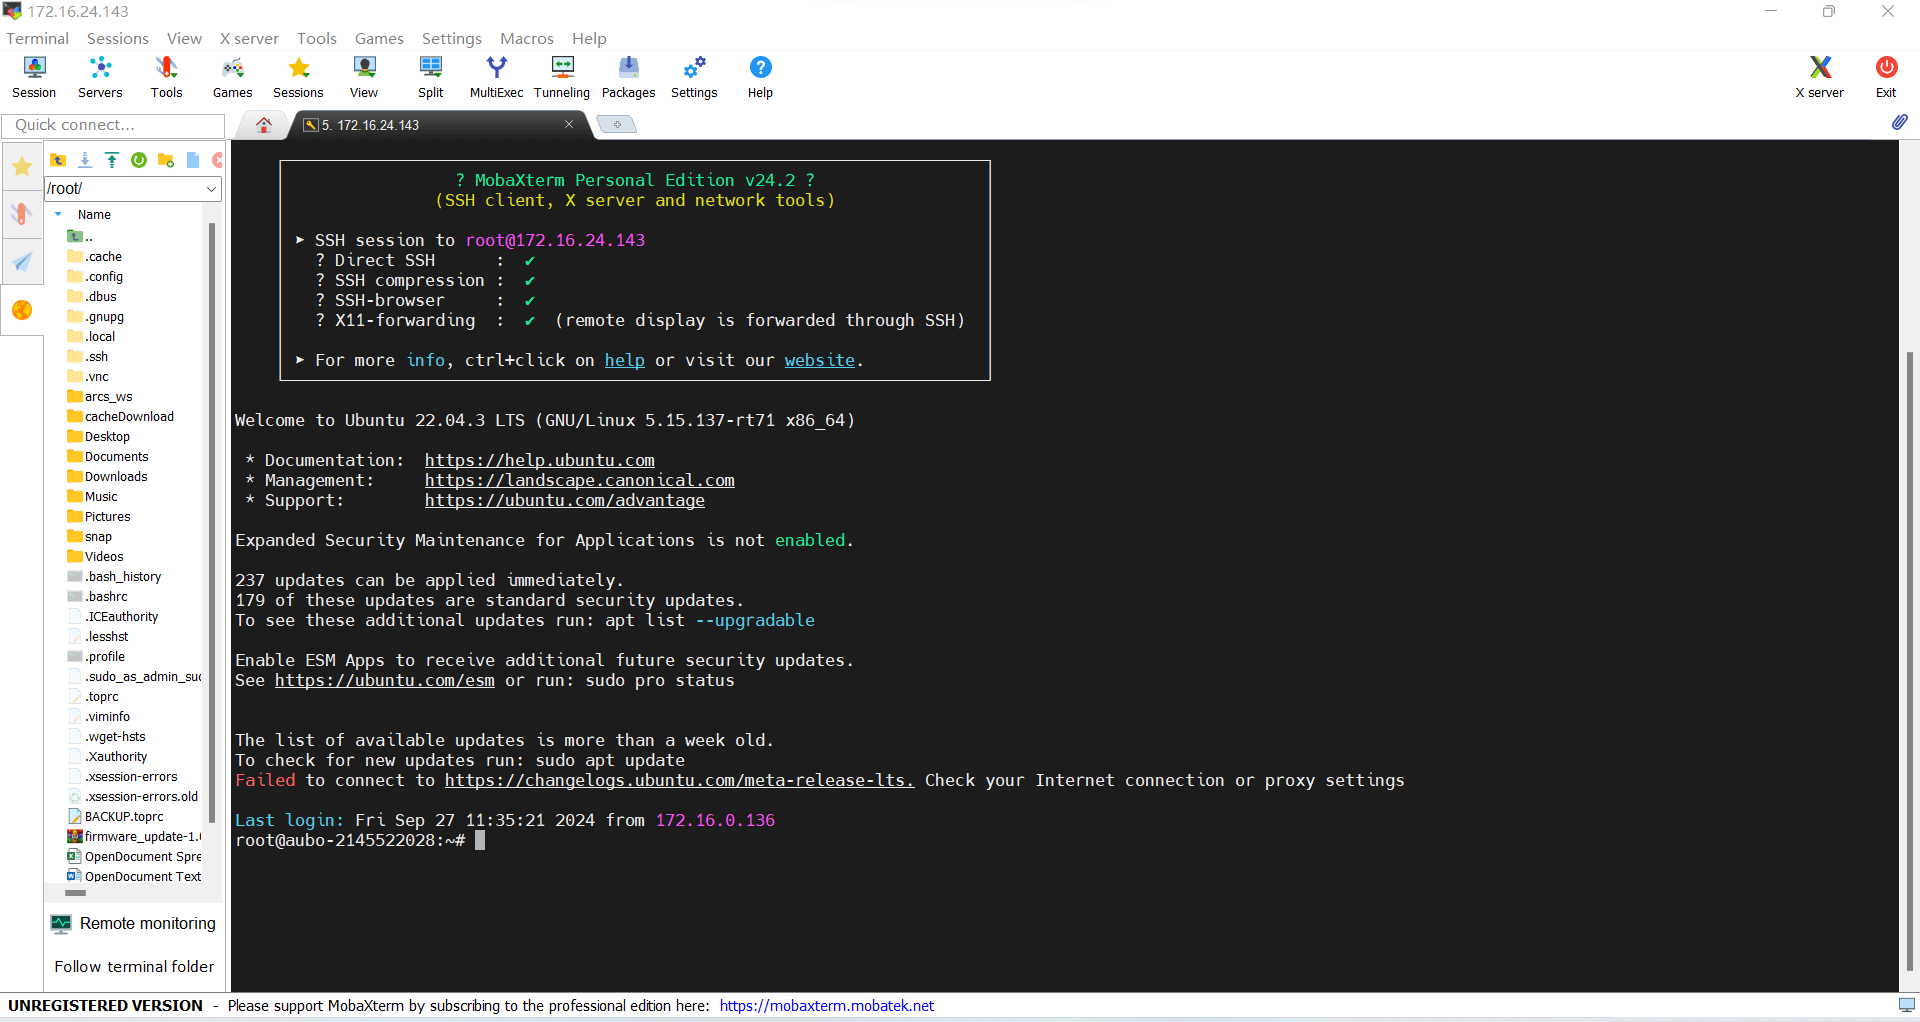
2.2 Key Authentication Login
2.2.1 Generating a Key Pair
A key pair consists of two files: the private key file (Private Key) and the public key file (Public Key)
Private key file
Equivalent to a door key, and is the key to logging into the remote host.
(The private key file must not be leaked; otherwise the remote host is at serious security risk)
Public key file
Equivalent to a door lock, which can be opened by anyone with the key. The public key file can be published anywhere and does not need to be kept secret.
The steps to generate a key pair using MobaXterm are as follows:
In the
MobaXtermsoftware, clickToolsSelect
MobaKeyGen (SSH key generator)to open the operation interface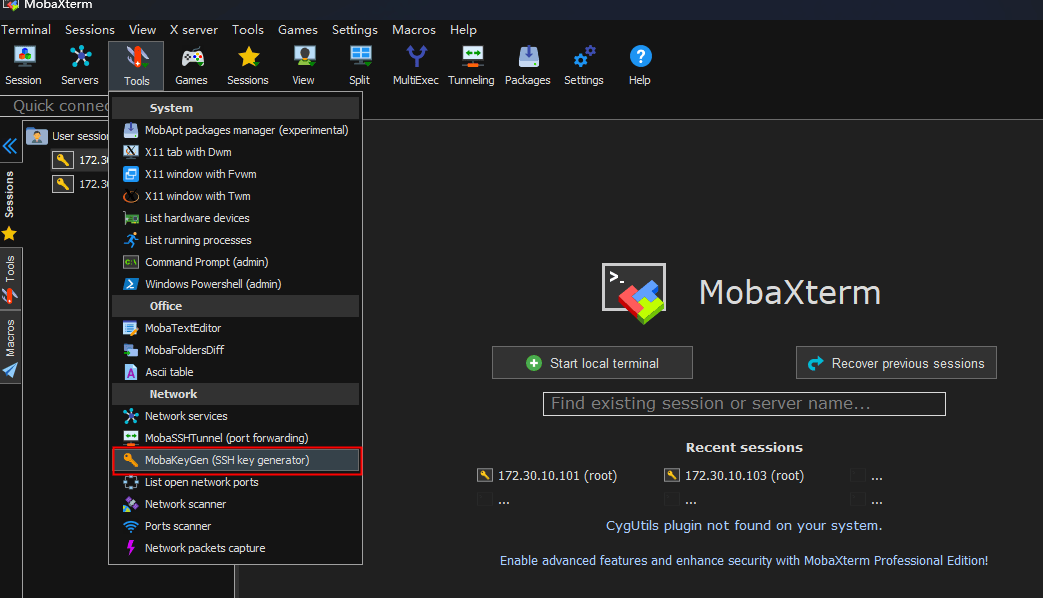
Click the
Generatebutton to start generating the key pair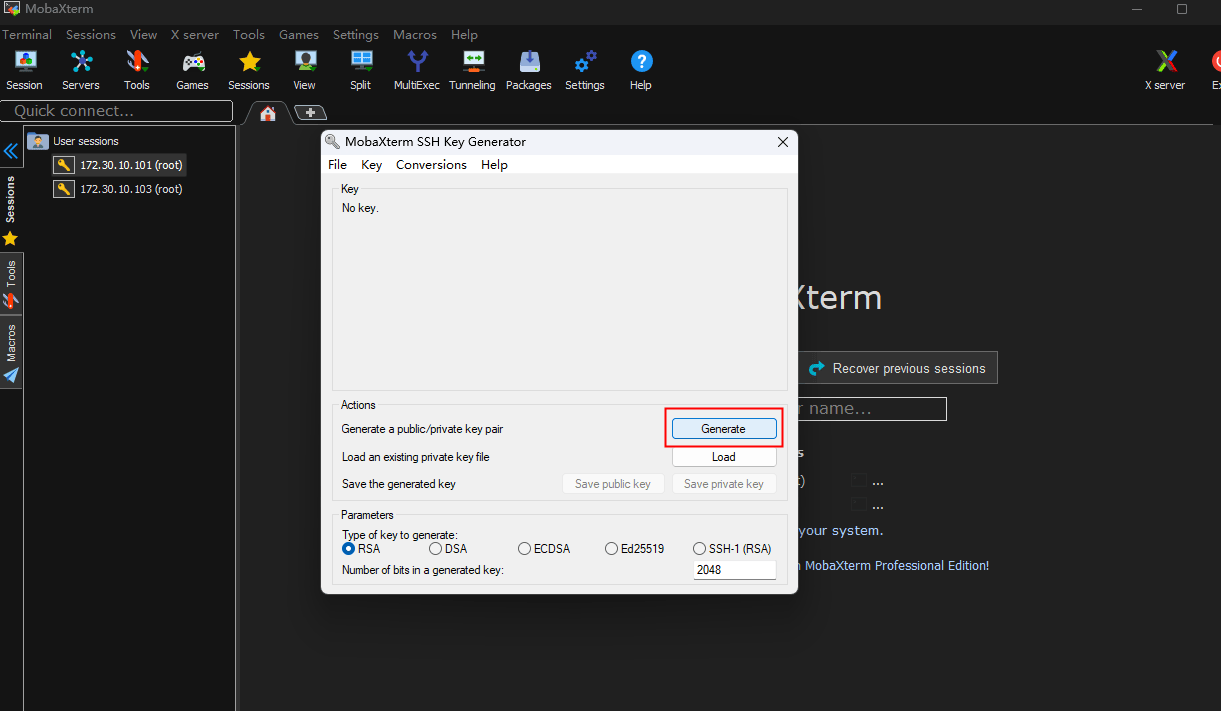
Moving the mouse generates more random numbers, speeding up the process
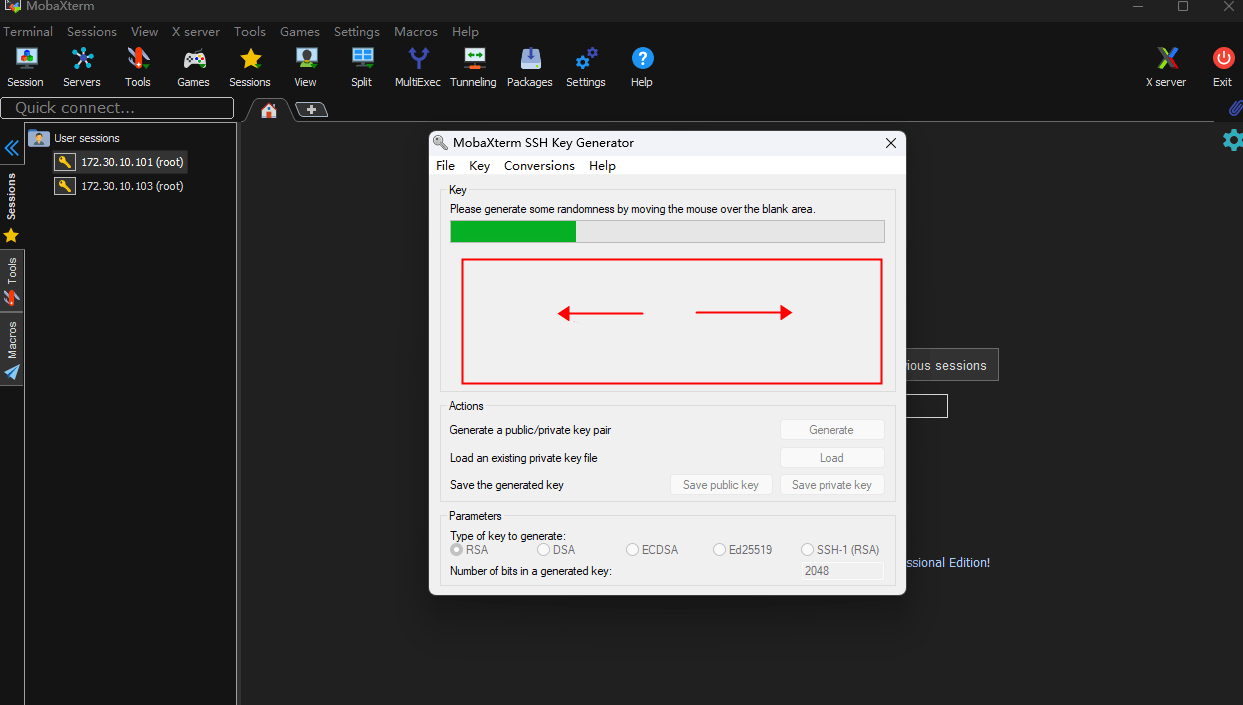
Generation takes about one minute
The key pair has been generated
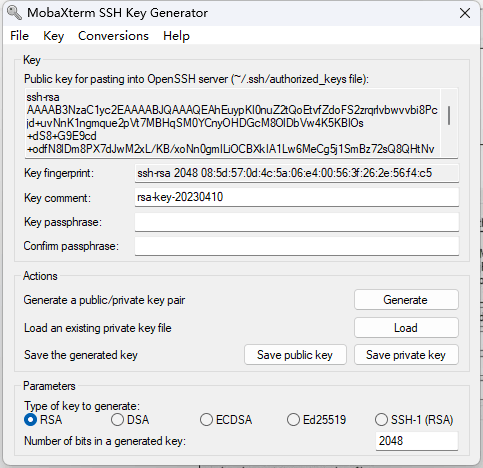
2.2.2 Saving the Public Key and Private Key
Create a new folder named
ProLinuxto save the public key file and private key file.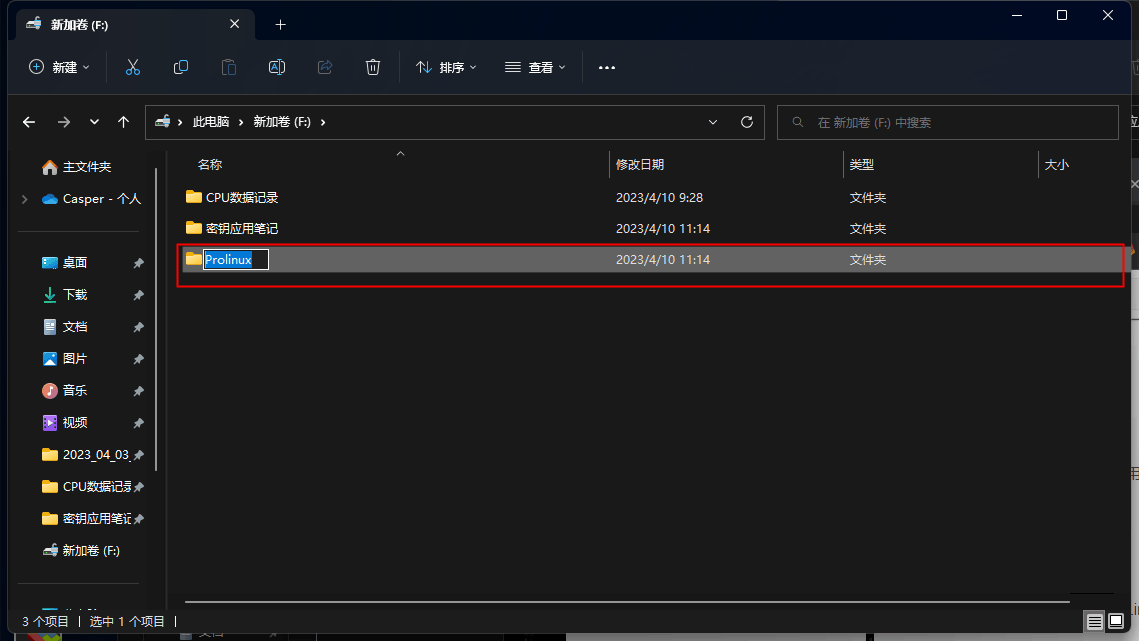
Select all the content in the
Public key for pasting into Open SSH server (~/.ssh/authorized_keys file)box, right-click, and selectCopy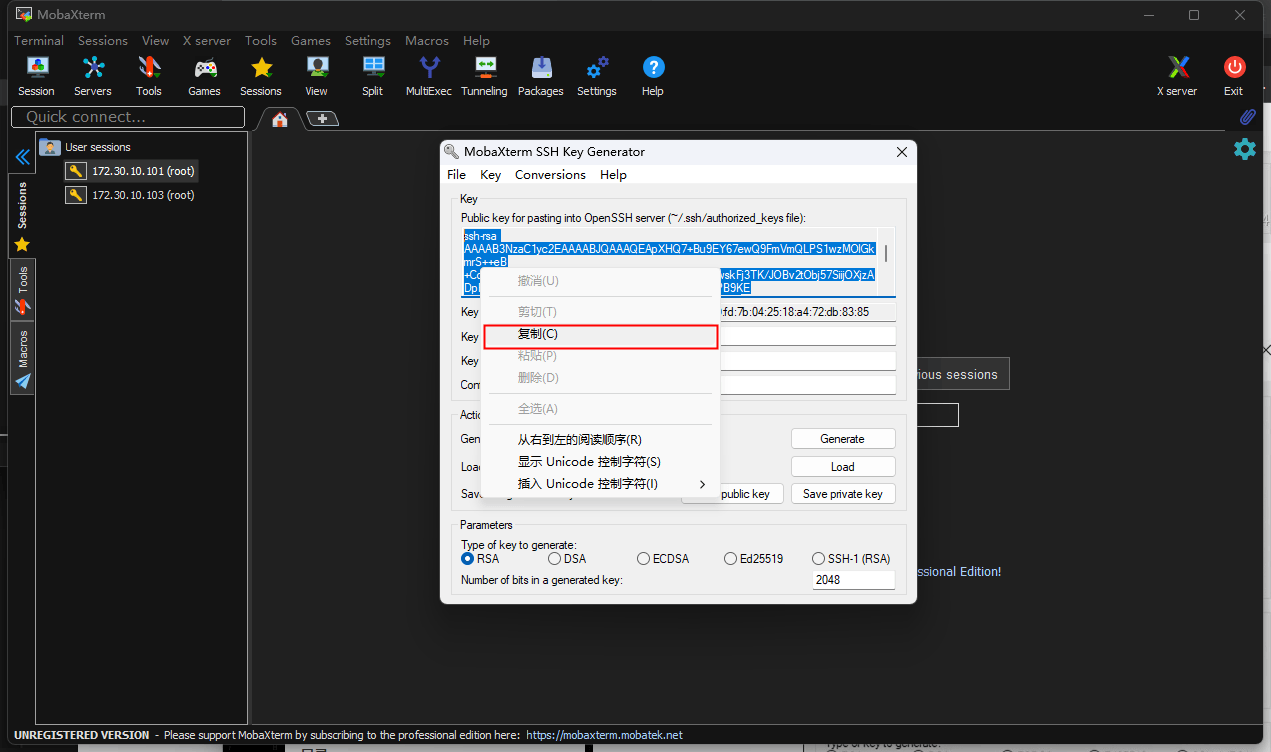
Double-click to enter the
ProLinuxfolder you just created, create a newText Document, and change the file name tomk.pub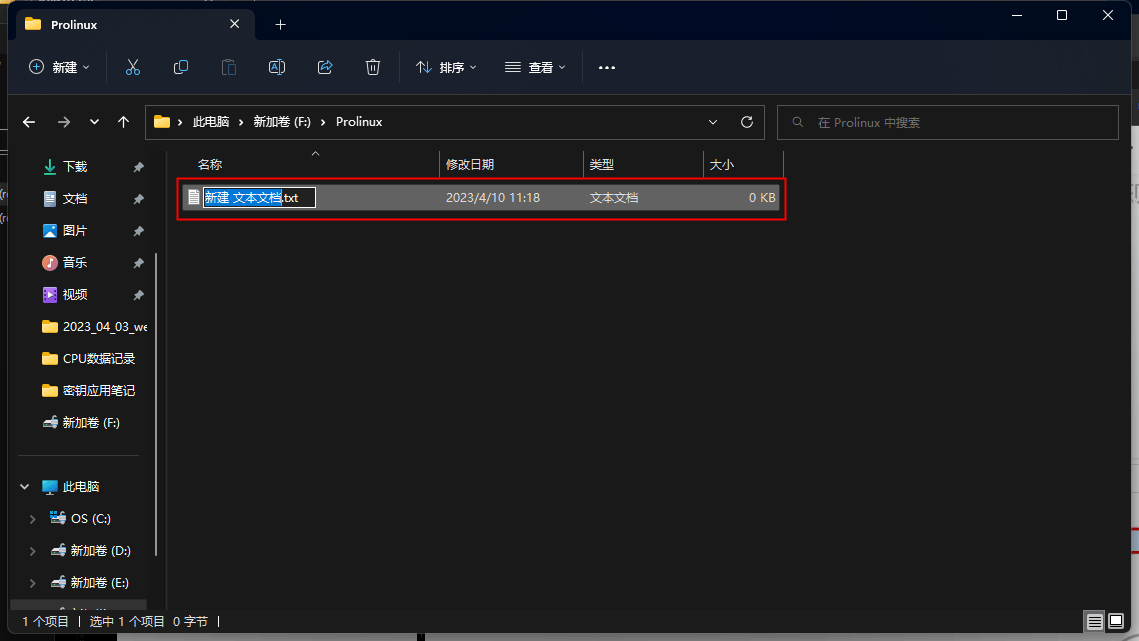
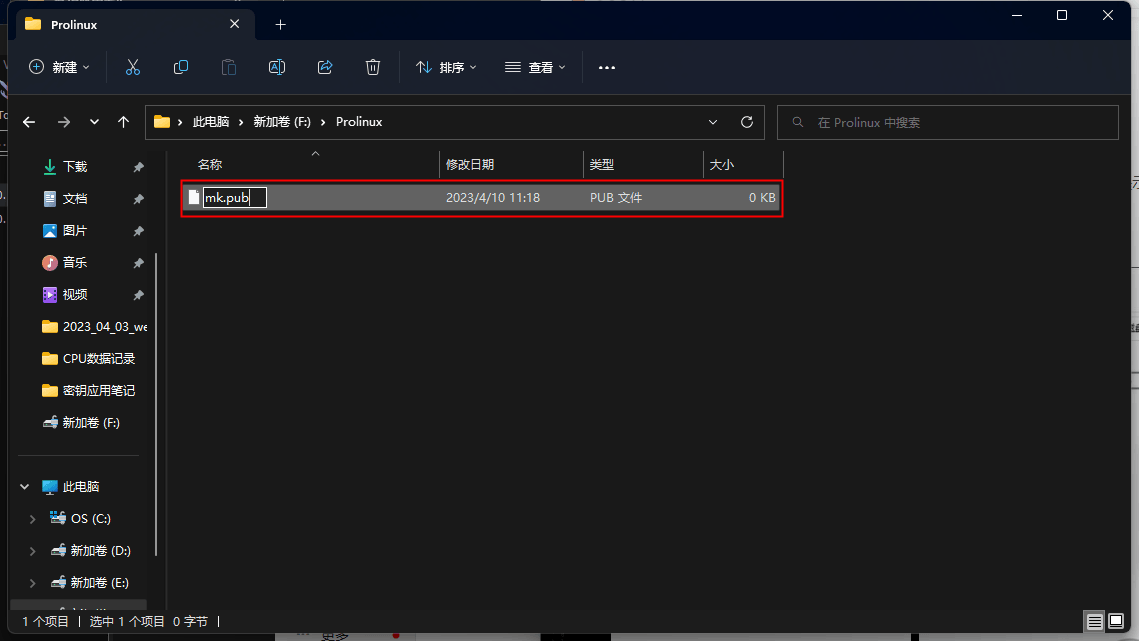
Select and right-click the
mk.pubfile, and choose >Open with (H)>Notepad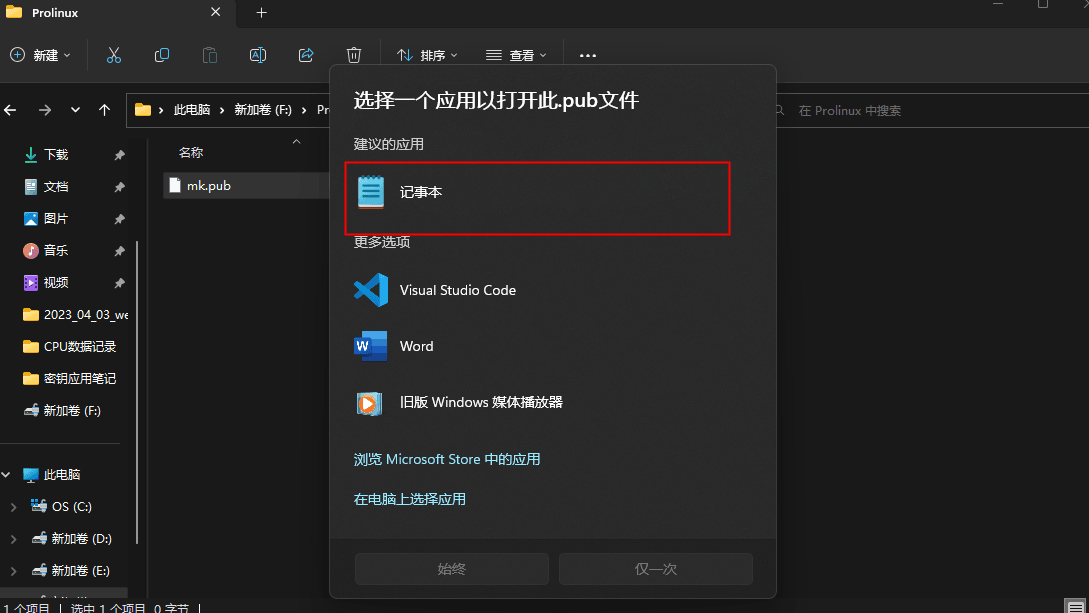
Paste the public key content (the content copied earlier)
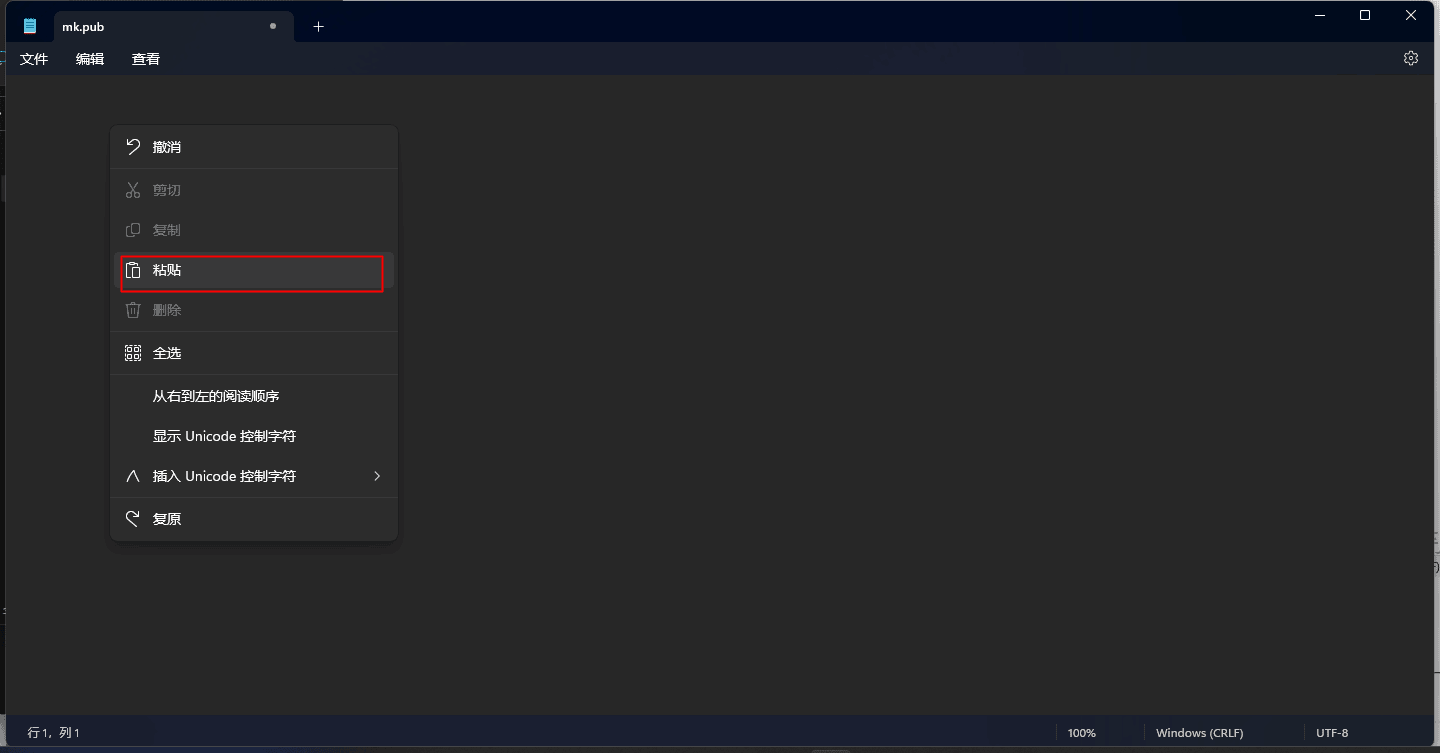
Click
Fileand selectSave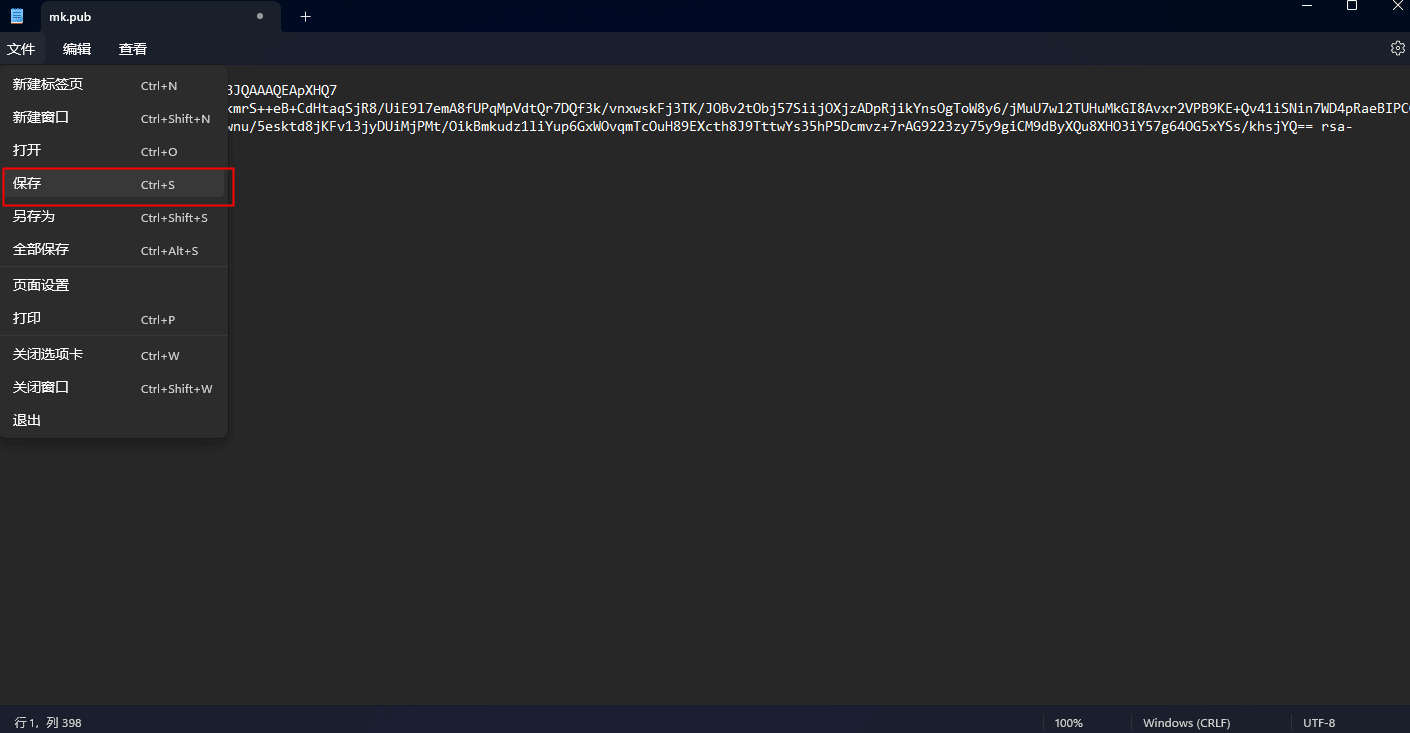
Return to the
MobaXterm SSH Key GeneratorinterfaceClick the
Save private keybutton to begin saving the private key file. If no private key password is set, MobaXterm will pop up a warning; selectYes (Y)to ignore it.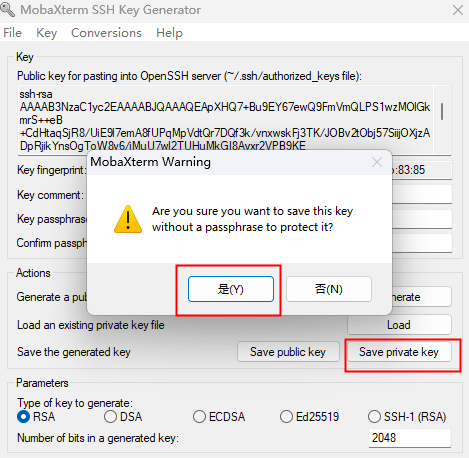
Enter the
ProLinuxfolder you just created, and enter the private key file name inFile name (N):. Here we use [mk] as an example.Click the
Savebutton to save the private key file.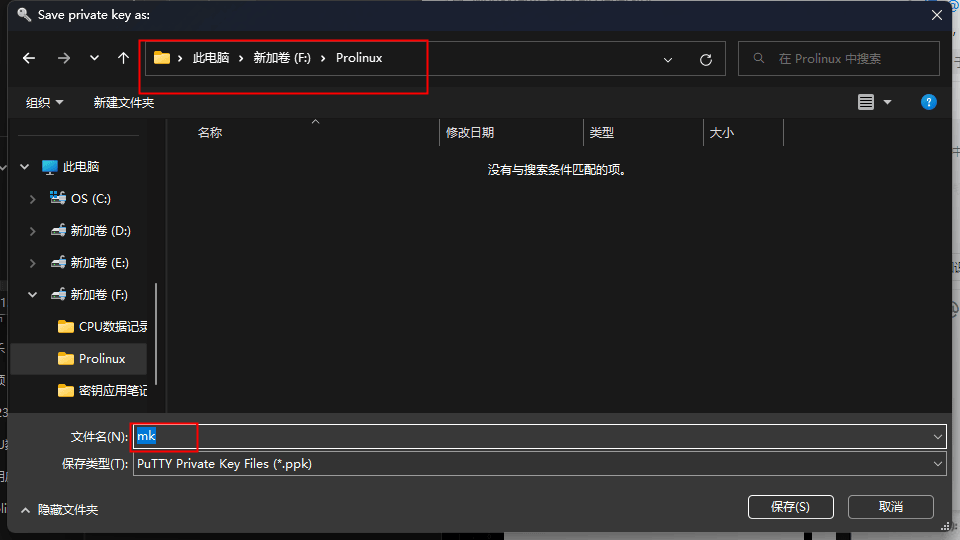
View the key files
After following the steps above, you will obtain two files
mk.pub
mk.ppk
2.2.3 Uploading the Public Key
Select
mk.pub, pressCtrl+Cto copy the file, then rename it toauthorized_keys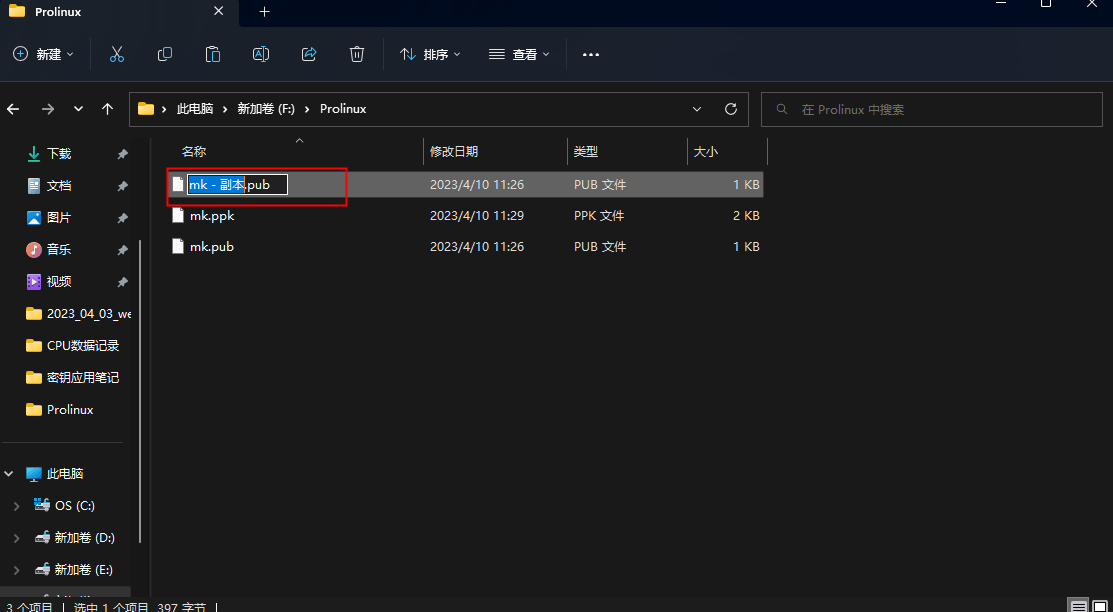
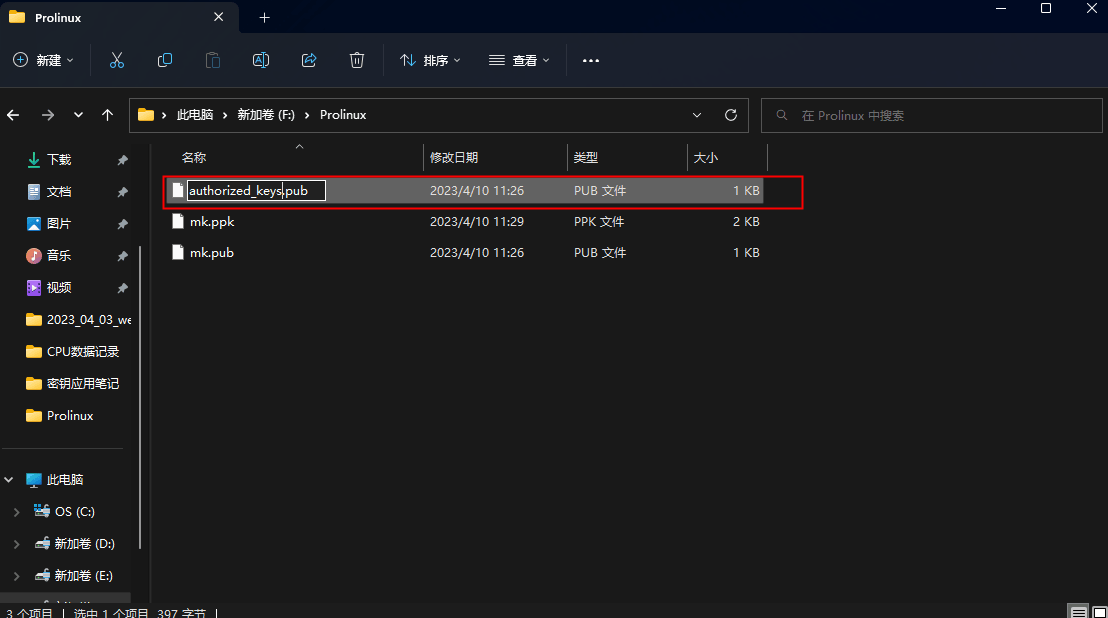
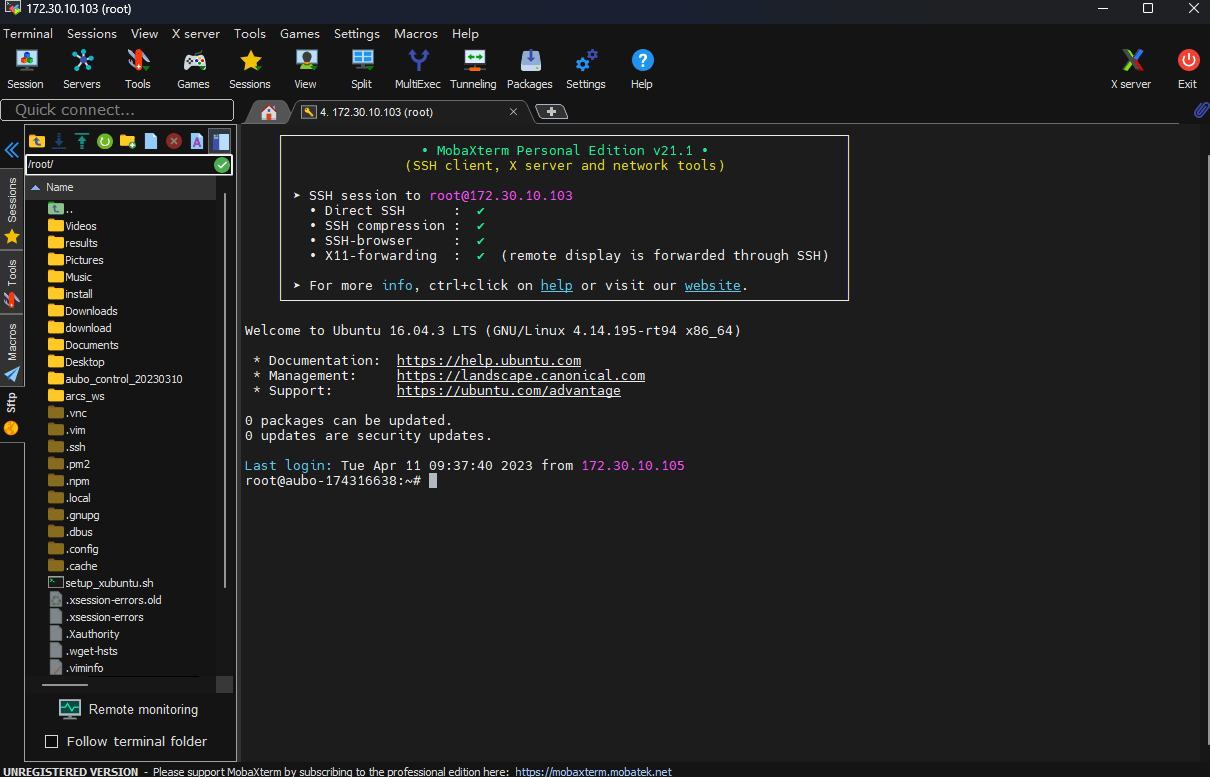
First log into the host using the method in Section 2.2: Password Authentication Login. Here we use
172.30.10.103(root)as an example, and upload theauthorized_keysfile to the/tmp/directory, because this is the directory opened by default when the teach pendant adds a new key.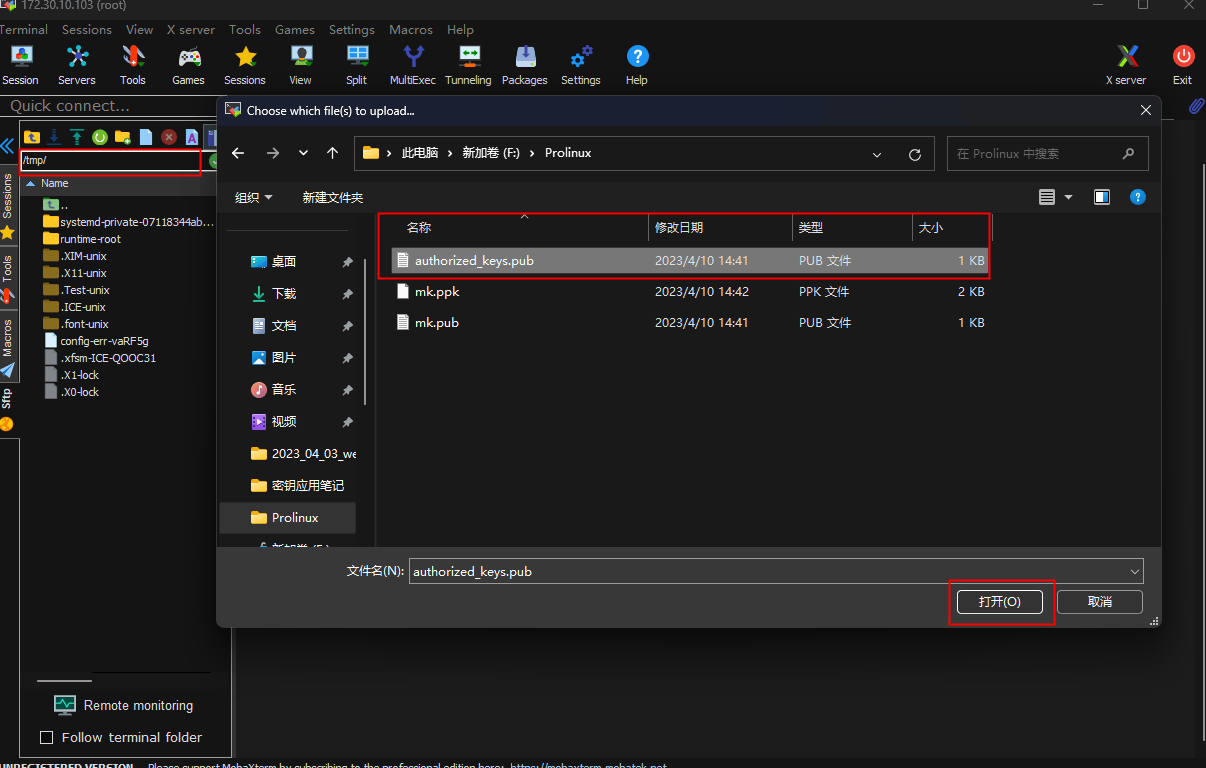
Seeing
authorized_keysin the directory tree means the upload was successful; then close the connection tab.
2.2.4 Enabling the Private Key
Right-click
172.30.10.103(root)and selectEdit sessionto edit the remote host configuration parameters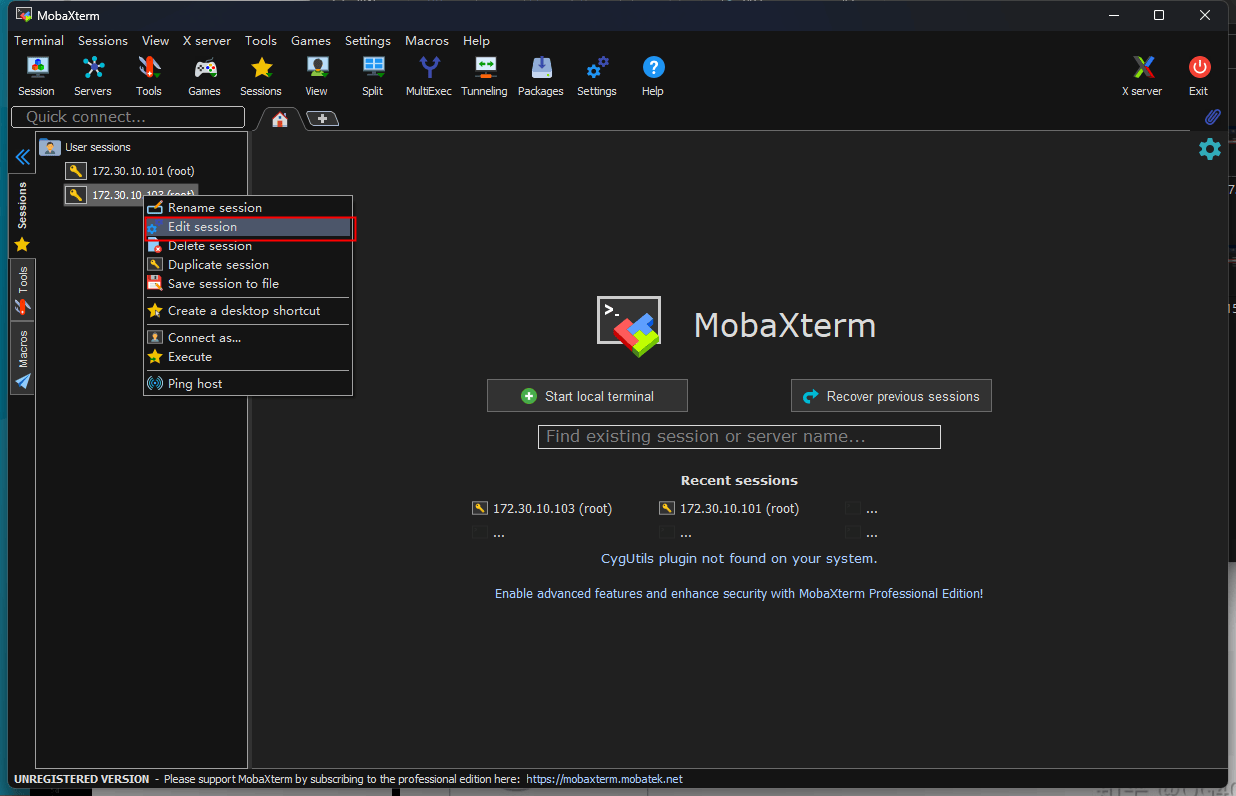
A settings interface pops up
Select the
Advanced SSH settingstab, find theUser private keyparameter, and click the file icon at the end of the input box to open themk.ppkprivate key file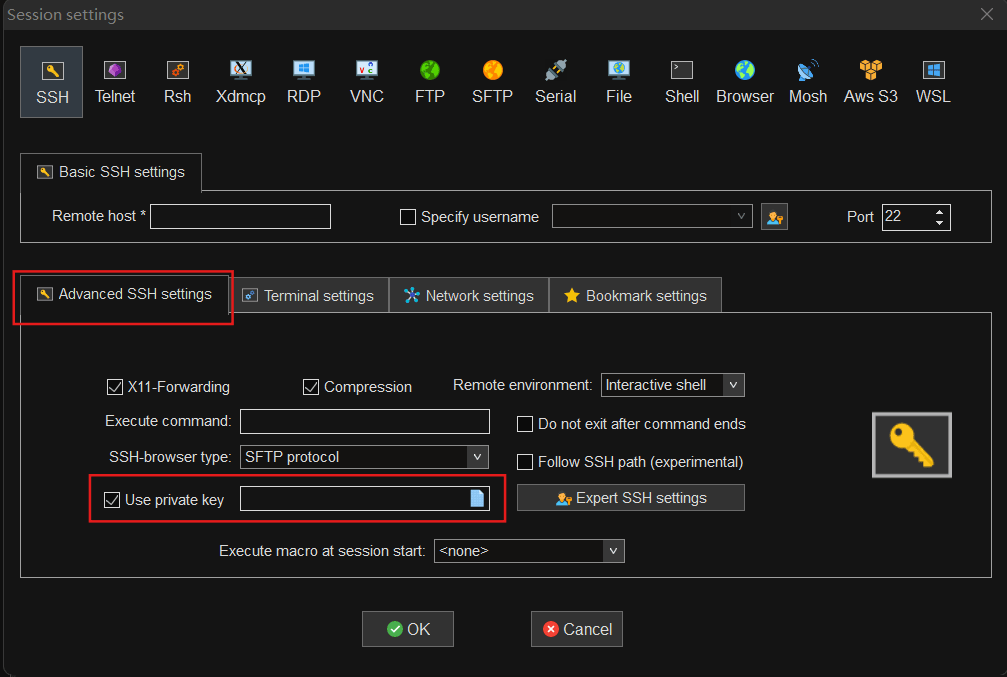
The configured result is shown in the figure; click
OKto save the configuration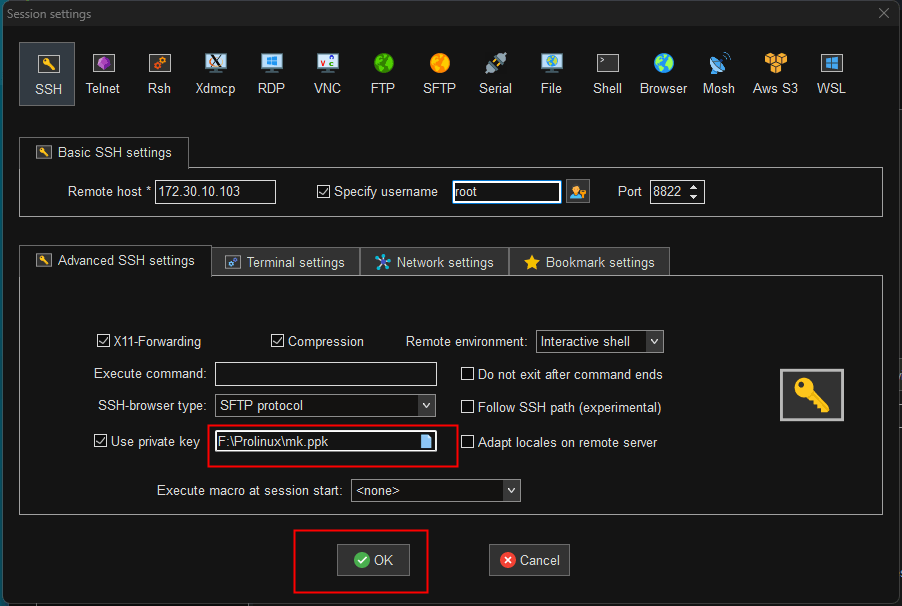
2.2.5 Uploading the Public Key File on the scope Interface
Here we use the teach pendant as an example; from the teach pendant home page, enter the
SettingsfunctionSelect
Security - Secure Shell, and clickAdd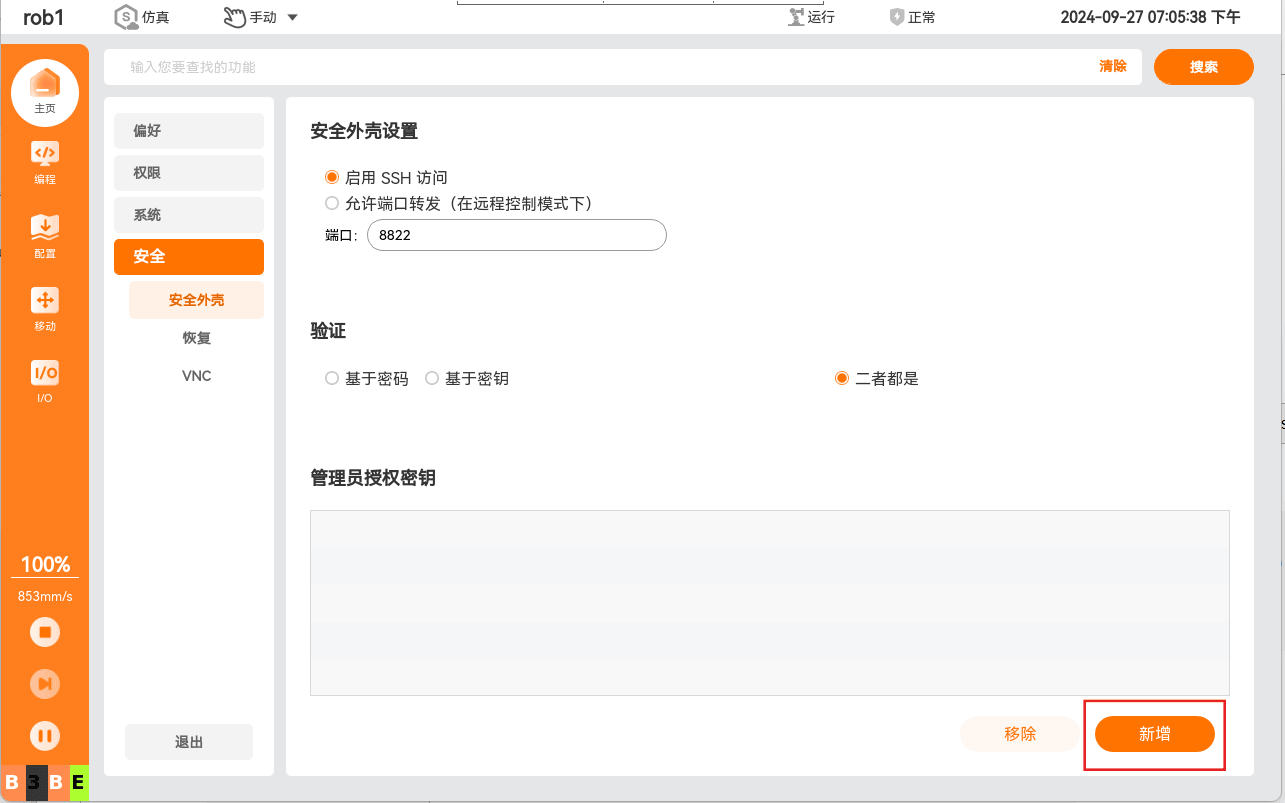
The popup shows the default
/tmpdirectory; selectauthorized_keys.puband open it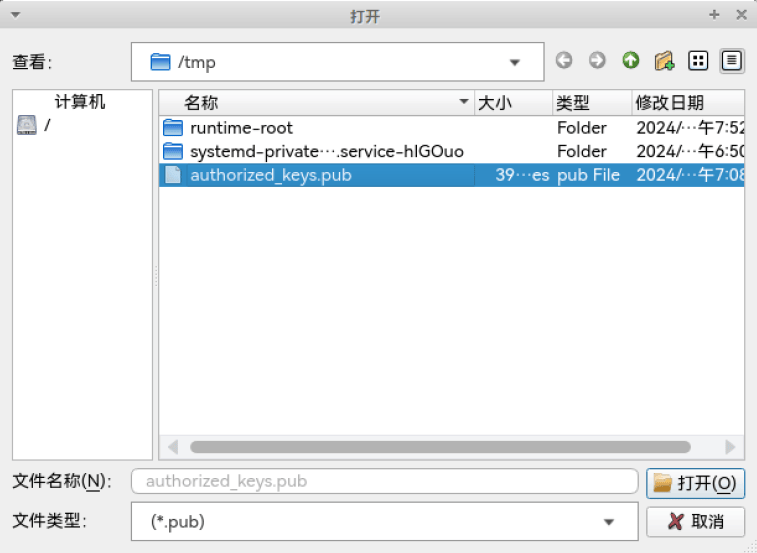
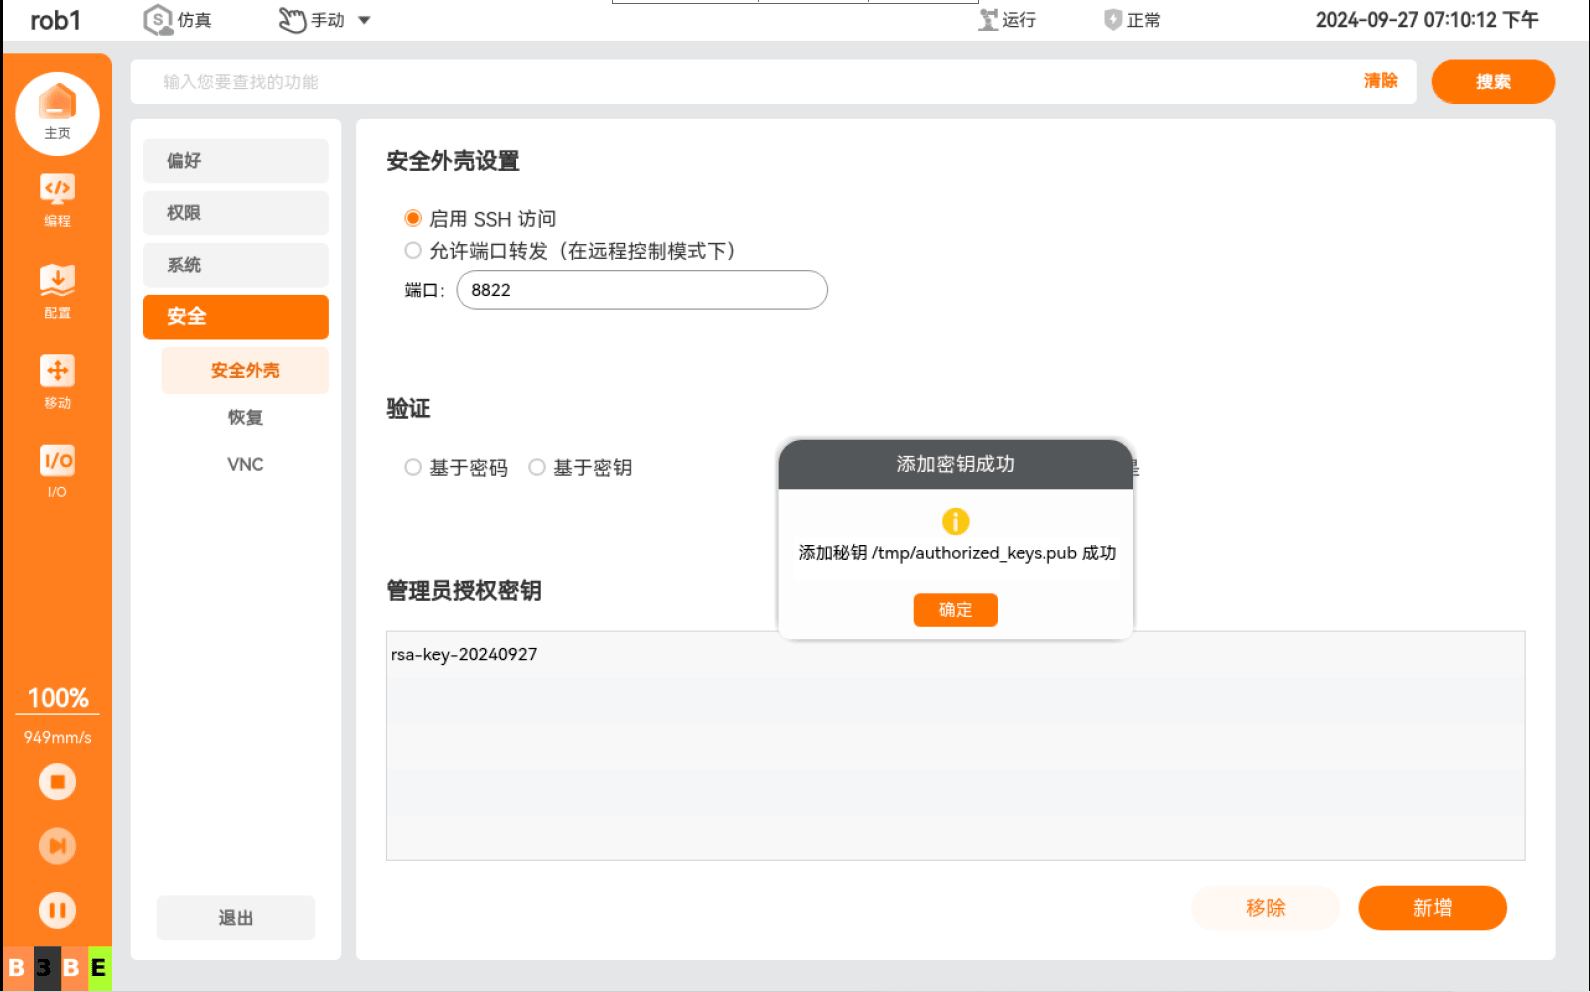
The interface shows that the key was added successfully
2.2.6 Testing Key Login
In the MobaXterm main interface, double-click 172.30.10.103(root) in the User sessions list.
If the login succeeds, it means key login is successful.