
Unboxing Test Guide
This briefly introduces the unboxing test process to ensure that the product remains intact during transportation and to verify that its basic functions work correctly.
I. Product Inspection
- Appearance inspection: check whether the outer packaging has damage, squeeze marks, or other abnormal conditions.
- Internal inspection: open the outer packaging and check whether the internal cushioning materials are intact and whether the items are securely fastened.
- Item counting: check that all items are complete according to the packing list, including but not limited to the product itself, accessories, manuals, and warranty card.
- Product appearance inspection: carefully inspect the appearance of the robot arm for scratches and other problems; check whether the interfaces and buttons of the control cabinet, teach pendant, and robot arm are normal.
- Power-on test: connect the power and other cables correctly according to the manual; start the device and check whether the control cabinet indicator lights light up normally and whether there are any abnormal sounds or odors.
II. Basic Function Test
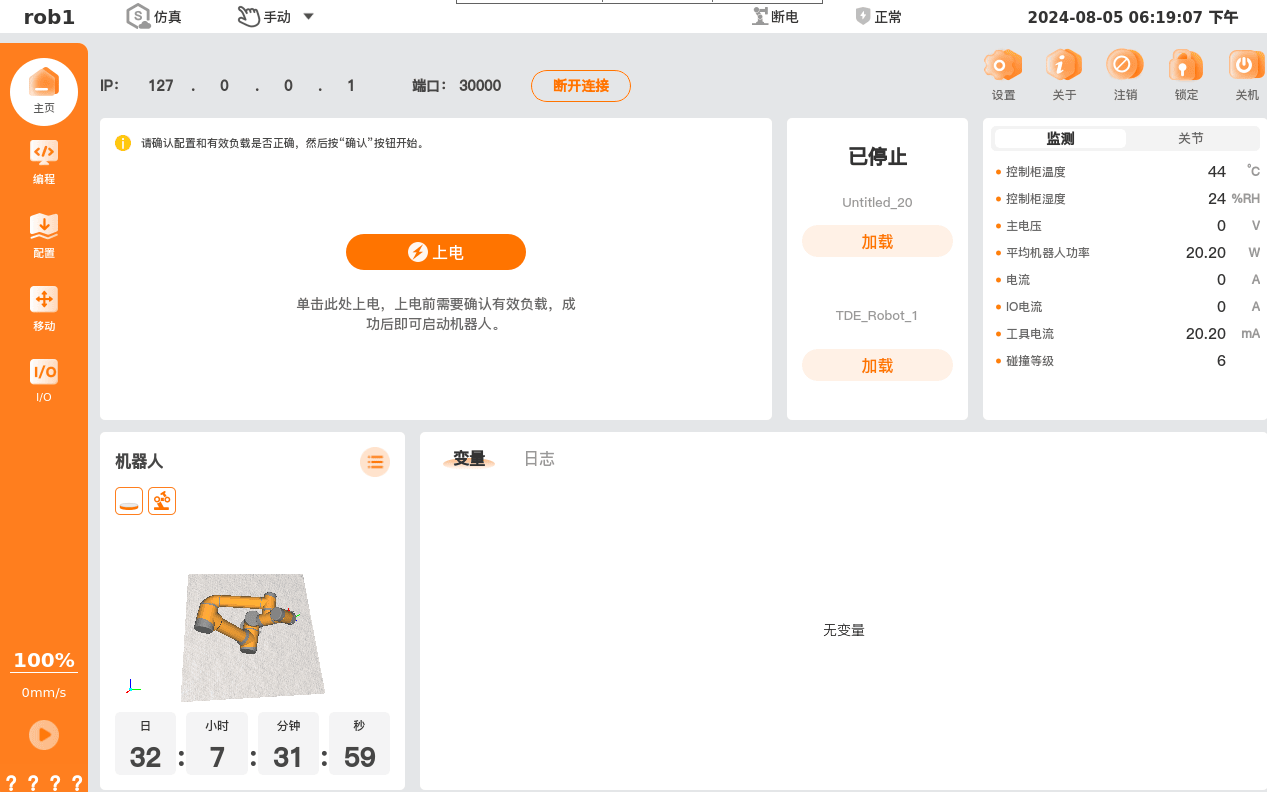
Connect the device, and after powering on and releasing the brake, complete the writing and running of the first program.
The entire process is recorded in detail in the user manual at the following link: https://docs.aubo-robotics.cn/user_manual/zh/v0.29/2_aubo_scope/01-preface/01-quick-start.html
Use the Windows robot factory diagnostic tool to complete the automated test; all test items need to pass.
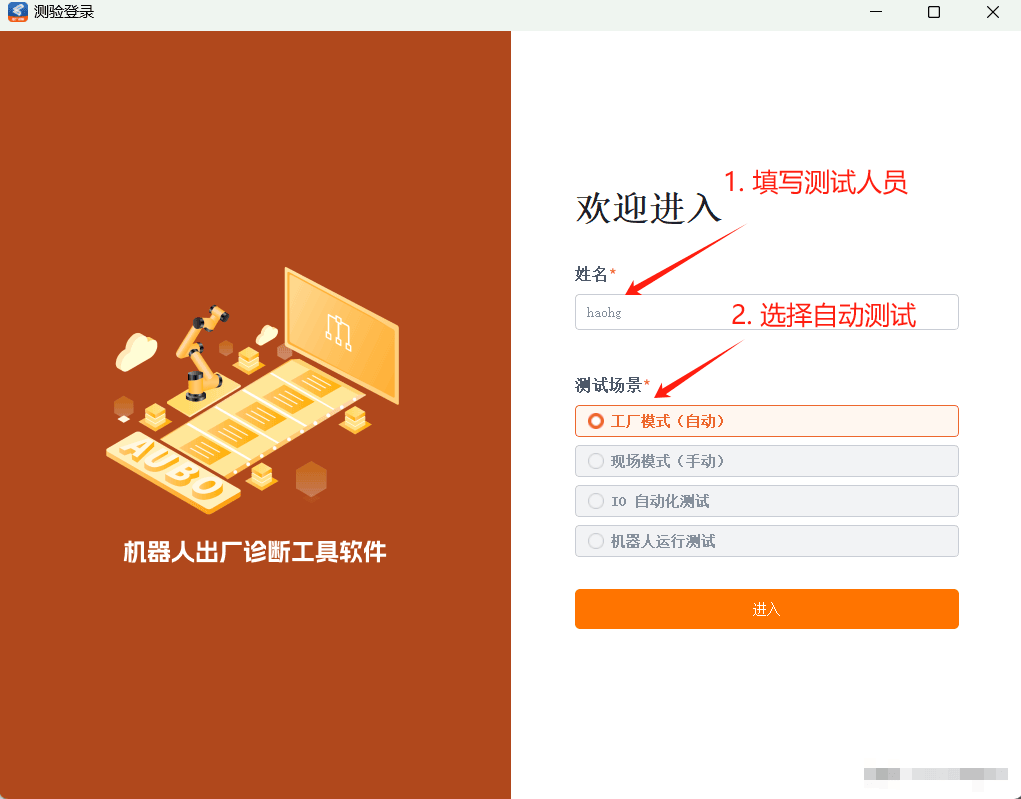
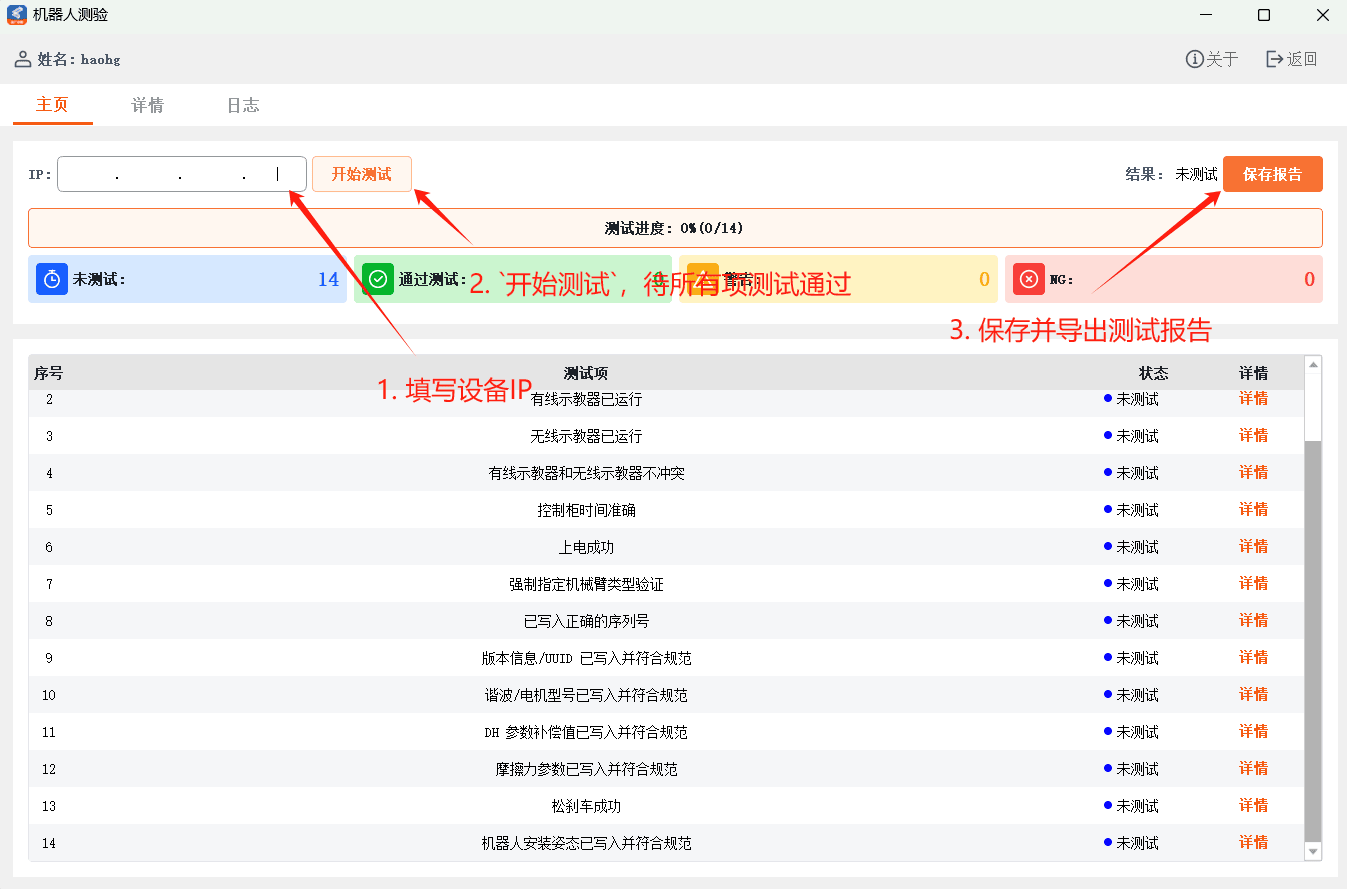
Ps:
- The Windows robot factory diagnostic tool can only be installed on Windows 10 or Windows 11 systems.
- For the diagnostic tool software, use version v1.0.2-alpha.3 for now.
- To complete the test, the control cabinet and the tool software must be on the same subnet, which can be achieved by configuring a static IP.
Check whether the robot arm is tilted in the zero position.
Long-press the
Zero Pointbutton to teach the robot arm to the zero position, and check whether all joint values are zero.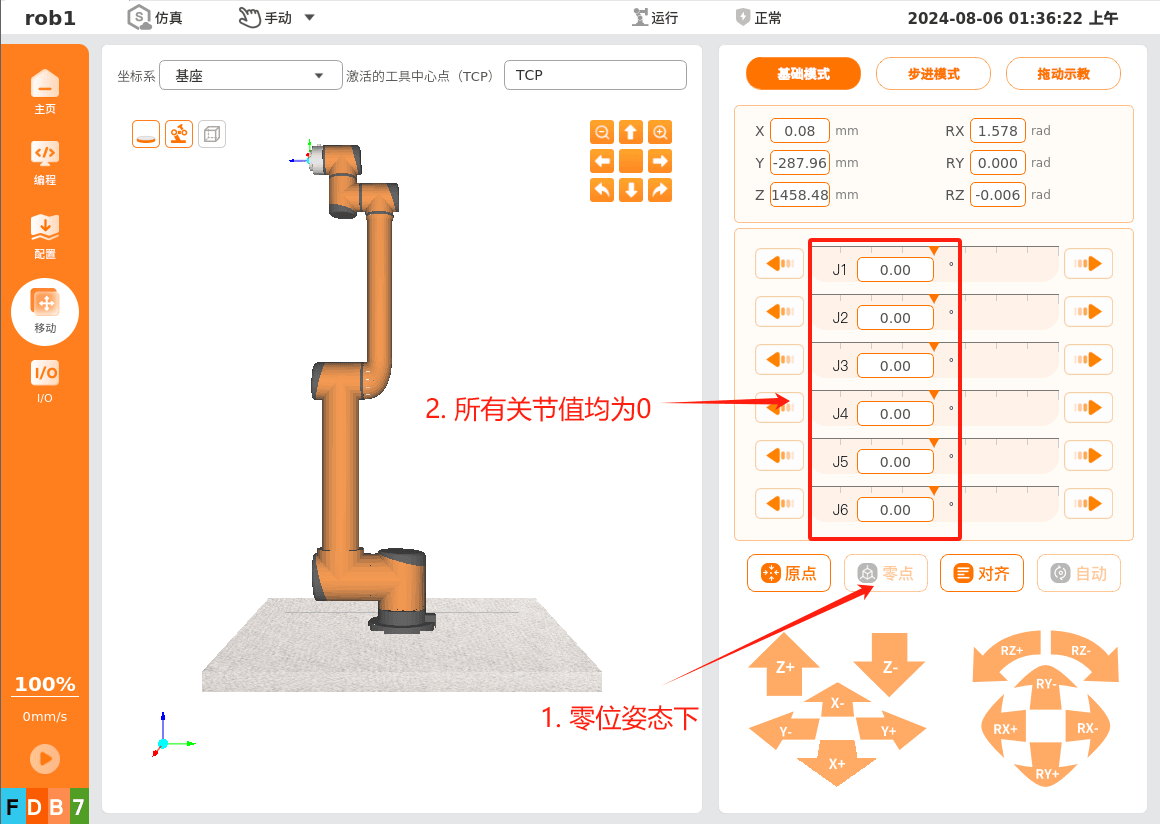
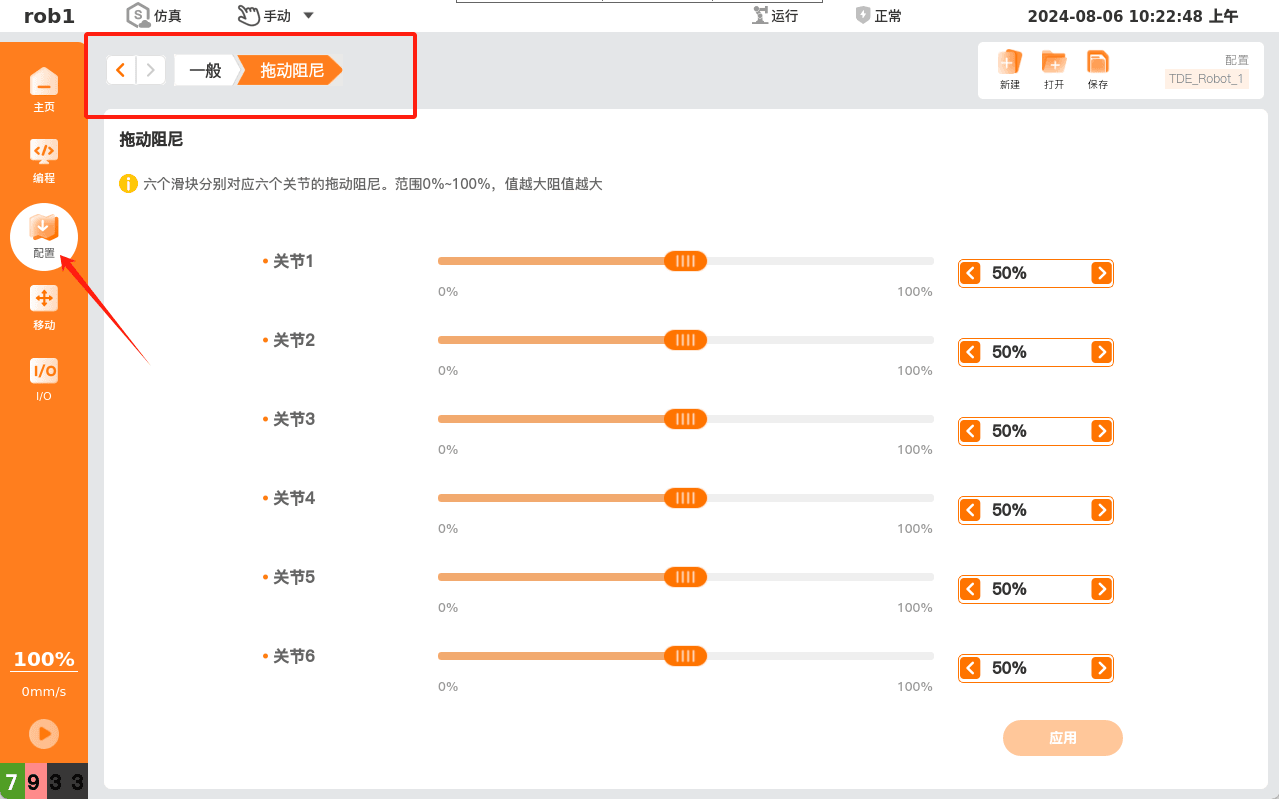
Drag teaching function support
- Drag the six joints individually; the feel should be consistent when dragging in the forward and reverse directions.
- Drag any joint to different poses and release it in a stationary state; there should be no drift of the robot arm. If there is slight drift, adjusting the damping can improve it.
- Drag any joint to the limit position; the joint must not exceed the limit position. After clearing the popup, you can drag or teach it back within the safety limits.
Collision detection function support
- When a strategy of float after collision / stop after collision / brake after collision is selected and a collision occurs with the robot arm, the device will stop moving and pop up a prompt.
- Resume operation after collision: if the robot arm triggers a collision during operation, after clearing the collision popup, click the resume button, and the project can continue running after teaching to the collision point.
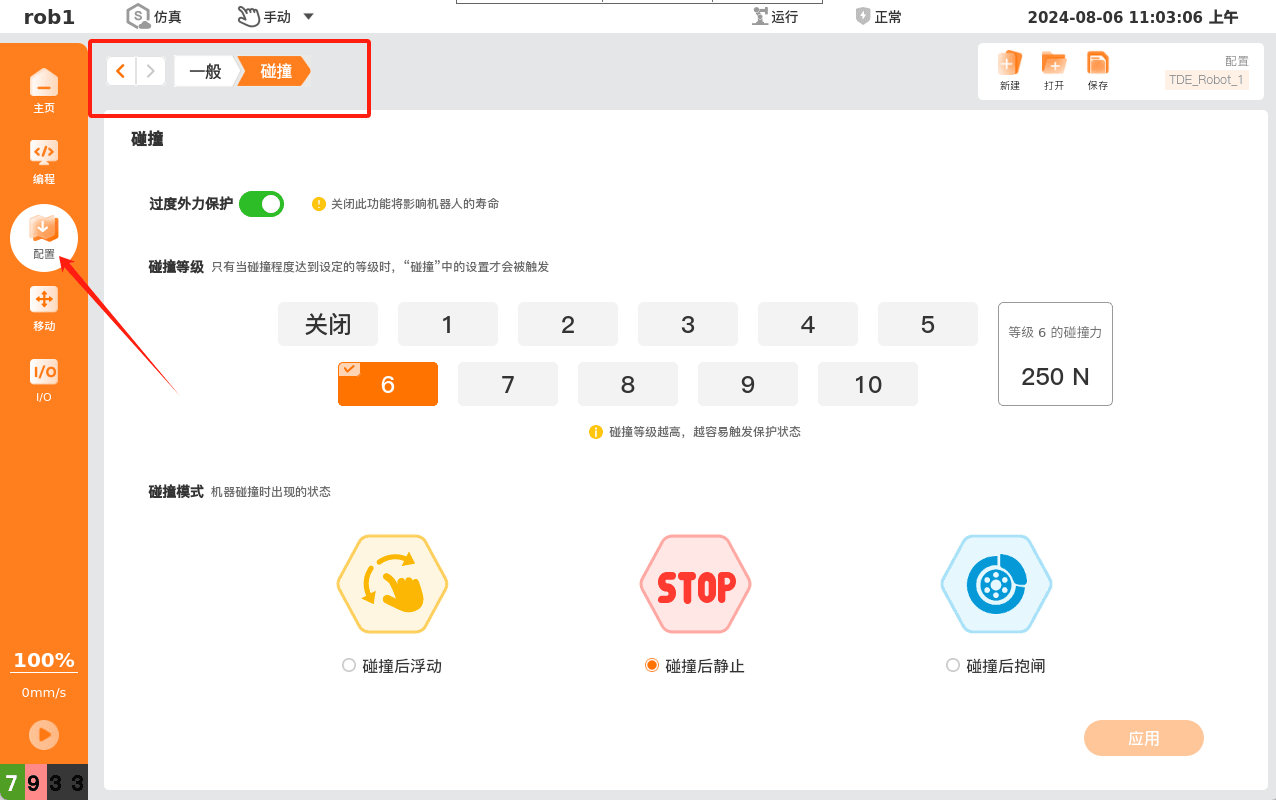
If the collision detection function is ineffective, check method
III. Software Test
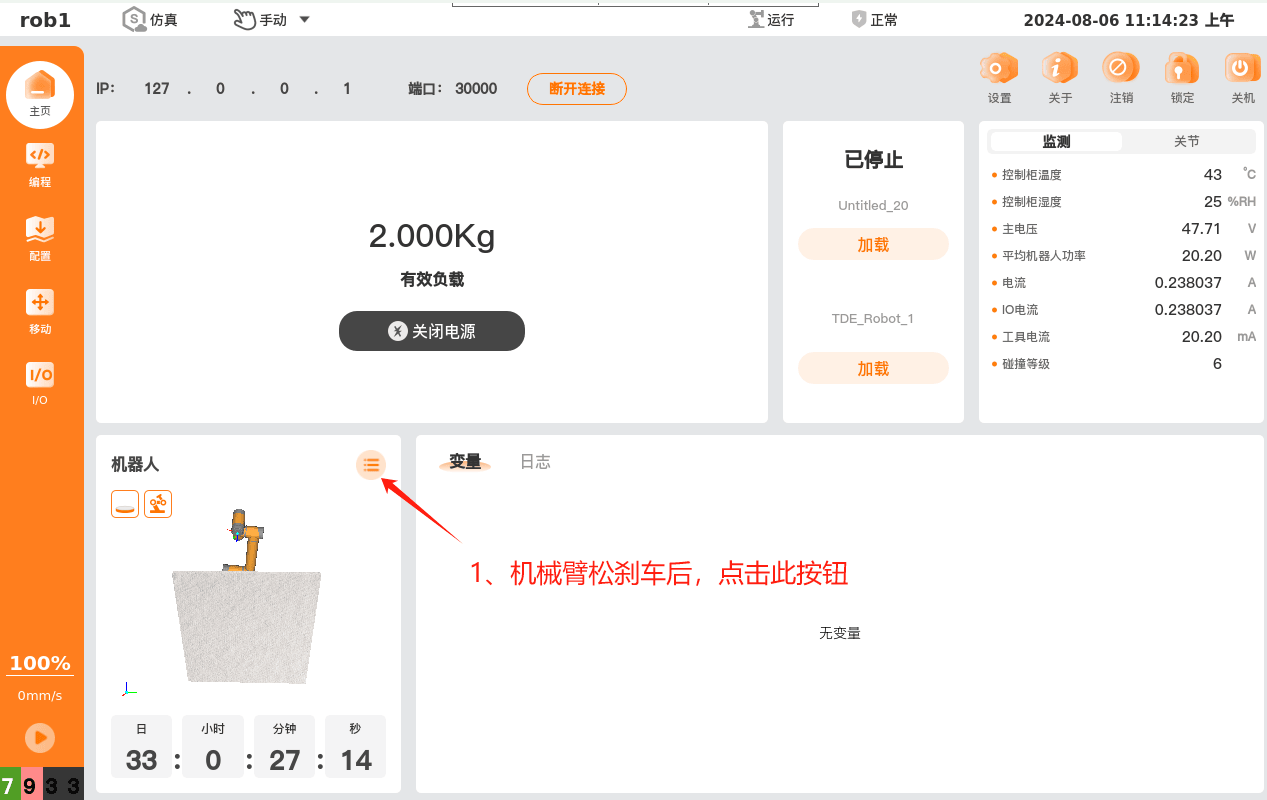
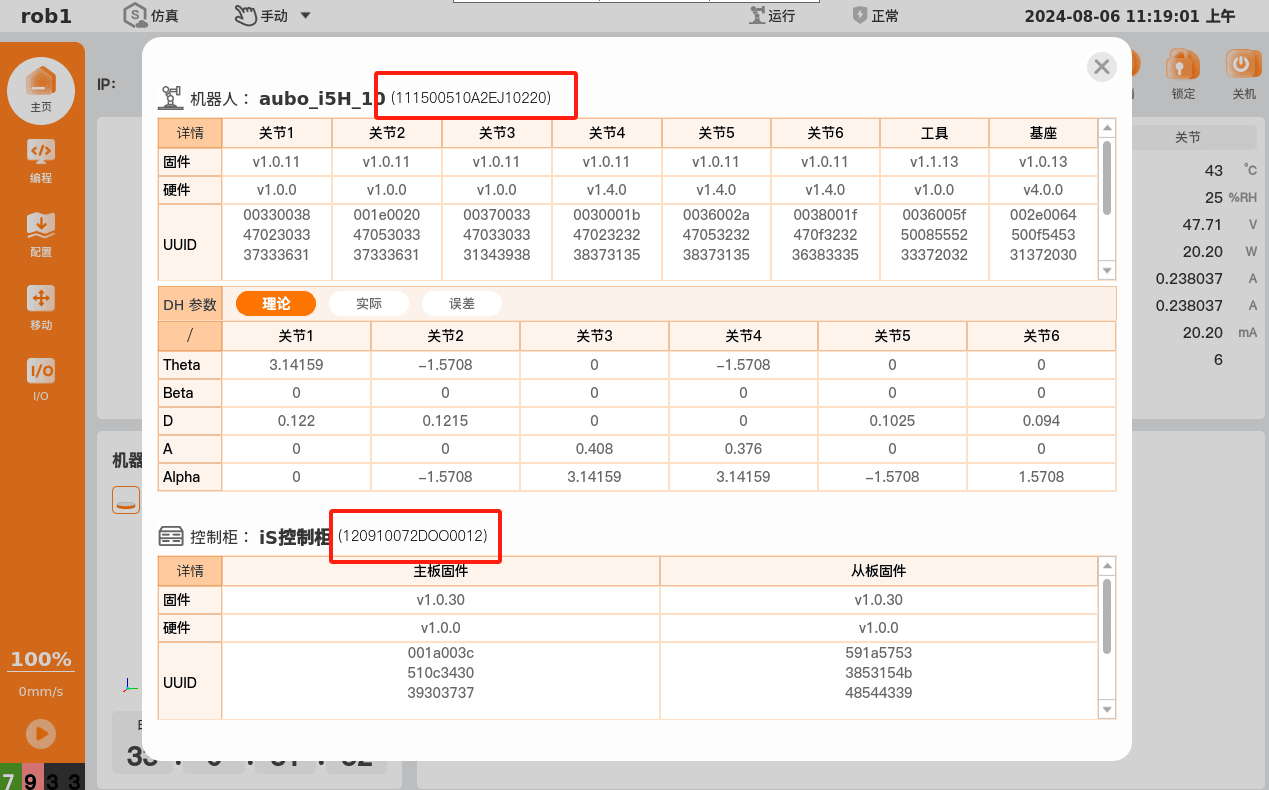
Check whether the robot arm serial number and control cabinet serial number written into the software match the nameplate affixed to the device.
Robot arm and control cabinet serial numbers:
Check whether the joint limits in the current configuration file (.ins file) match the expected joint limit values, to prevent the maximum limit value overflow caused by mixing configuration files of different robot arm types.
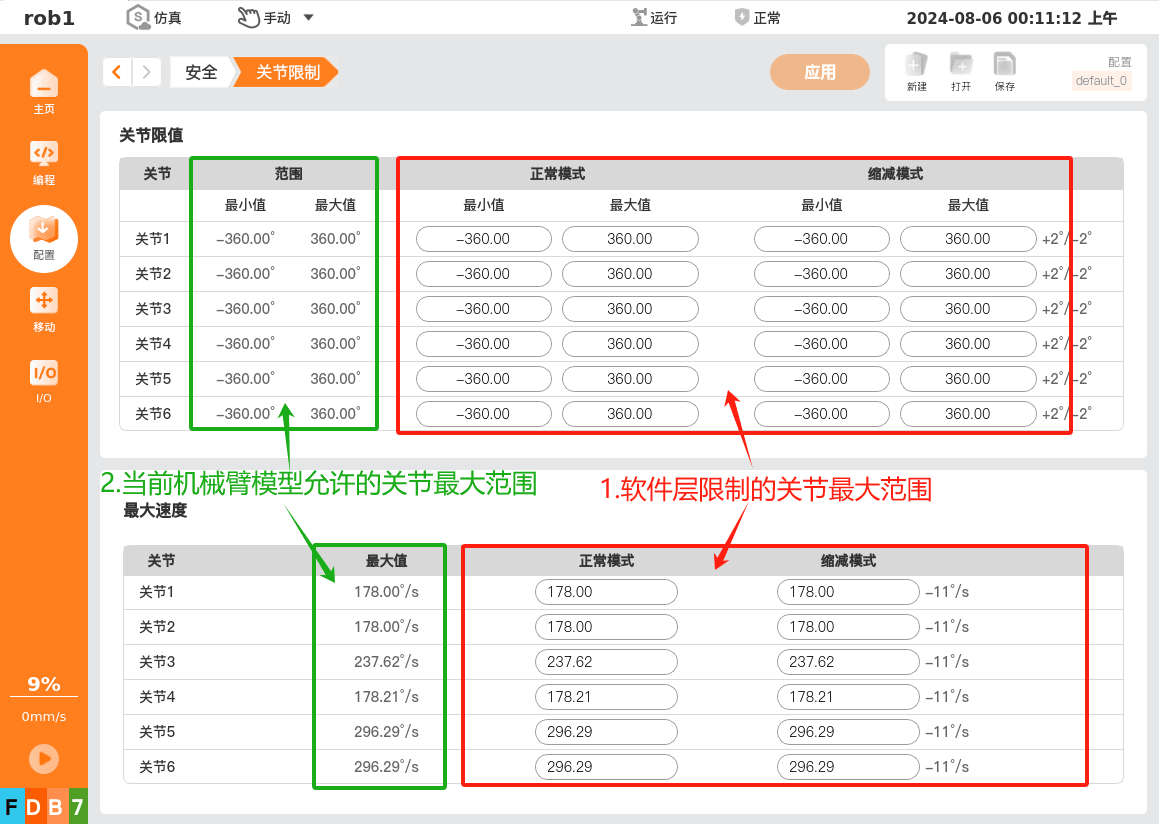
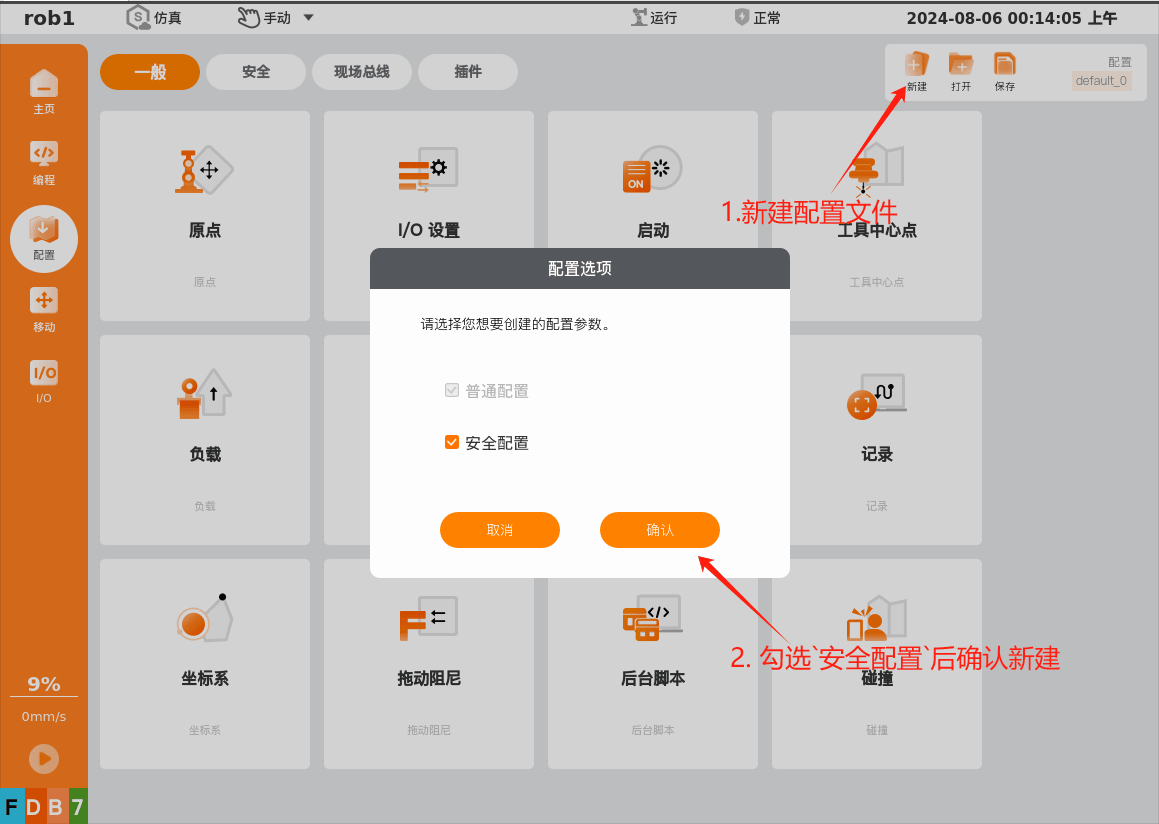
If they do not match, create a new configuration file (.ins file) and then use the ARCS software.
IV. Recording and Feedback
- Record the results of all the above tests in detail, including the problems and abnormal situations found; take necessary photos or videos as records.
- If there is a problem with any item, promptly report it to technical support colleagues or R&D personnel and handle it according to their guidance.
- Summarize the results of this unboxing test and confirm whether the product meets expectations.