
Wireless Teach Pendant Network Connection Guide
1 Controlling the Robot via an External Network
Connect the control cabinet to a wired network.
Connect the wireless teach pendant and the control cabinet to the same network.
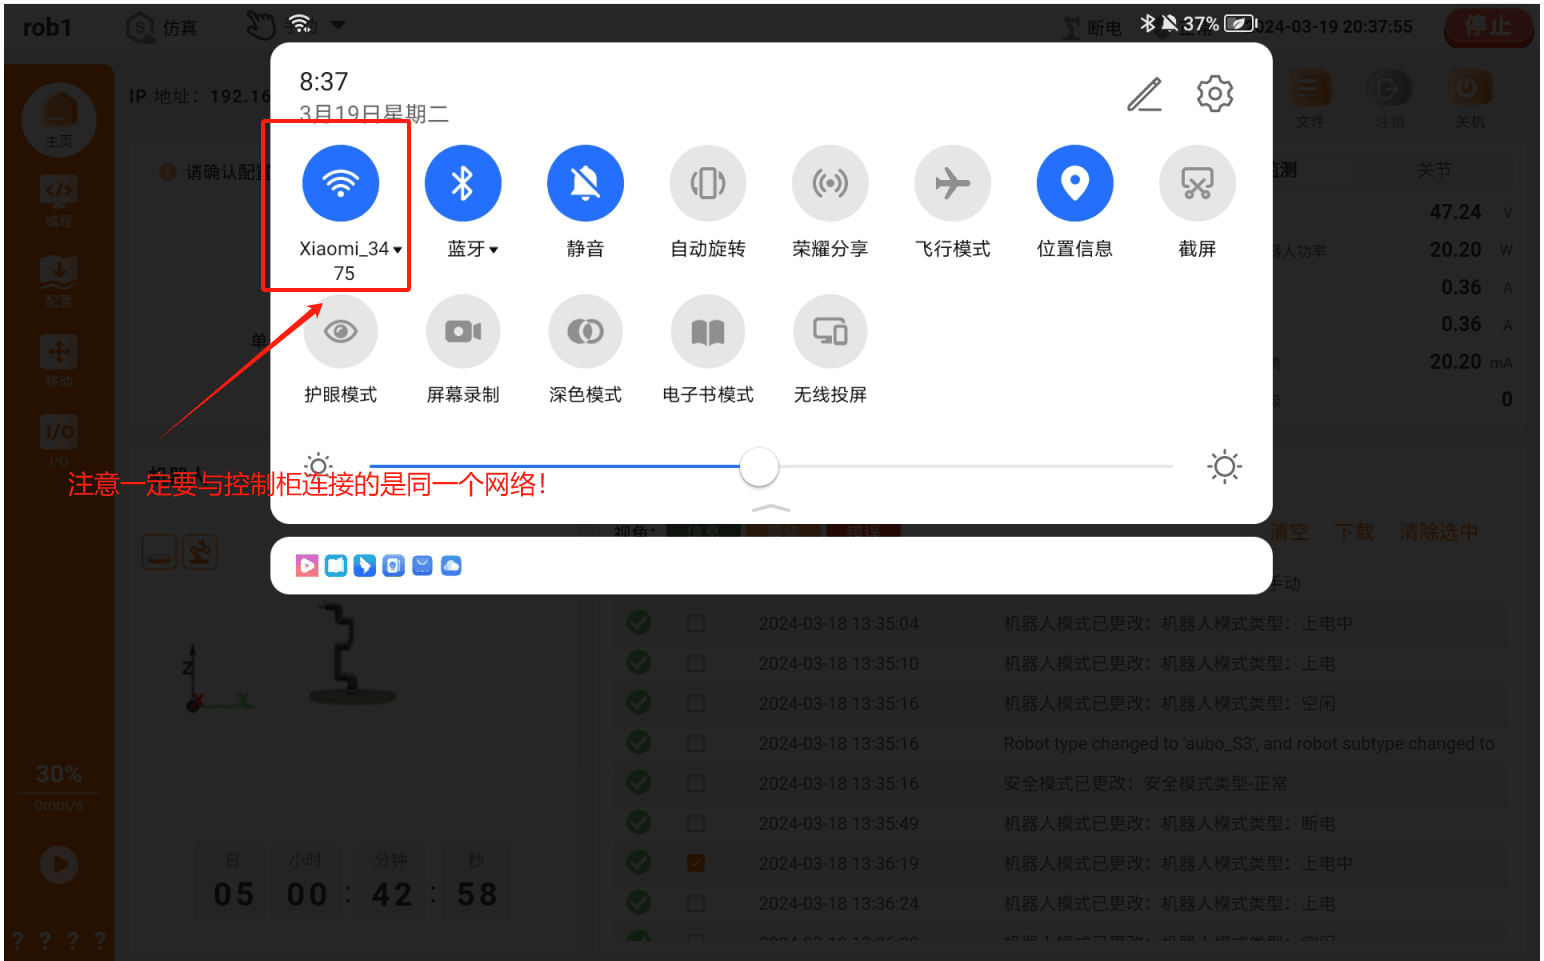
In the AUBO STUDIO software, search for the target control cabinet
ip, and click Connect to control the robot with the wireless teach pendant.If the
ipcannot be found on the same network, refer to the section below on using a self-assignedipto control the robot and modify the relevant network configuration.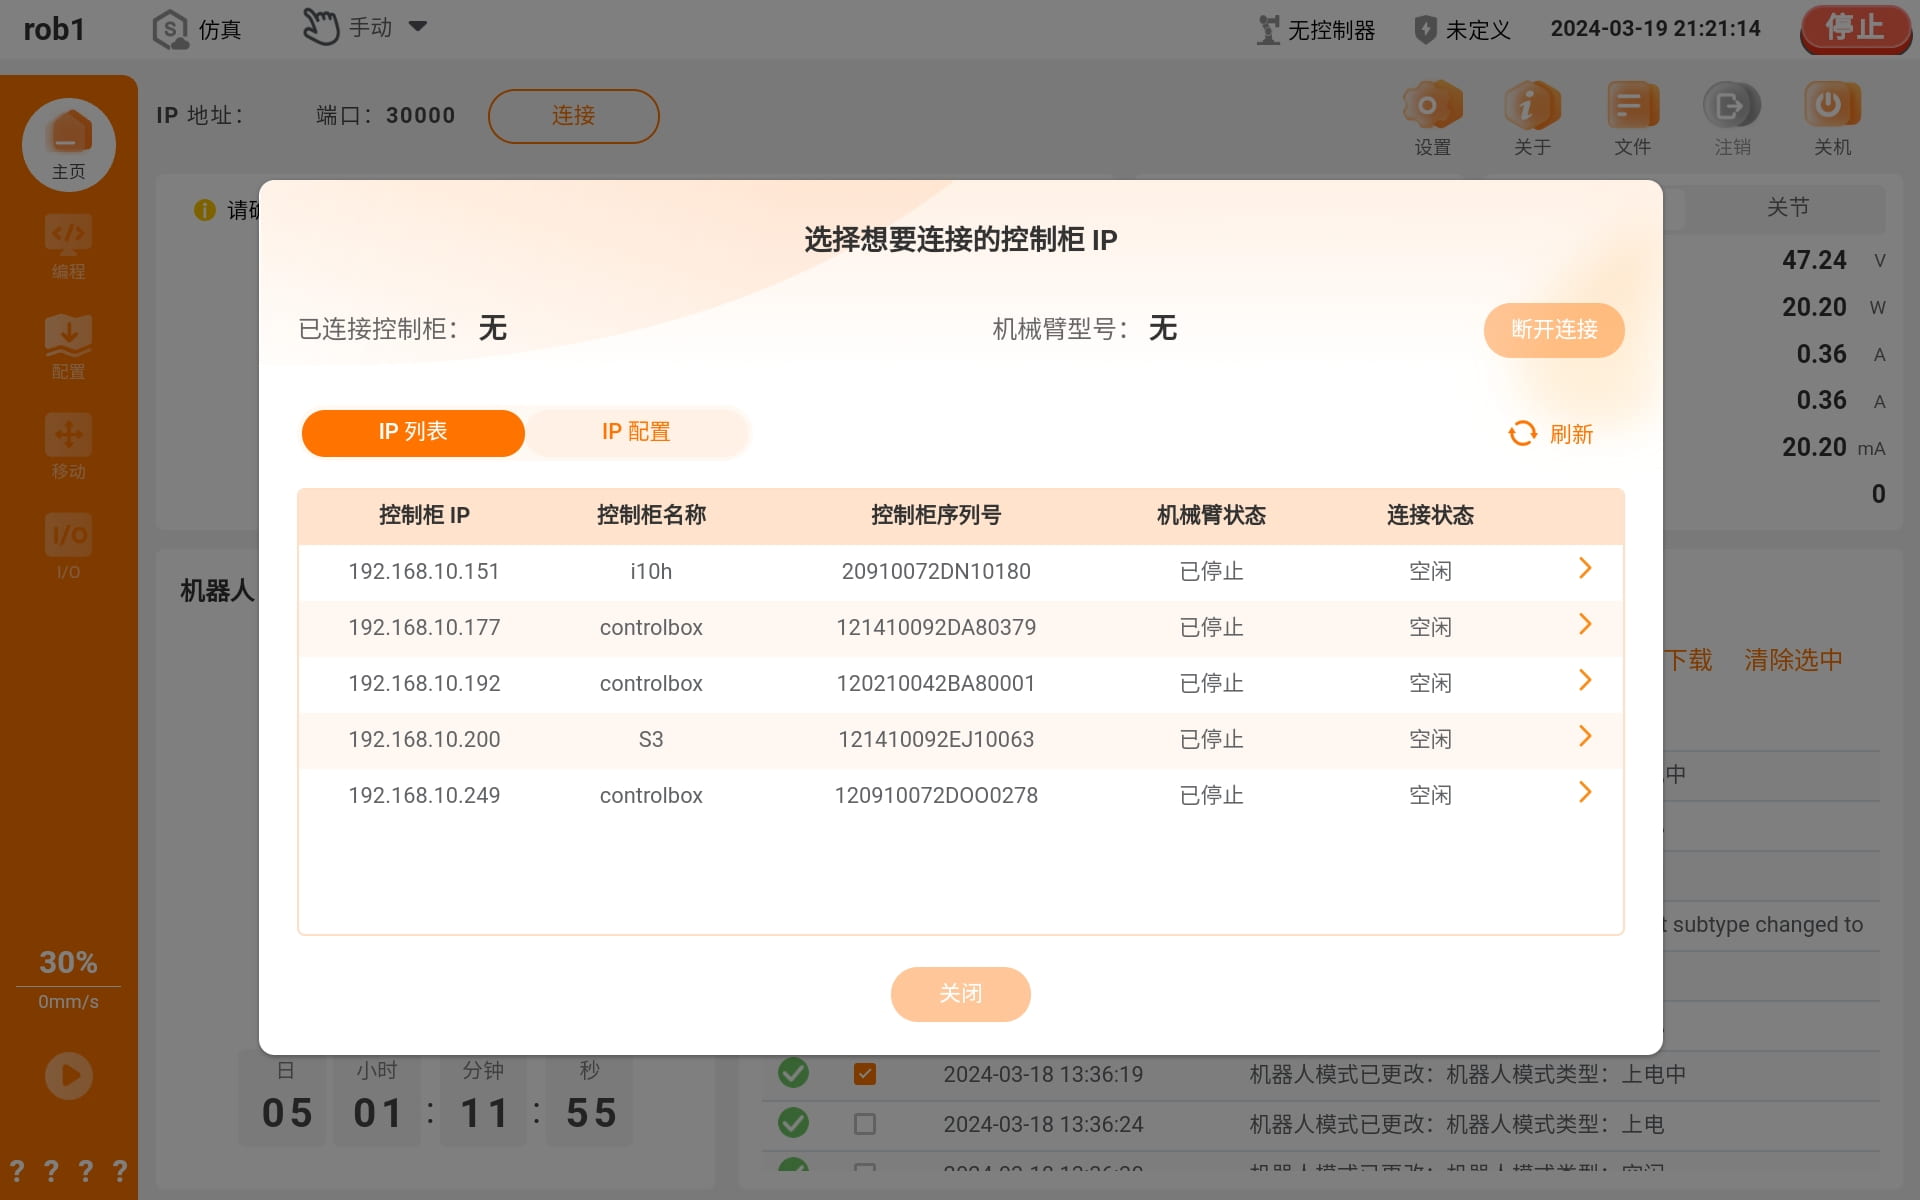
2 Wireless Router Method
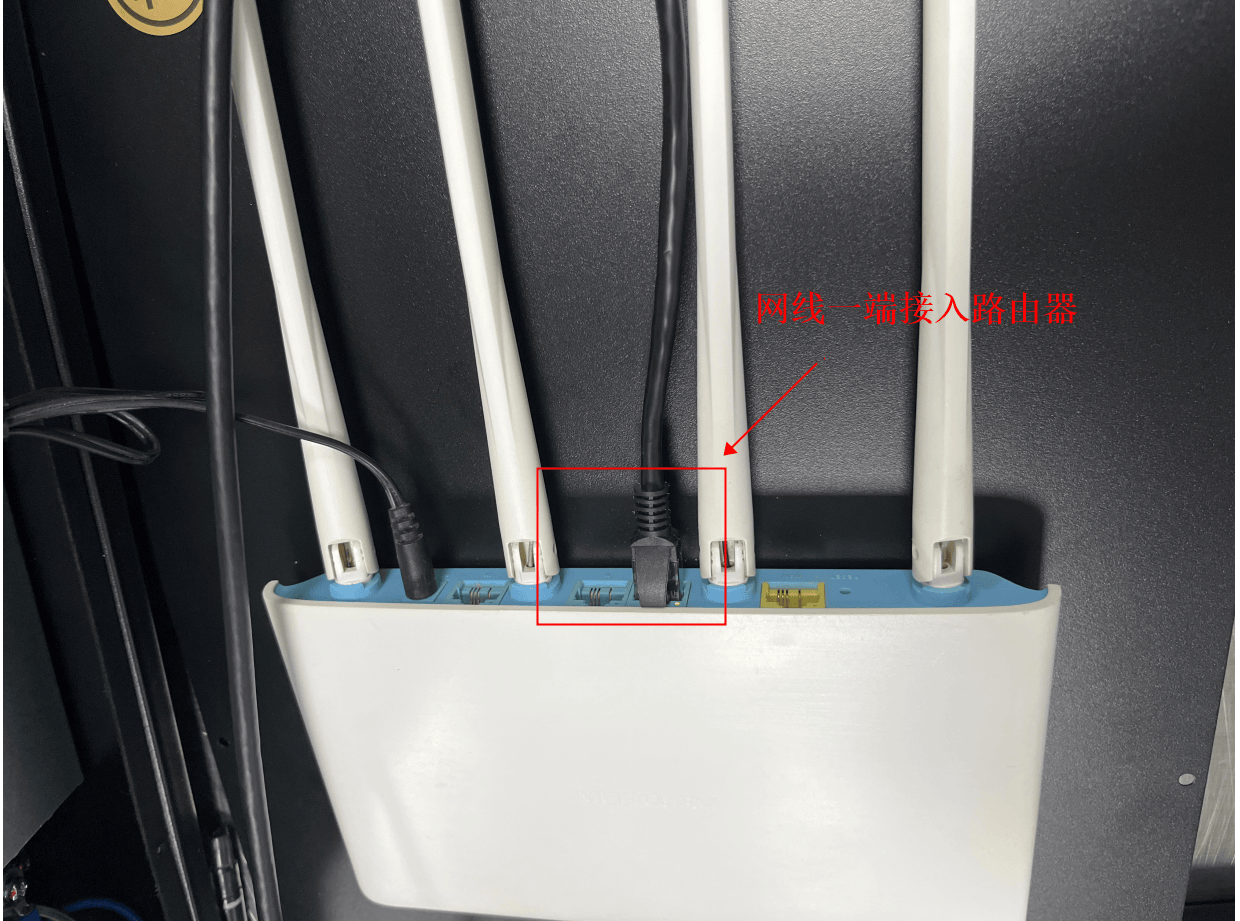
Add a router beside the control cabinet, set up a wireless network, and connect the router's LAN port to the control cabinet's enp1s0 so that it automatically assigns an
ipto the control cabinet.The wiring is as follows:
Use a tablet device to connect to the router's WiFi, search for the control cabinet's
ipin AUBO STUDIO, and click Connect to use it.You can use a wired teach pendant to view the target control cabinet's
ipin Settings - System - Network, to help confirm the target control cabinet'sipaddress.
3 Controlling the Robot Using a Self-Assigned AP
3.1 Built-in Wireless NIC, the Control Cabinet Has Its Own Self-Assigned IP
When the control cabinet has a built-in wireless NIC, you can connect directly using the control cabinet's self-assigned
ip.Control cabinets that currently have a built-in wireless NIC include the S control cabinet, the new C control cabinet, the ES integrated robot, etc.
Connect the wireless teach pendant to the control cabinet's self-assigned WiFi.
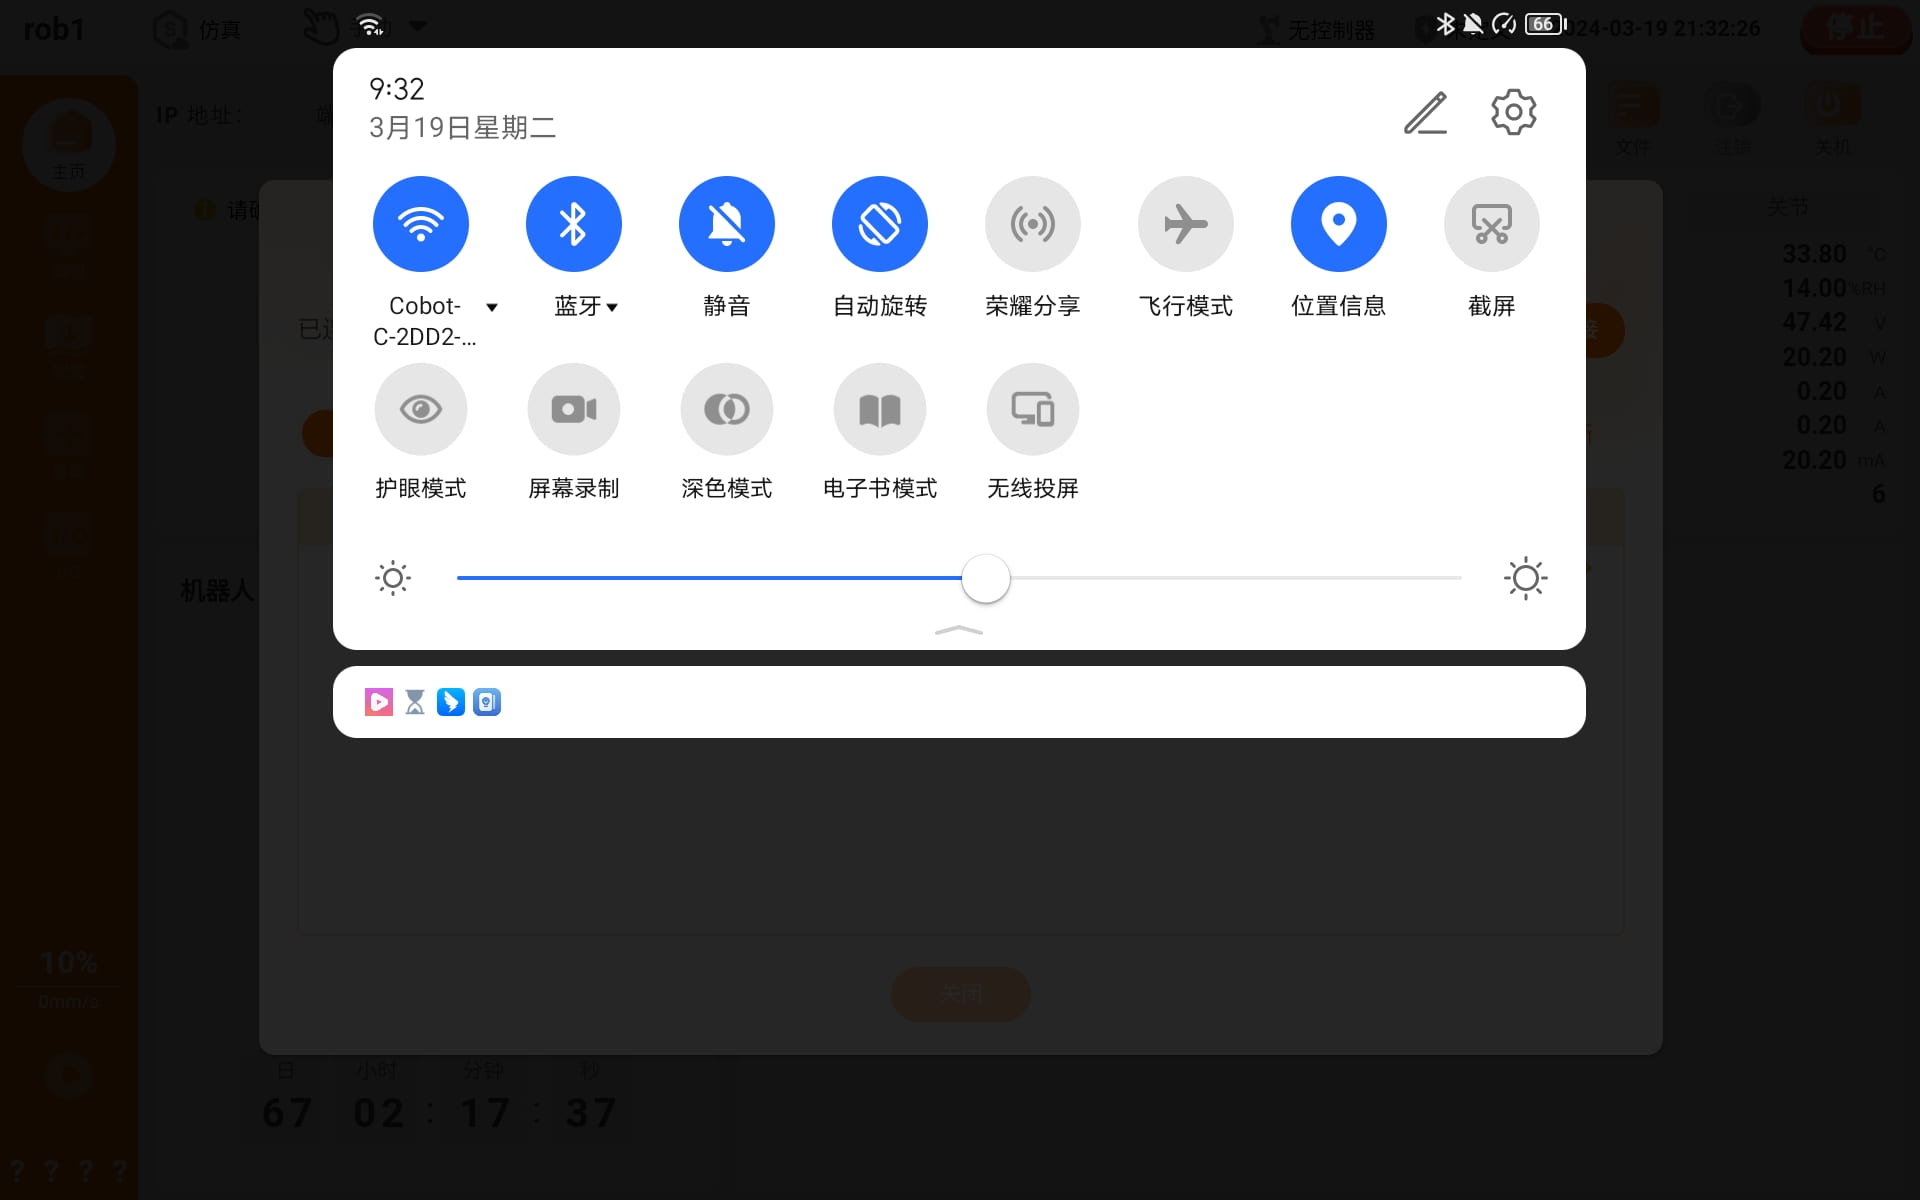
In the AUBO STUDIO software, search for the target control cabinet's self-assigned
ip, and click Connect to control the robot.
3.2 External USB Wireless NIC
3.2.1 Edimax Wireless NIC Configuration
Supported NIC models are as follows:
EW-7811UAC, EW-7811UTC, EW-7822UTC
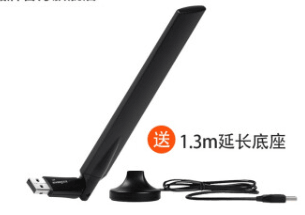
Connect the wireless NIC to the control cabinet, then enter
lsusbin the control cabinet terminal and check whether the printed result recognizes the USB device.
As shown in the figure, printing Edimax-related information means the device was recognized successfully.3.2.2 Modifying the /etc/create_ap.conf Configuration File
Confirm whether the current wireless NIC supports 2.4G or 5G, and modify the
CHANNELparameter in the configuration file.2.4G recommended channels: 6, 8, 9, 11
5G recommended channels: 149, 165
Enter
ifconfigin the terminal to check whether the wireless NIC is recognized. In the example figure below, the wireless NIC name iswlx08beac297ccb, so theWIFI_IFACEparameter should be modified.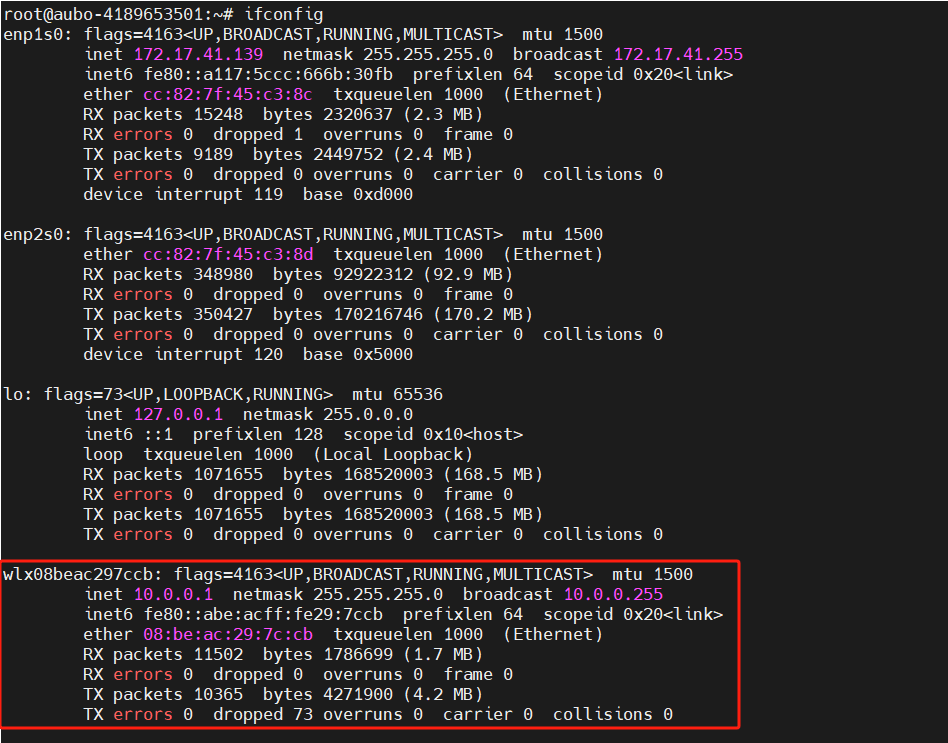
Introduction to other parameters.
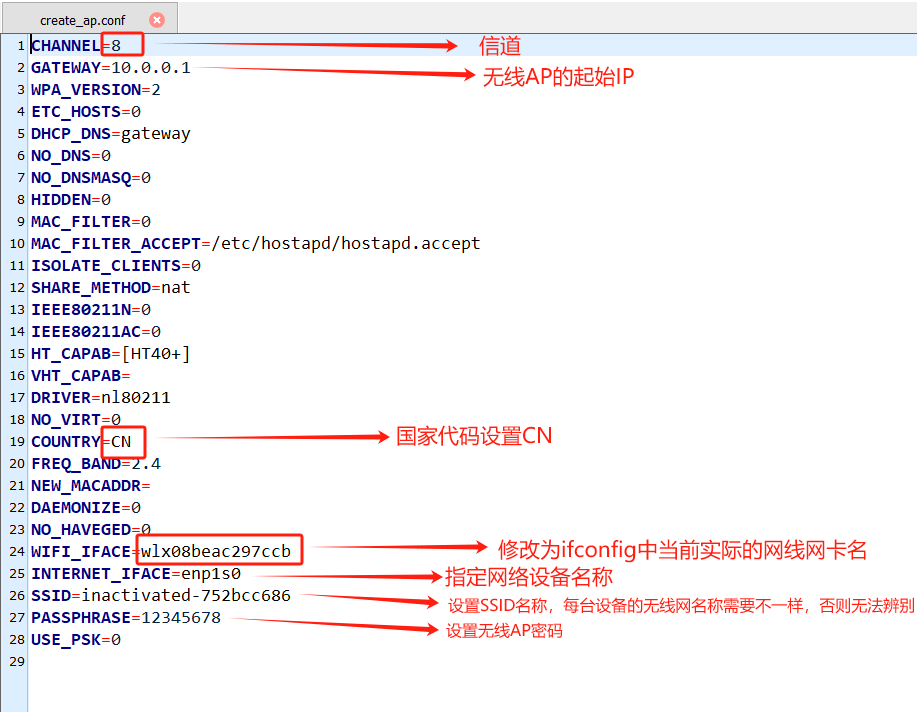
Restart create_ap and enable it to start automatically at boot.
systemctl restart create_ap
systemctl enable create_ap
3.2.3 Connecting the Wireless Teach Pendant to the Self-Assigned IP
Connect the wireless teach pendant to the self-assigned WiFi so that it is on the same LAN as the target control cabinet.
That is, the SSID of the wireless NIC configured in create_ap, with the password 12345678 set in PASSPHRASE.
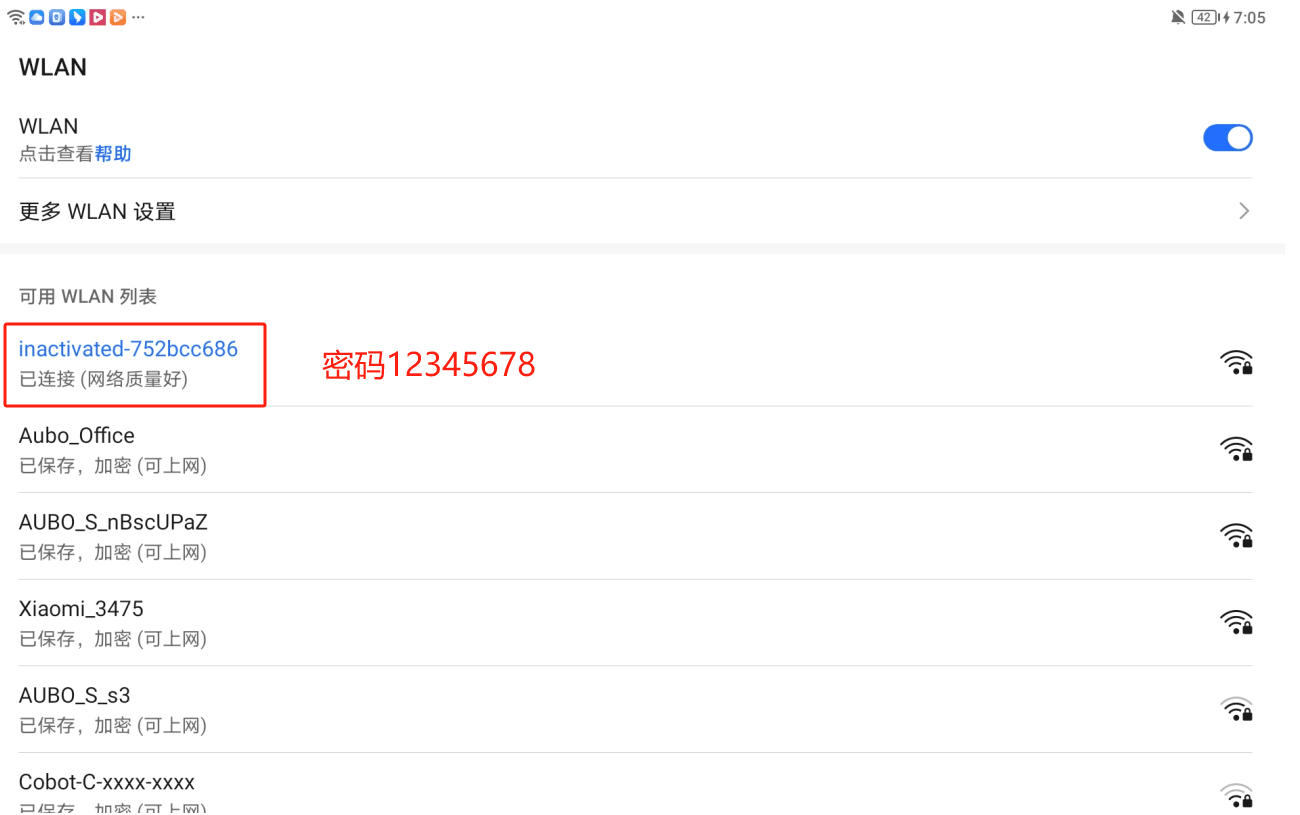
In the AUBO STUDIO software, search for the target control cabinet's self-assigned
ip, and click Connect to control the robot.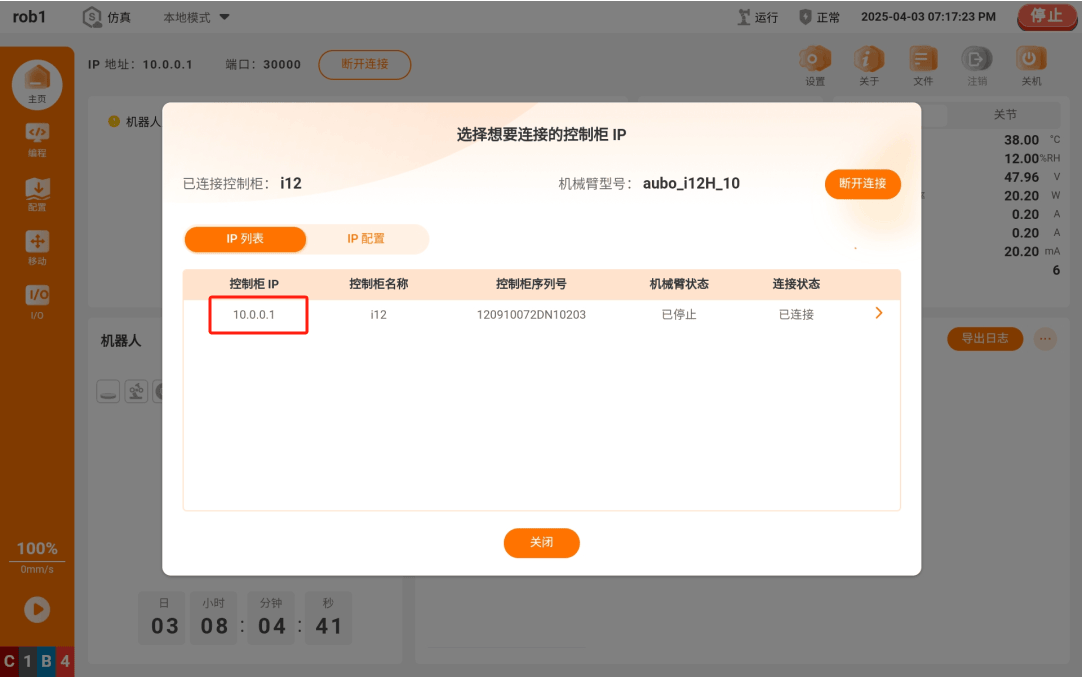
4 Connecting to a Computer Using a Static IP
Change the network method to a static address, and select the corresponding NIC to configure the
ip, gateway, and other information.Note:
- After switching to a static
ip, change it back toDHCPwhen you are done using it; otherwise the corresponding network port will be unable to connect to the external network. - When switching to a static
ip, make changes strictly according to the port-to-NIC mapping in the table above; do not modify theipaddress information of any NIC that is not listed in the port-to-NIC mapping table.
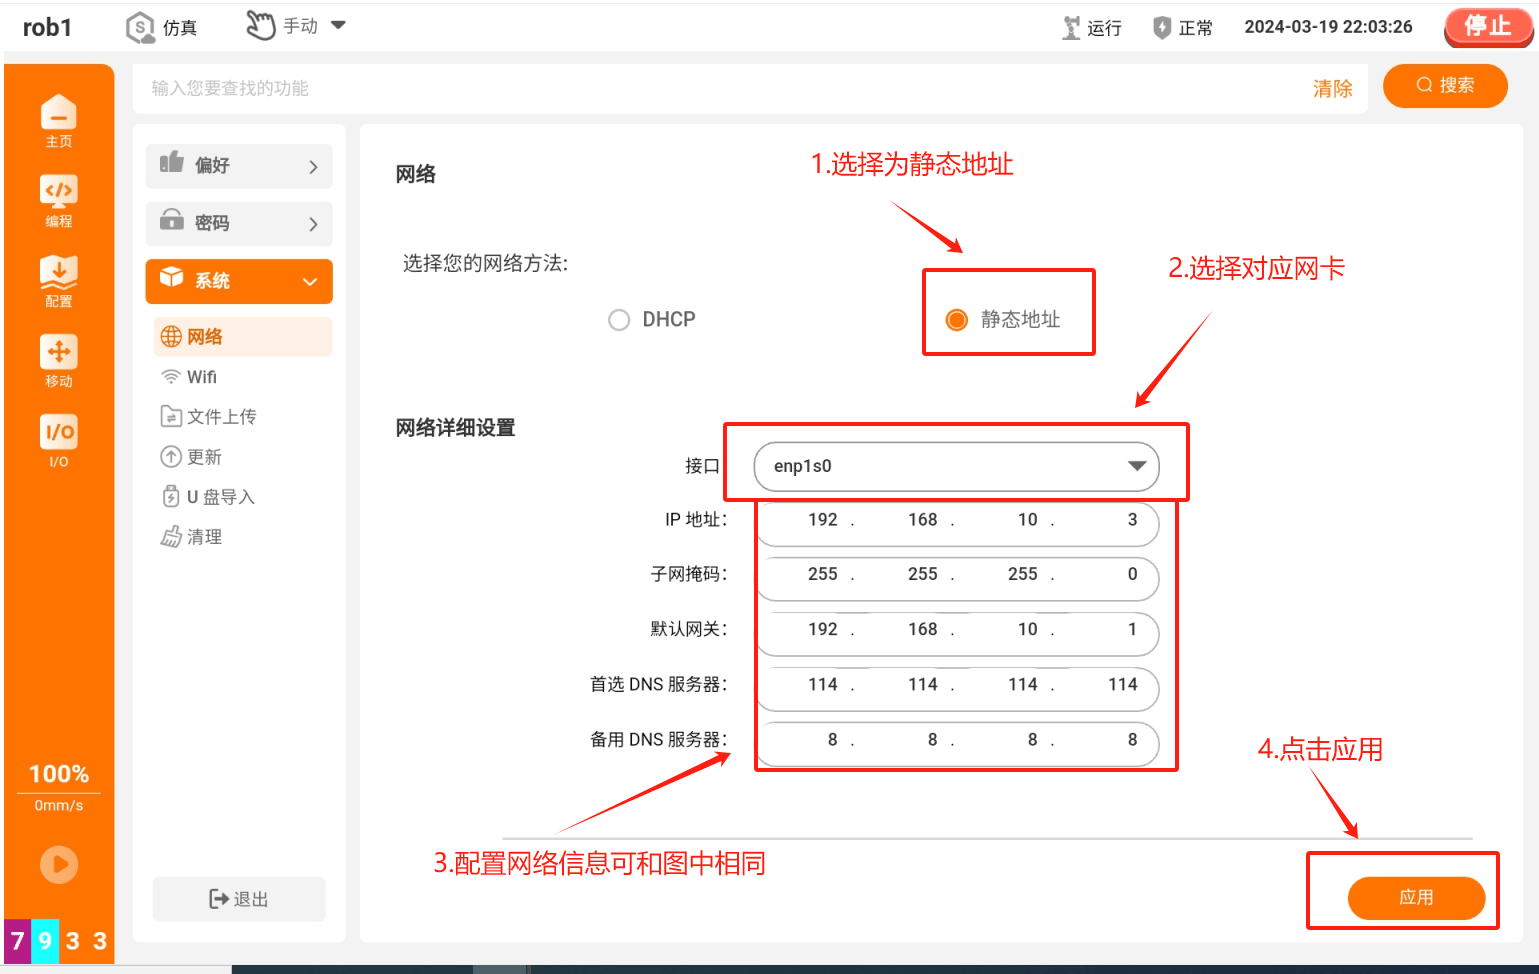
- After switching to a static
On your computer, go to Settings - Change Adapter Options - select the inserted Ethernet NIC - right-click and select Properties - configure your computer's corresponding NIC
ipaddress, gateway, and other information.Note:
- At this point, try not to connect your computer to any network; connecting to another network may cause ping to fail.
- The page layout may differ across Windows versions.
.png)
Open a terminal and enter the target control cabinet's
ipaddress; if you can ping it successfully, the modification is complete. You can then use a remote SSH tool to manage the target device. For usage, refer to 34 Managing the Target Device Remotely with MobaXterm · GitBook (aubo-robotics.cn).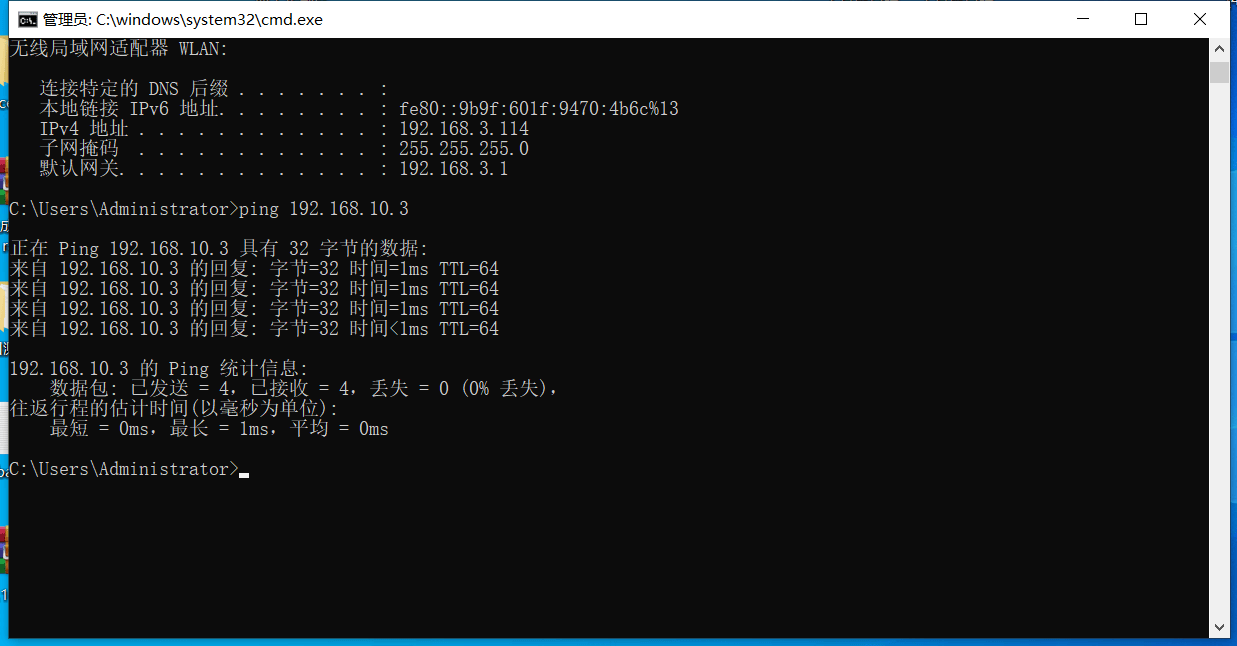
5 FAQ
Q1: When connecting to the external network, I cannot find the ip or confirm the target control cabinet's ip.
Method 1:
Use a wired teach pendant or an external display to enter the Settings - System - Network page and view it.
Method 2:
After connecting via the control cabinet's self-assigned
ip, go to the Settings - System - Network page and change the corresponding network method toDHCP; you can then connect to the external network and control the robot through the wireless teach pendant.Note: In older ARCS versions, when the static address is empty it may not be possible to switch to
DHCP; you can fill in theipinformation and then switch.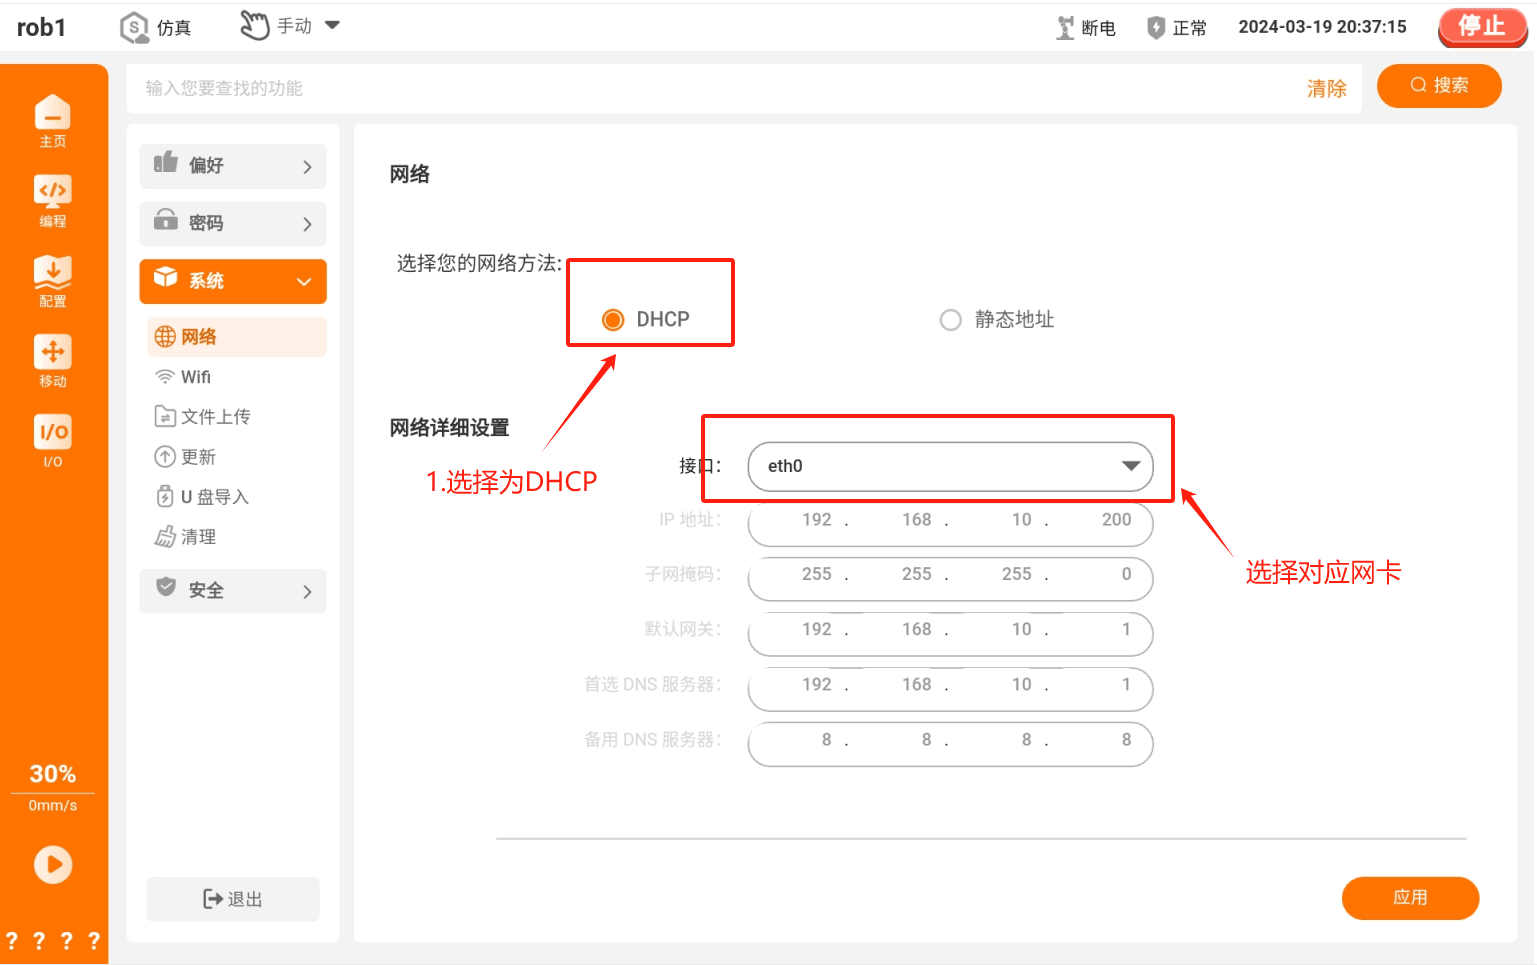
The network cable must be inserted into the corresponding control cabinet network port. The mapping between each control cabinet model's network ports and NICs is shown in the table below.
Number of network ports Mapping S control cabinet 1 ETHERNET-eth0C control cabinet 3 LAN1-enp4s0LAN2-enp3s0LAN3-enp2s0iS control cabinet 1 LAN-enp1s0